Components - Product Management
The product management tool allows you to create an inventory of gift items to use on Premium donation pages or Symbolic Giving sites. To use this tool in page-builder you will first need to set up the component under Pages > Components > Product Management.
You can either create gifts for
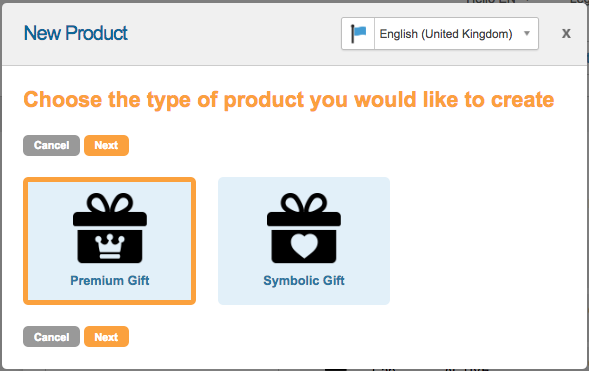
New Product (premium gift)
To create a new premium gift product just click Create New Product button. Click on Premium Gift and Next.
This will open the Product editor where you can create your gift items.
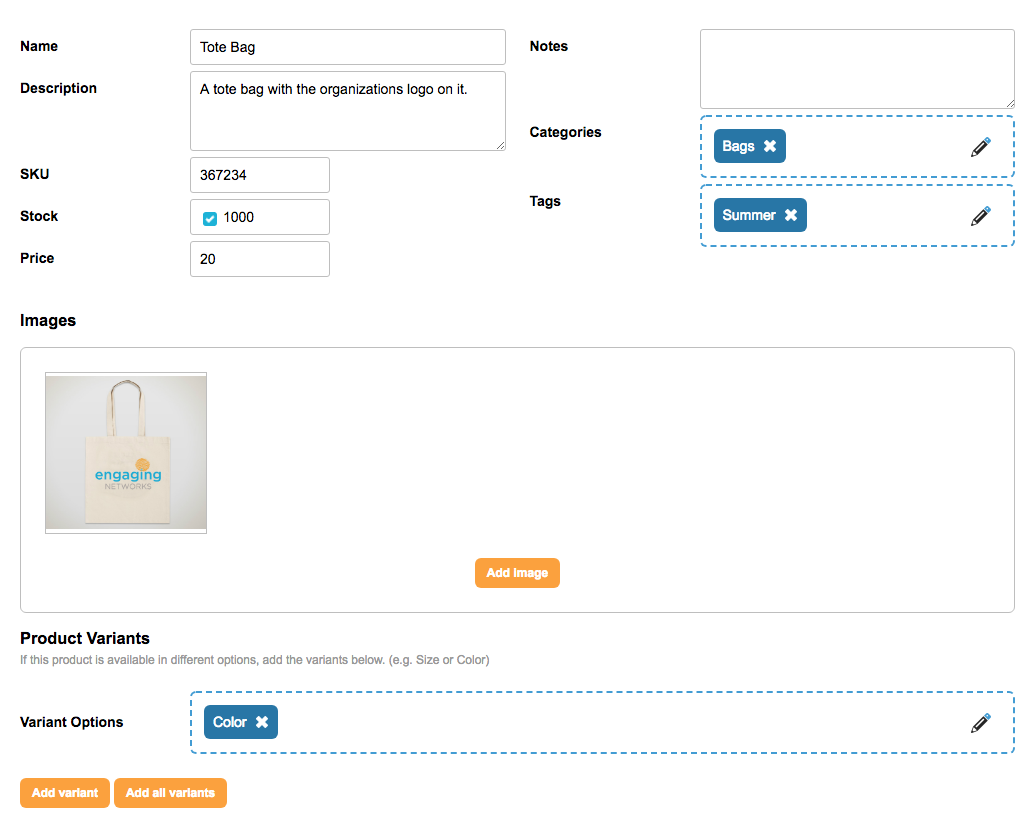
Below is a description of the fields and what you should enter.
Field | Description |
|---|---|
Name | This is the name of the gift item. This name will be displayed internally and in page-builder, so a descriptive name is useful. |
Description | A summary of the gift |
SKU | The SKU number of the gift if applicable |
Stock | If the item has a limited quantity and you want to keep track of stock levels, use this field to list how many are in stock |
Price | The cost of the gift |
Notes | Internal notes about the gift |
Categories | You can add categories to organize your gifts |
Tags | You can tag gifts with keywords |
Images
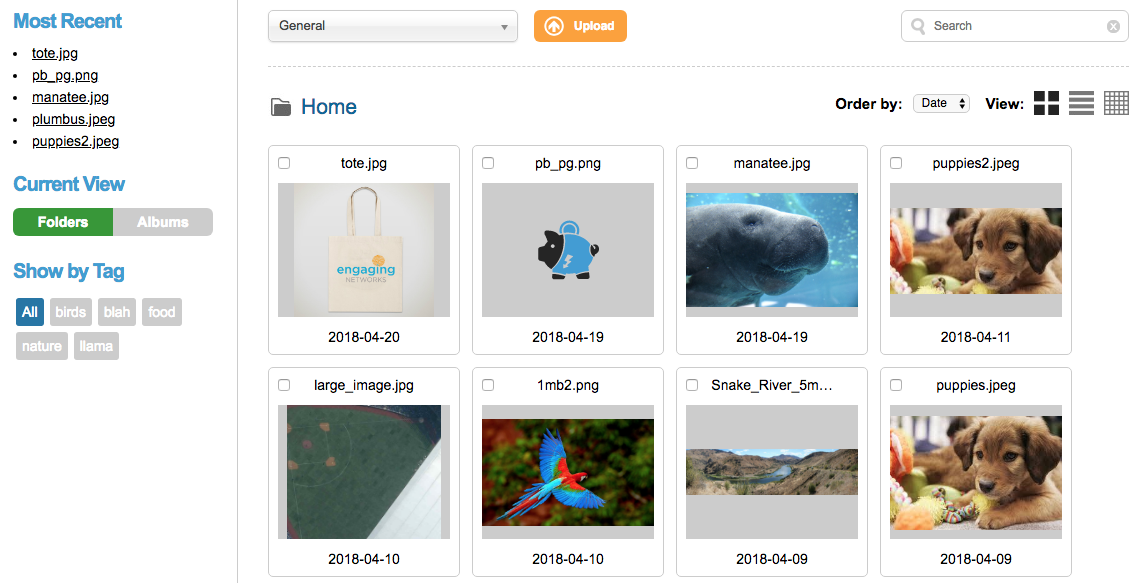
To display a thumbnail(s) of the gift to your donors you can add images of the gift here. Click the Add Image button to choose an image from the library or upload a new image.
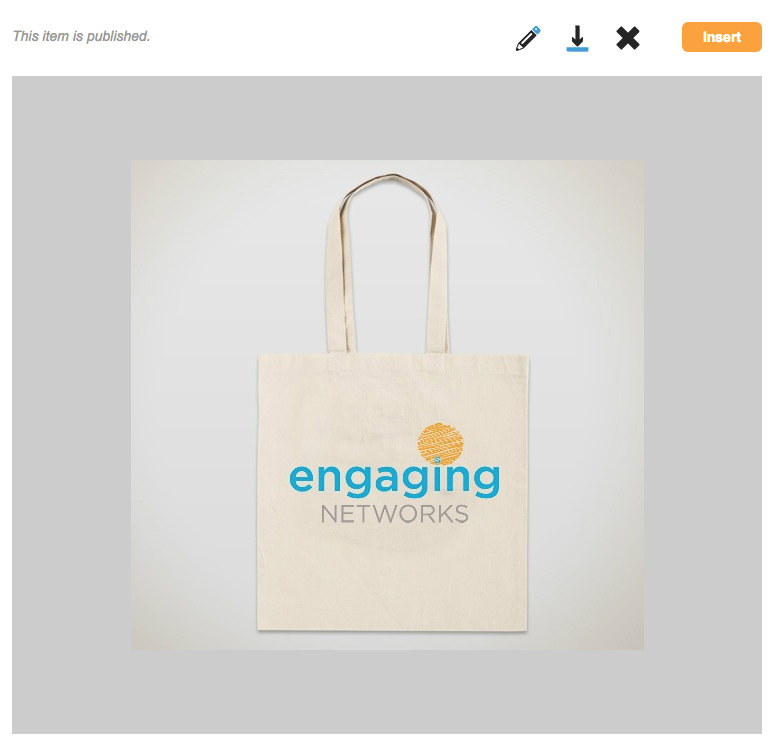
Once you have selected an image just click Insert to use it.
Product Variants
If your gift has different variants such as size or color you can set those up here. Click the pencil icon to open the option types editor.
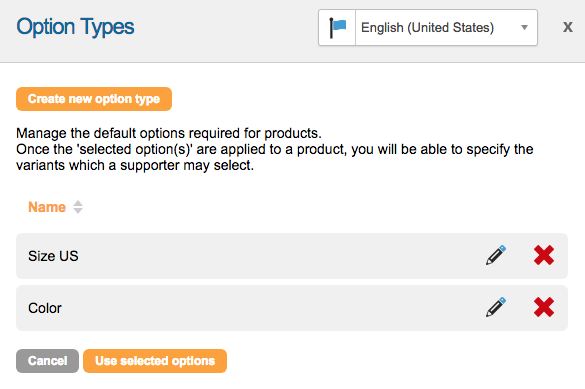
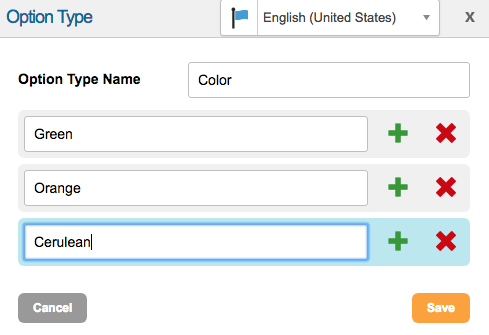
Then click Create new option type to set up a new variant option such as a choice of colors.
When you are finished click Use select options to use that variant.
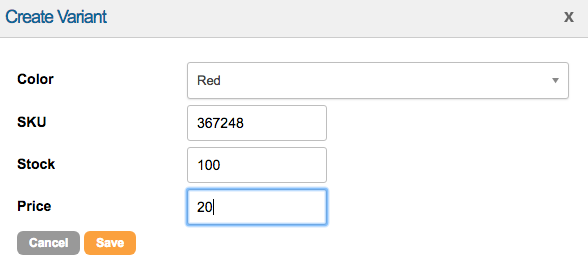
To add a variant from the variant list you have chosen click Add Variant. This will open the variant editor where you can pick an option from the list.
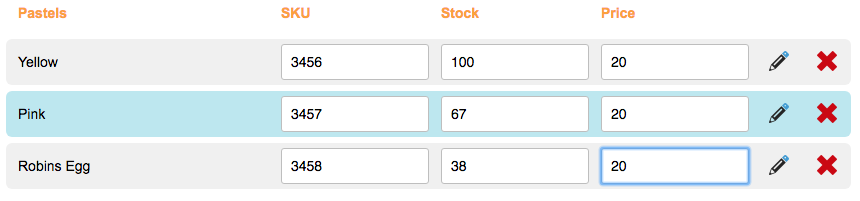
If you would like to use all of the available variants in the list just click Add all Variants instead.
Saving the product
When you are finished just click SAVE.
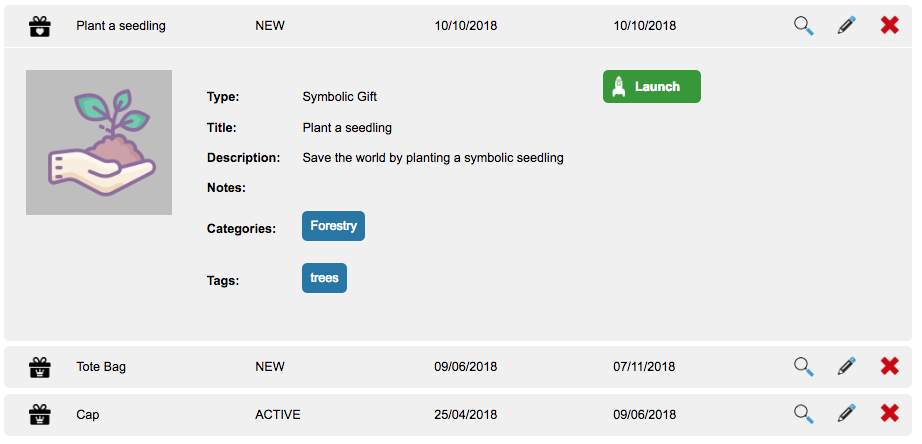
Launching the product
Before the product becomes available, you need to Launch it. To do this, click on the product in the main list and click Launch. Once live, this product’s variants cannot be edited. This is to help with reporting as changes made during a program would skew numbers.
New Product (symbolic gift)
Symbolic gifts are used with Ecommerce pages, and are the virtual gifts that a supporter can buy for their friend.
To create a new product just click Create New Product. Click on Symbolic Gift and Next.
This will open the Product editor where you can create your gift items.
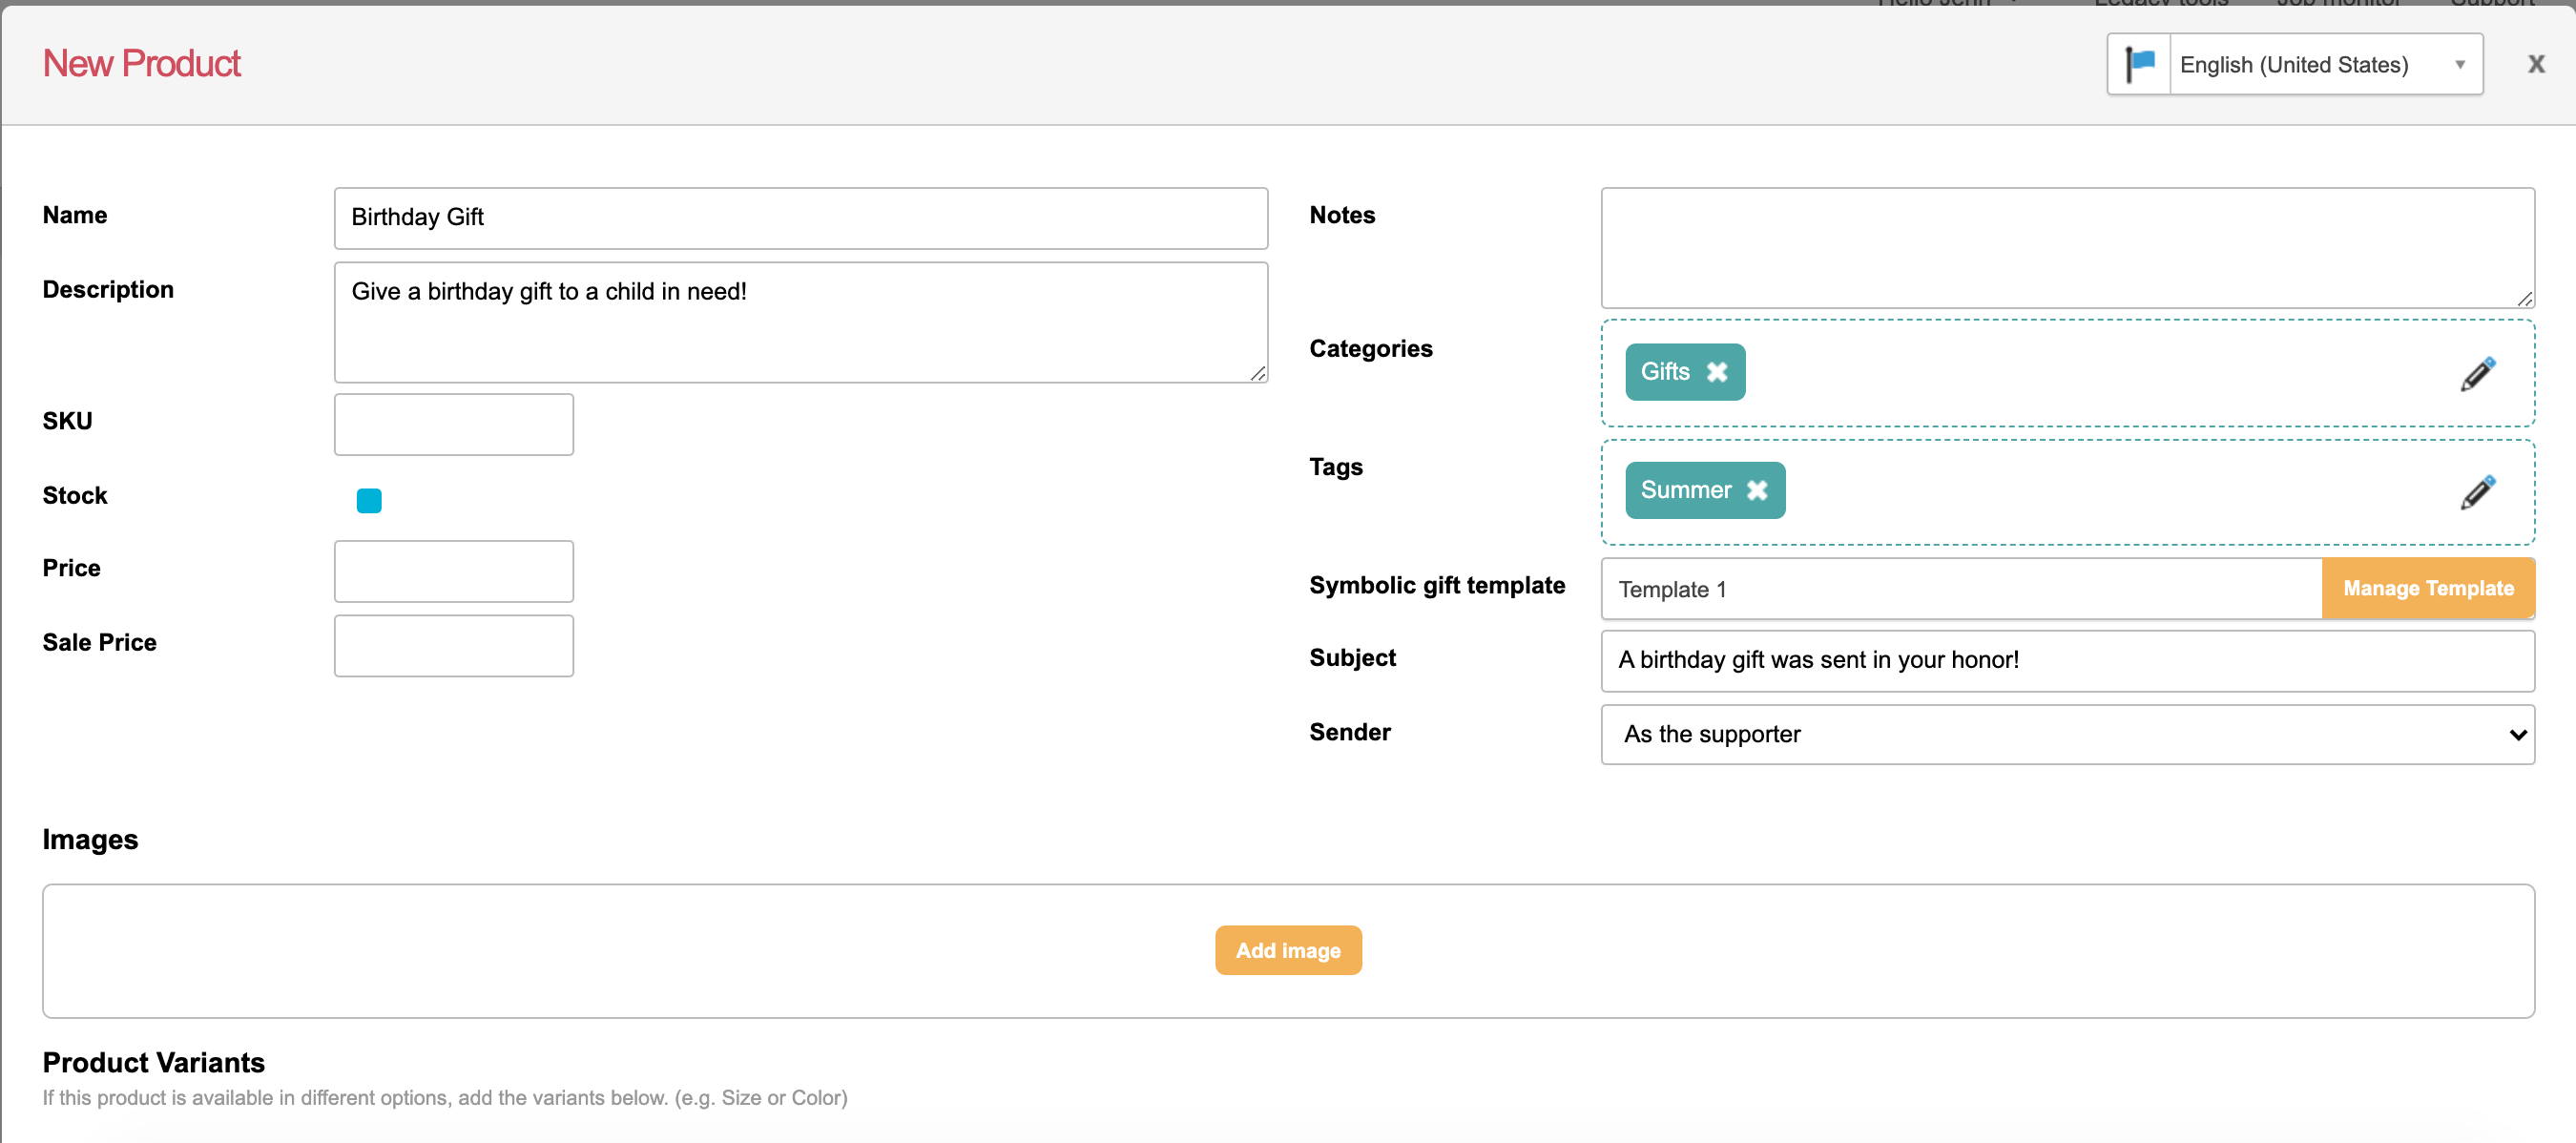
Below is a description of the fields and what you should enter.
Field | Description |
|---|---|
Name | This is the name of the gift item. This name will be displayed internally and in page-builder, so a descriptive name is useful. |
Description | A summary of the gift |
SKU | The SKU number of the gift if applicable |
Stock | If the item has a limited quantity and you want to keep track of stock levels, use this field to list how many are in stock |
Price | The cost of the gift |
Sale Price | Optional. If set, this will put the product “on sale” |
Notes | Internal notes about the gift |
Categories | You can add categories to organize your gifts |
Tags | You can tag gifts with keywords |
Symbolic gift template | This allows you to assign and manage your symbolic gift email templates. These emails are sent by the supporter to the gift recipient, telling them they have been bought a gift |
Subject | The subject line that will appear in the recipient’s inbox when sent the product |
Sender | The sender that will appear as having sent the product in the recipient’s inbox |
Images
To display a thumbnail(s) of the gift to your donors you can add images of the gift here. Click Add Image to choose an image from the library or upload a new image. Once you have selected an image just click Insert to use it.
Product variants
If this product is available in different options, add the variants here.
Related products
You can optionally add related products, so when supporters are browing you Ecommerce site they can see what products are similar to the one they are looking at.
Importing products
You are also able to do an import job for Products you want to bulk upload on which can save you time rather creating the products one at a time. Under Product Management Tab you can click on the button for Upload Product  this will give you a pop-up to give you an overview on what is expected and how to do the import
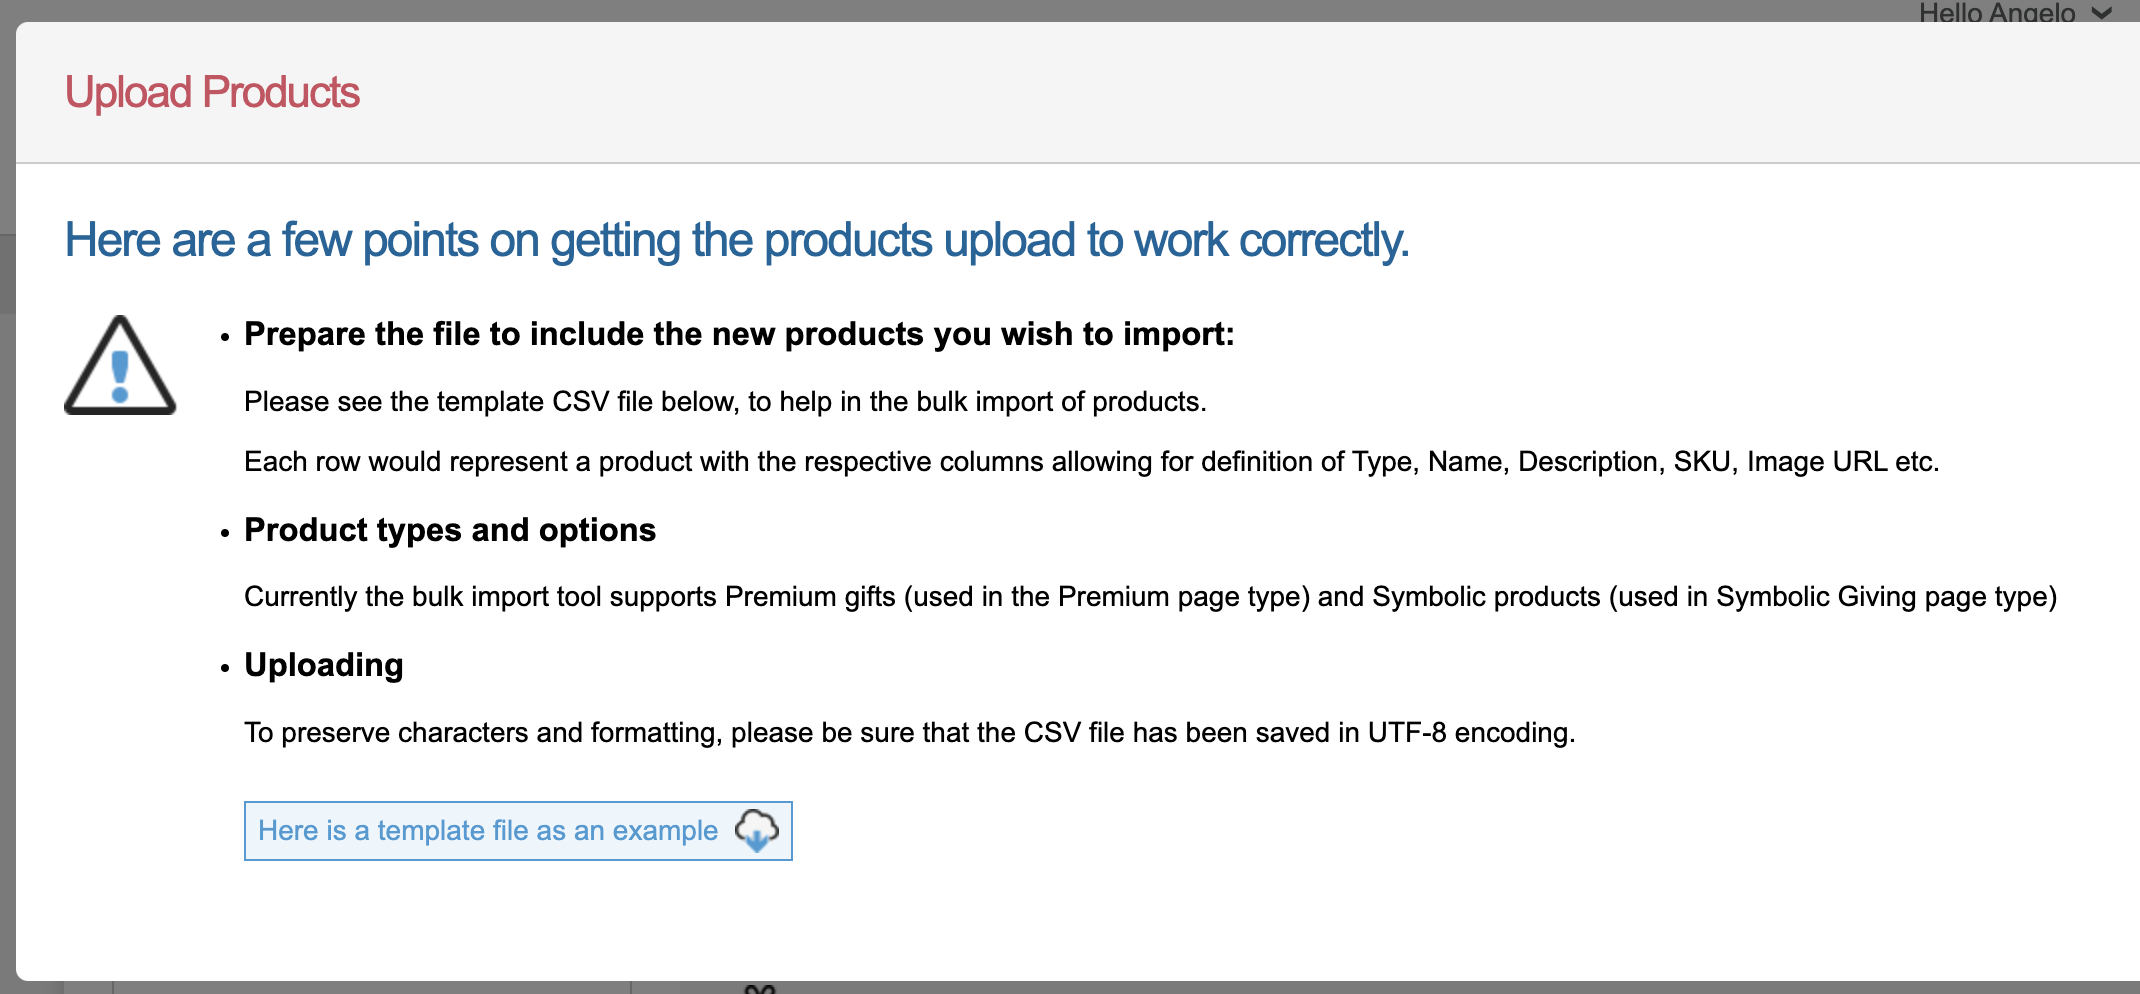
Similar to other types of import it will need to be a CSV File. There is a downloadable Example template you can reference to which is found in the pop-up 
From there you can start filling up all the necessary information and data you want to import for your products.
Do NOT delete or re-organize the headers as it will cause your import to fail. If you have some headers you do not wish to include just leave the values below the header blank. However, some headers are mandatory to have values on them in order for your product to be imported. [Product Name | SKU | Price | Description | QTY | Category].
Once import is complete, you can verify in your Job Monitor if the import was successful. Then you can go back to your Product Management Folder to see what was imported.
Search Engine Optimization
This will add a Title and Description to your page’s HTML that can be read by search engines and social networks.
Saving the product
When you are finished just click SAVE.
Launching the product
Before the product becomes available, you need to Launch it. To do this, click on the product in the main list and click Launch. Once live, this product’s variants cannot be edited. This is to help with reporting as changes made during a program would skew numbers.