Accounts Hub
Introduction
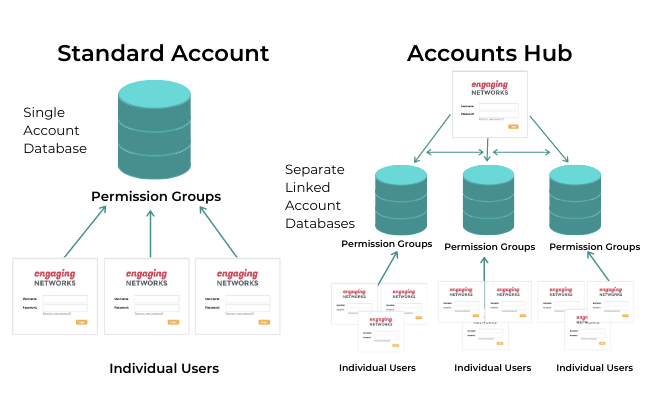
Most clients of Engaging Networks have a single database to store their supporter records and transactional data, and use permission groups to define which parts of their organization have access to various records in the database.
Some larger clients, particularly ones that operate internationally across multiple countries, have individual sub accounts for each country, and each country’s sub account houses their data in their own independent database.
The Accounts Hub is a top level interface for managing multiple sub-accounts that operate their own independent database, but are all part of one organisation.
Logging into Accounts Hub
Since the Accounts Hub access is the top level of your account structure, the main login will be set up by Engaging Networks and the credentials will be sent to you securely. Using the credentials provided you can access the Accounts Hub from the login screen.
CA datacenter – https://ca.engagingnetworks.app/index.html#login
US datacenter – https://us.engagingnetworks.app/index.html#login
If you lose access to your Account Hub credentials, Engaging Networks support will need to help you regain access
Accounts Hub functionality overview
Once you have a login for the Accounts Hub you can:
Manage Accounts Hub user access and their sub-account allocation
Manage sub-accounts within a single Accounts Hub account
Log in to individual sub-accounts from the Accounts Hub account
Transfer data records between sub-accounts on a one-off or recurring basis
Rollup aggregate reporting across sub-accounts
Create content to share down to the sub-accounts (template blueprints and page blueprints)
When you first log in to your Accounts Hub account you’ll land on the Accounts page and see an overview of the sub-accounts available to manage.
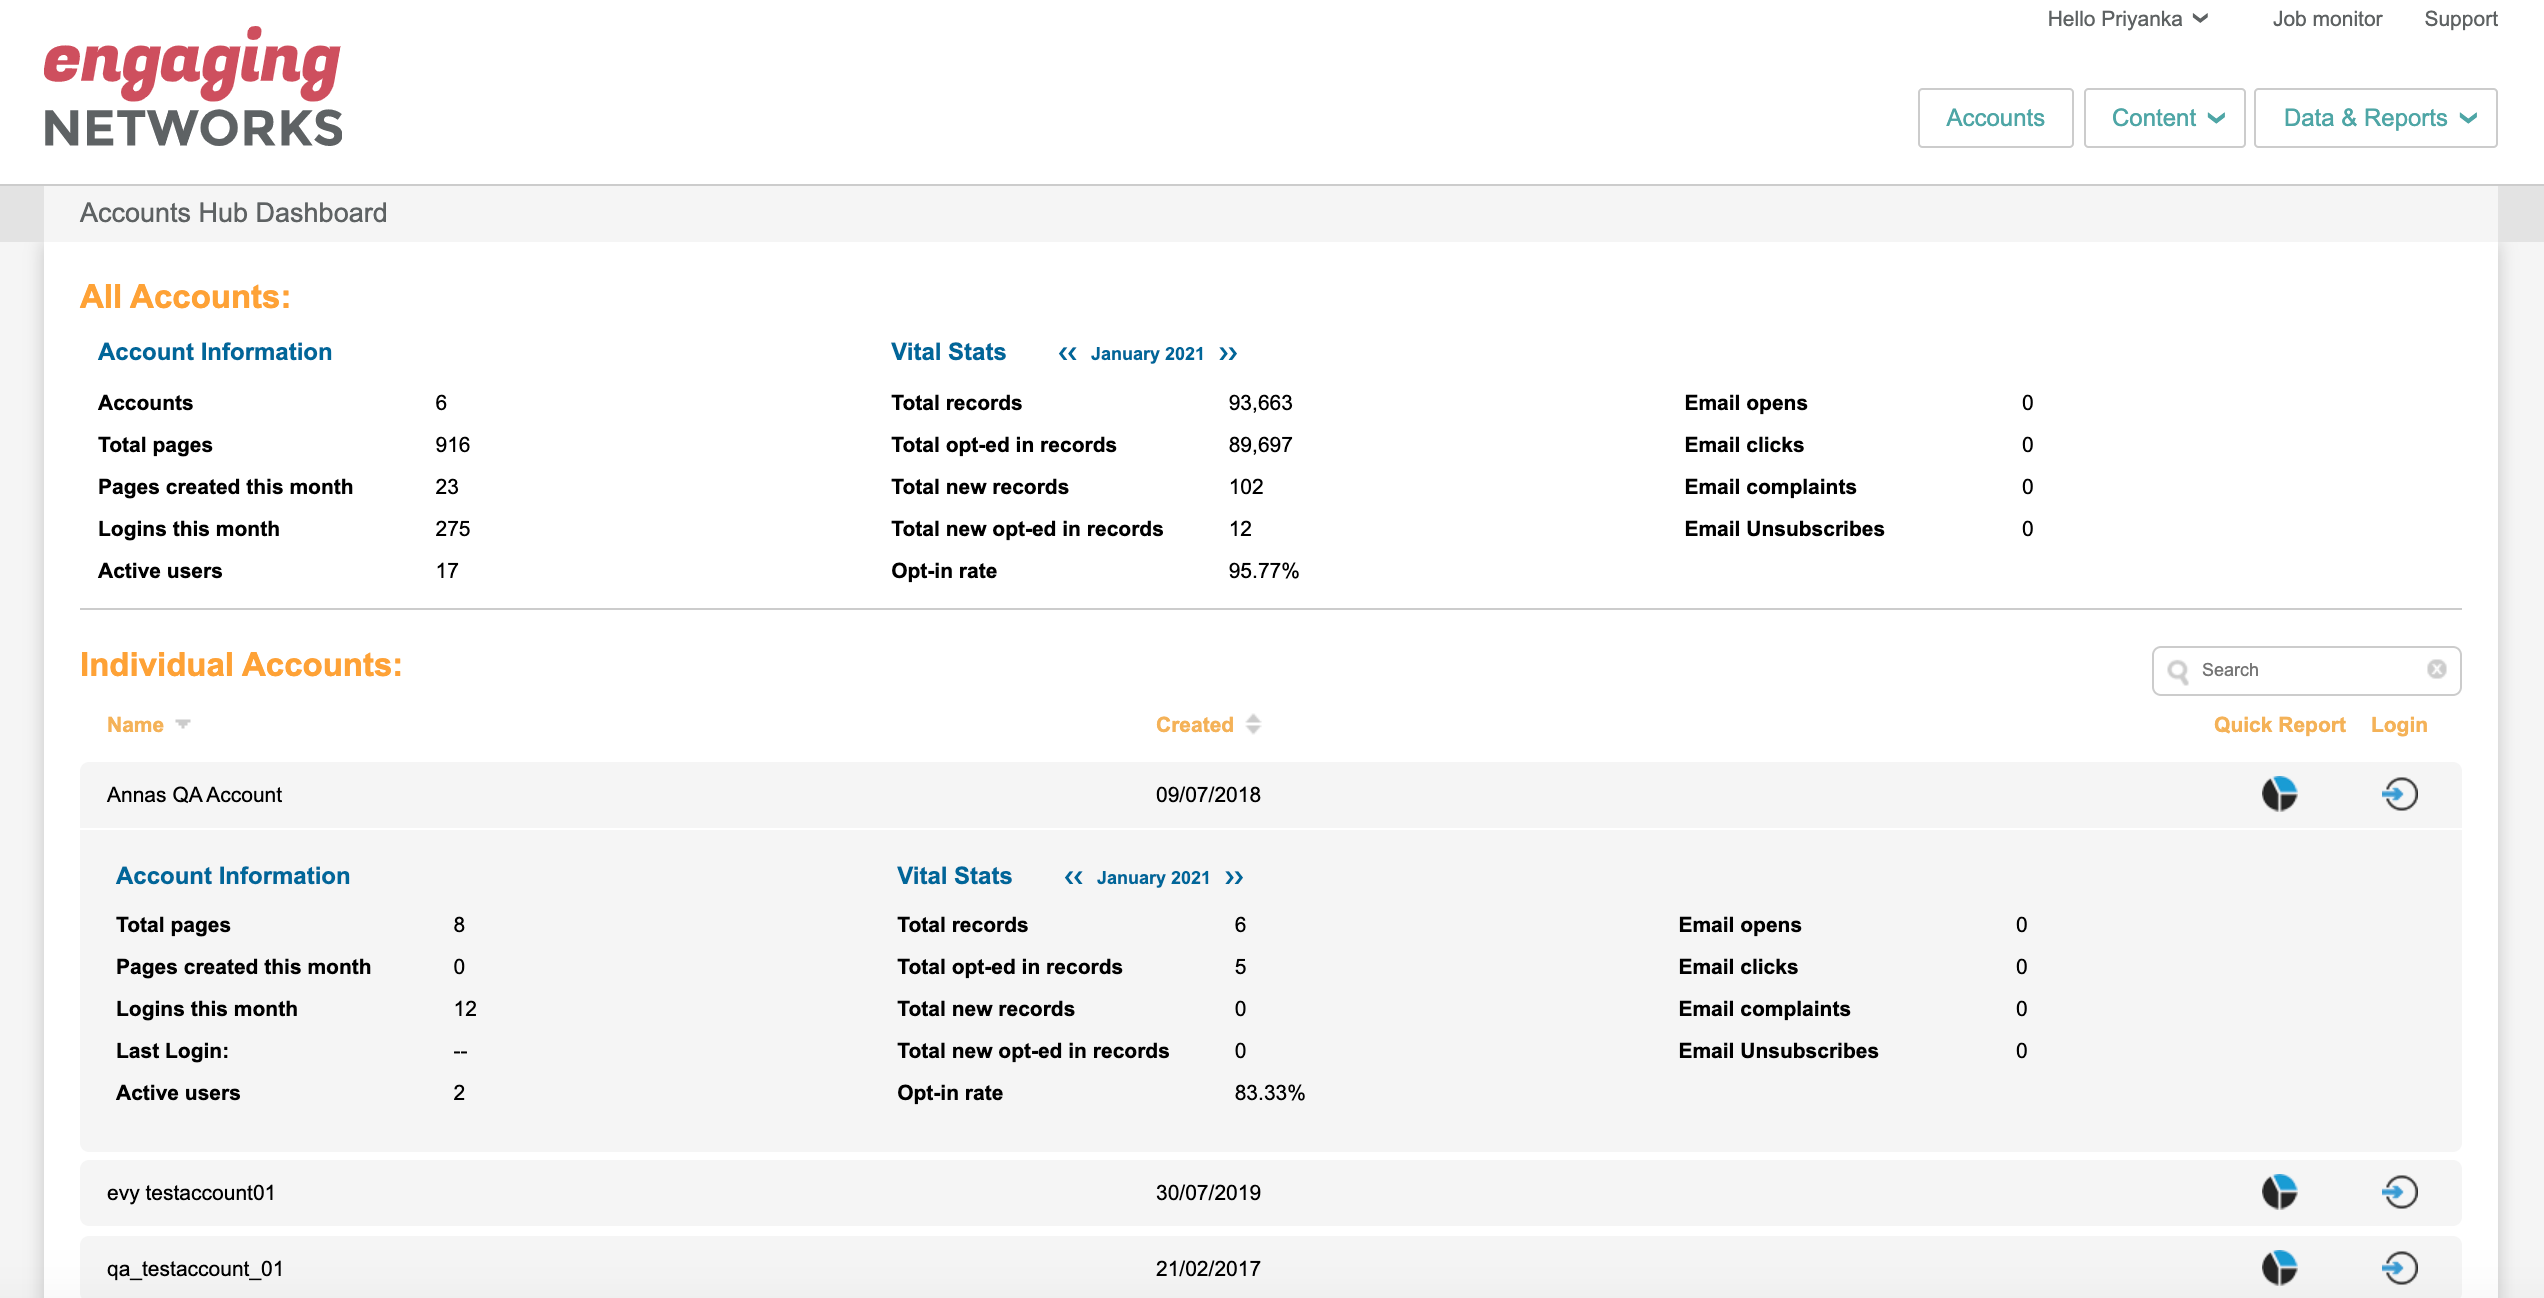
In addition to searching for a sub-account and sorting the account order, on the Accounts page you’ll be able to review the following sections.
All Accounts
The All Accounts section gives you an aggregated overview of all the sub-accounts assigned to your Accounts Hub login.
The Account Information area of All Accounts section rolls up a total of the number of pages, pages created this month, logins this month and active users across all sub-accounts.
The Vital Statistics area of the All Accounts section rolls up data such as total records, opt-ins, new records, total new opt-in records, opt-in rates and email statistics across all sub-accounts.
Individual Accounts
The Individual Accounts section lists all of the individual sub-accounts assigned to your Accounts Hub account. You can click on the name of the page to open up an overview of that specific account.
The Account Information area of Individual Accounts section displays a total of the number of pages, pages created this month, logins this month and active users for that specific account
The Vital Statistics area of the Individual Accounts section displays data such as total records, opt-ins, new records, total new opt-in records, opt-in rates and email statistics for that specific account
You can change the Vital Statistics date you want to report to using the chevron date pickers. The stats will show all accumalative data up to the selected date.

Quick report
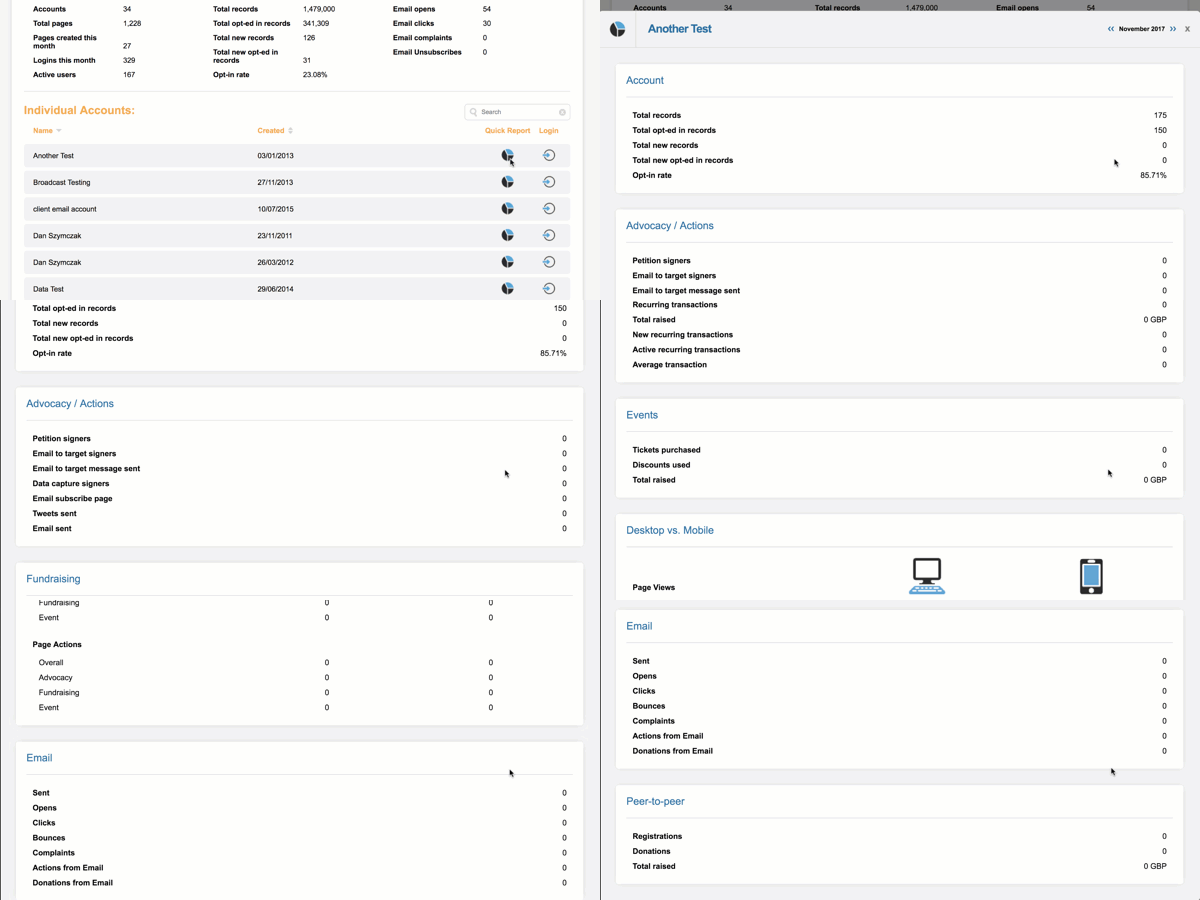
You can deep dive into more in depth stats for each sub-account using the Quick Report button next to each sub-account listed in your Accounts Hub.
Sub-Account login
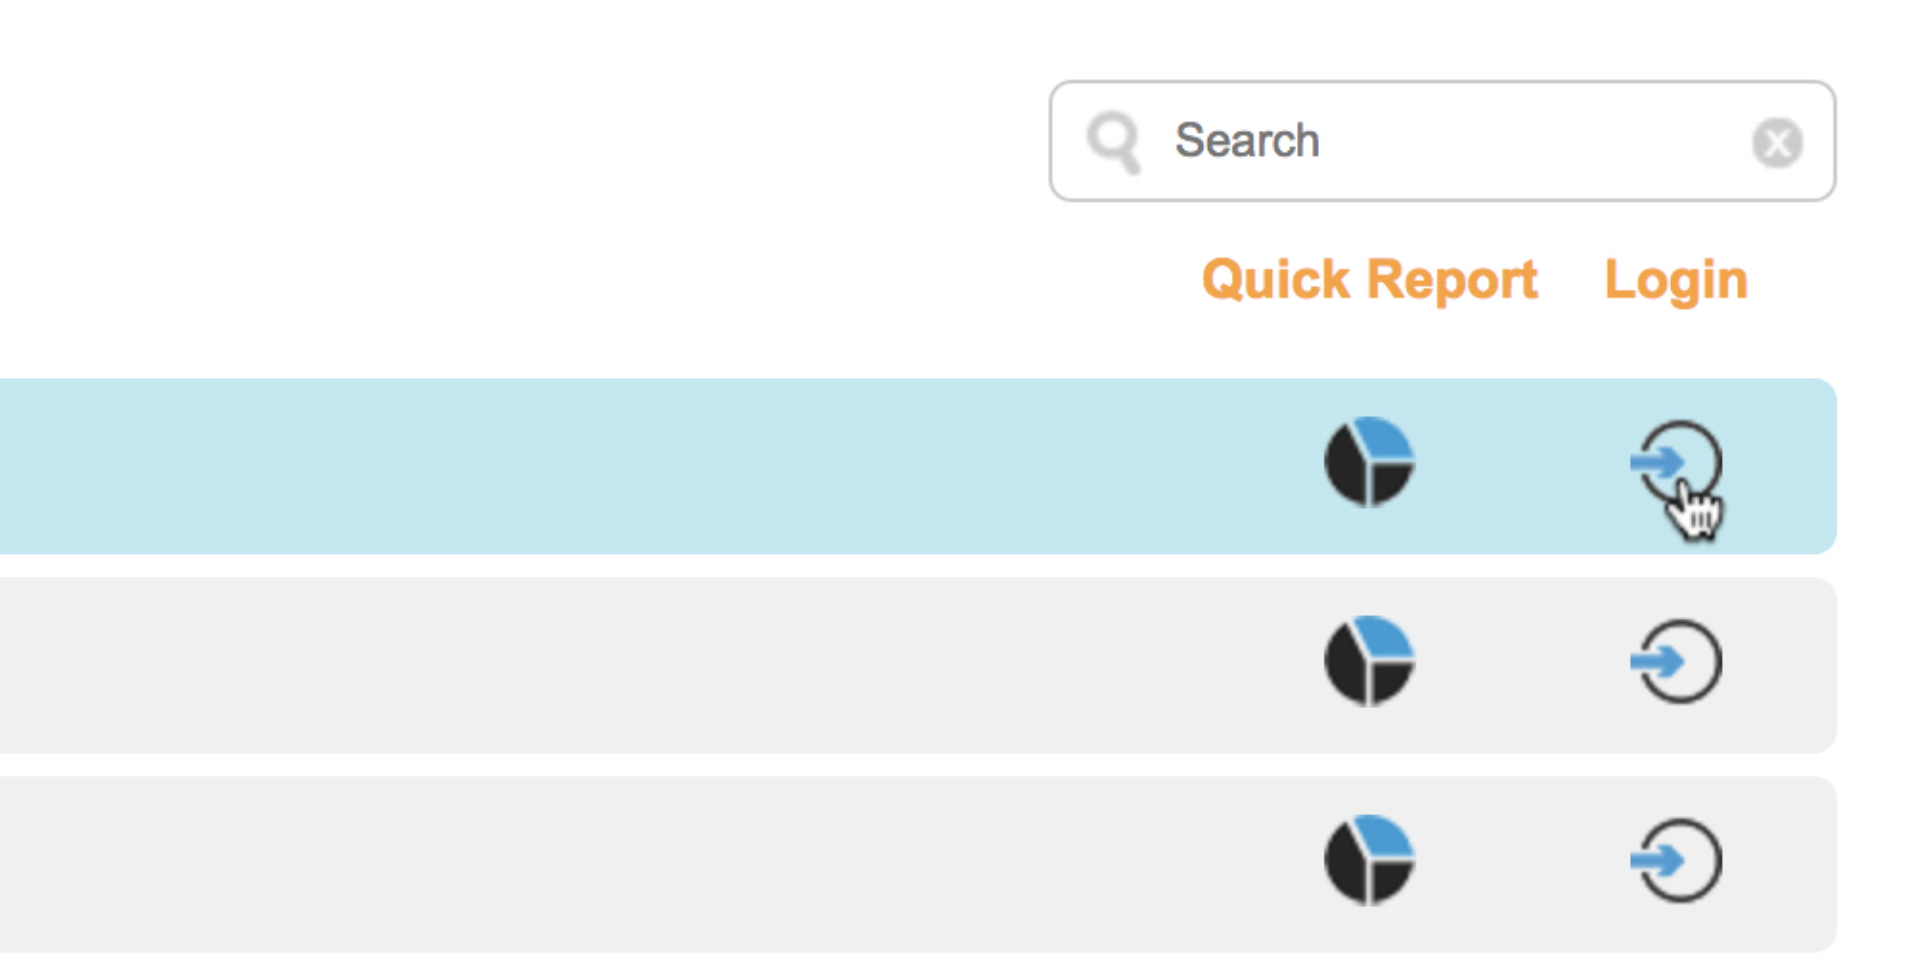
You can log into any of the sub-accounts listed in your Accounts Hub. Click the login button next to the sub-account you wish to access and you will be taken into that individual sub-account directly. You can operate the sub-account as a standard user and when you log out of the sub-account you will be returned to your Accounts Hub account.
Accounts Hub Administration
The main Accounts Hub account user is able to set up and manage their own and other Accounts Hub user accounts from the ‘Hello’ menu.
The main Accounts Hub user can update their own details and change their password under Hello > User Preferences.
Adding a new Accounts Hub User
Additional Accounts Hub users can be set up under Hello > Account Settings
To add a new Accounts Hub user click the New User button. You’ll be taken to the Add New User form.
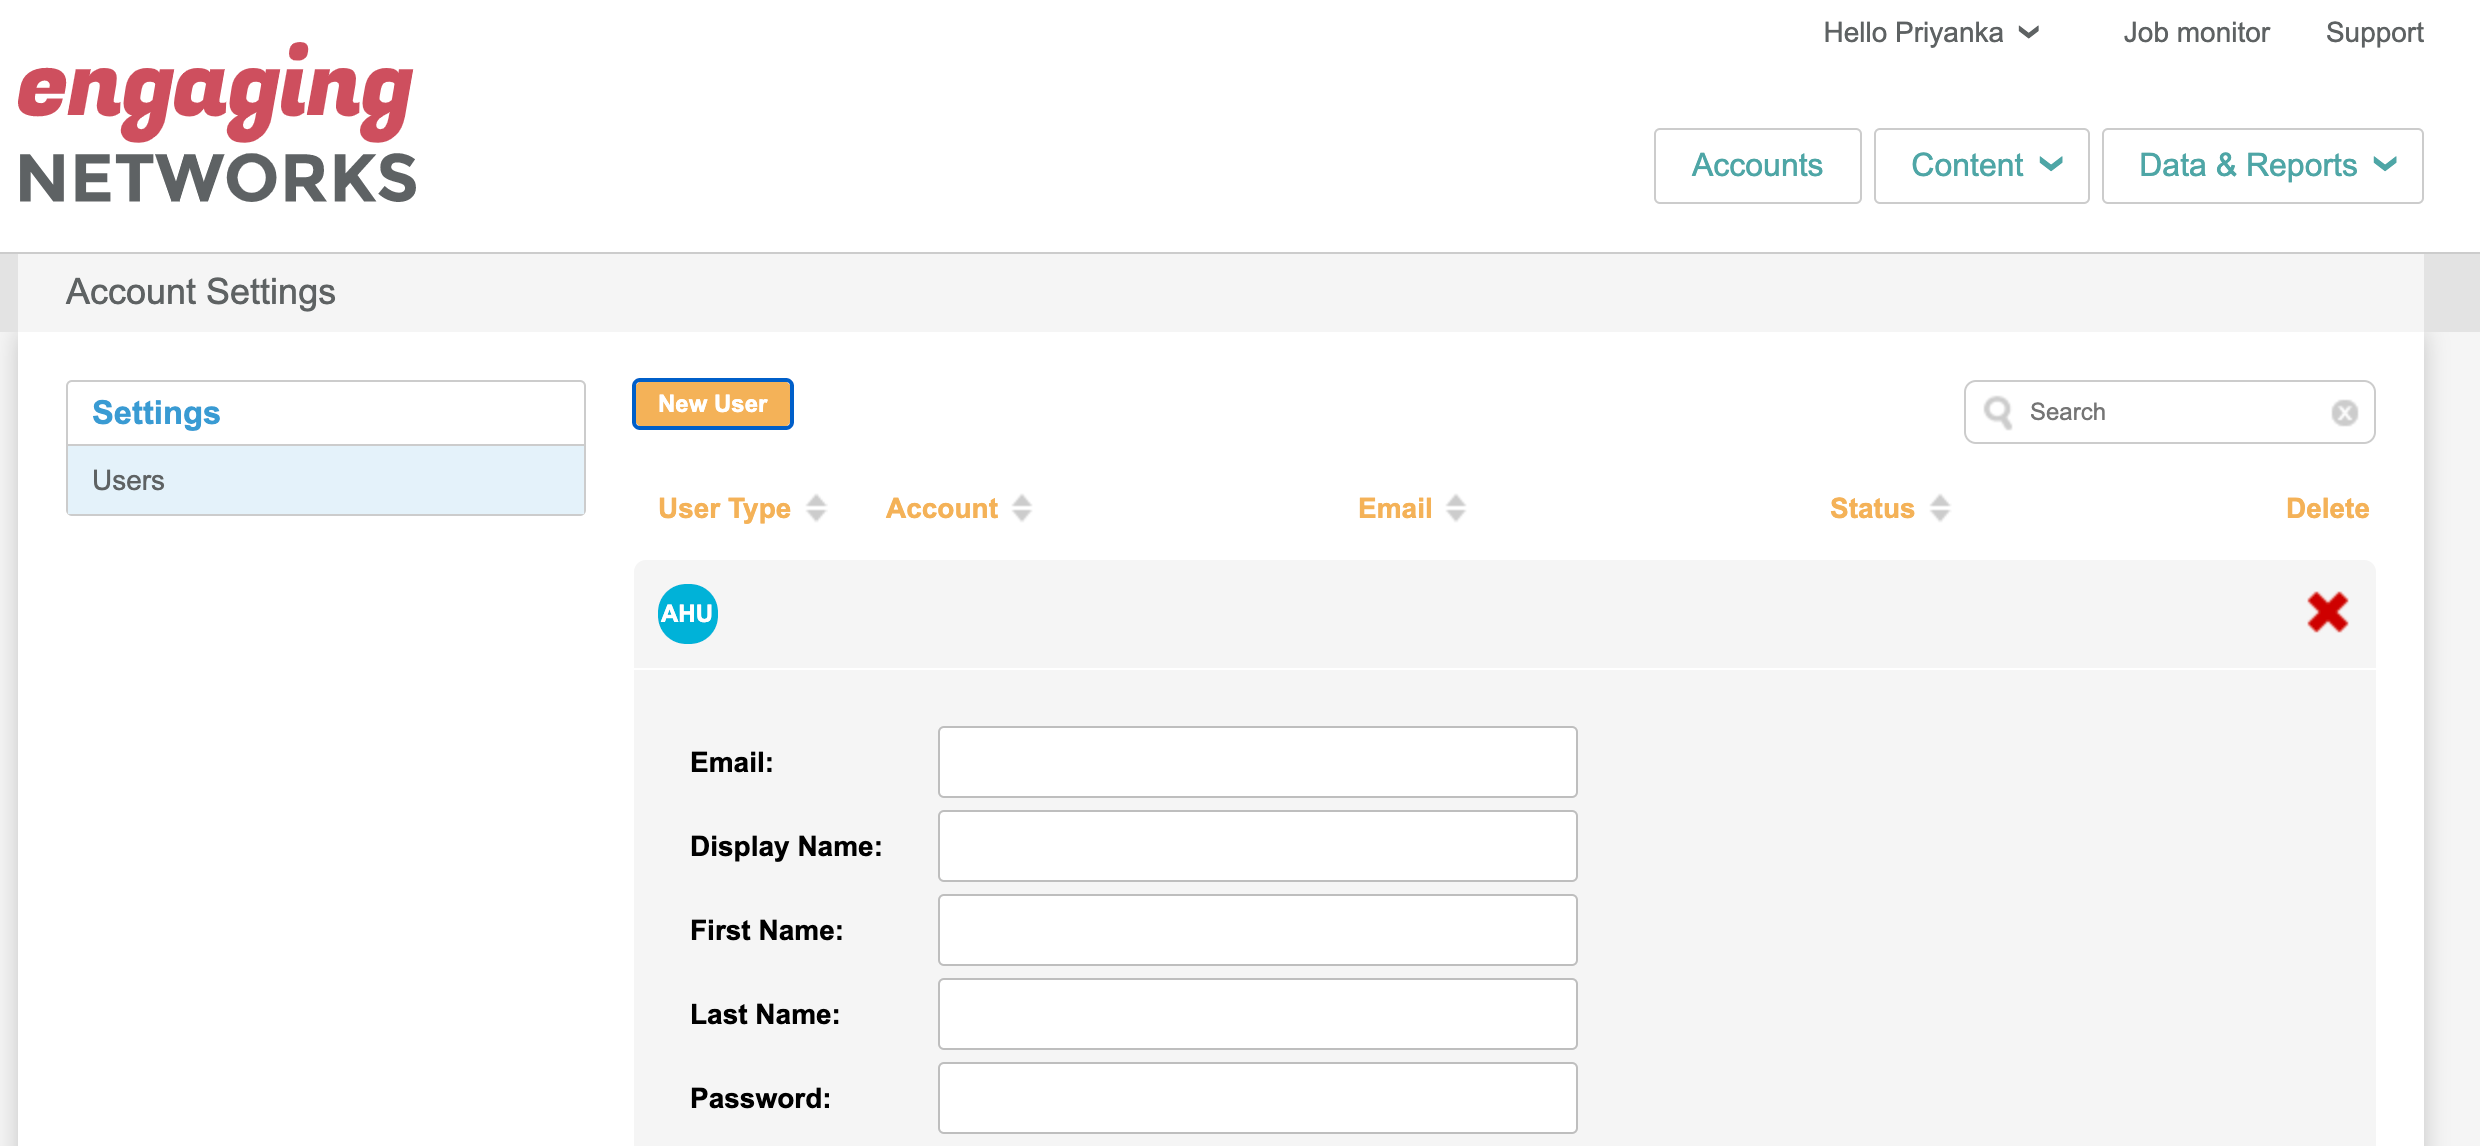
To add a new user type in their email, display name, first and last name and create a new password for them. By default we’ll add all the sub-accounts available to the Hub account to the new user. You can remove or add accounts that you’d like this user to have access to in the Client Scope section.
Once you’re happy with the new user’s settings you can click Save.
Note: Users do not receive notification that a Hub account has been created for them. You will need to communicate the login details directly through secure means.
Managing existing Accounts Hub Users
To edit an existing Accounts Hub user select Hello > Account settings and click on the name of the user to reveal their details panel.
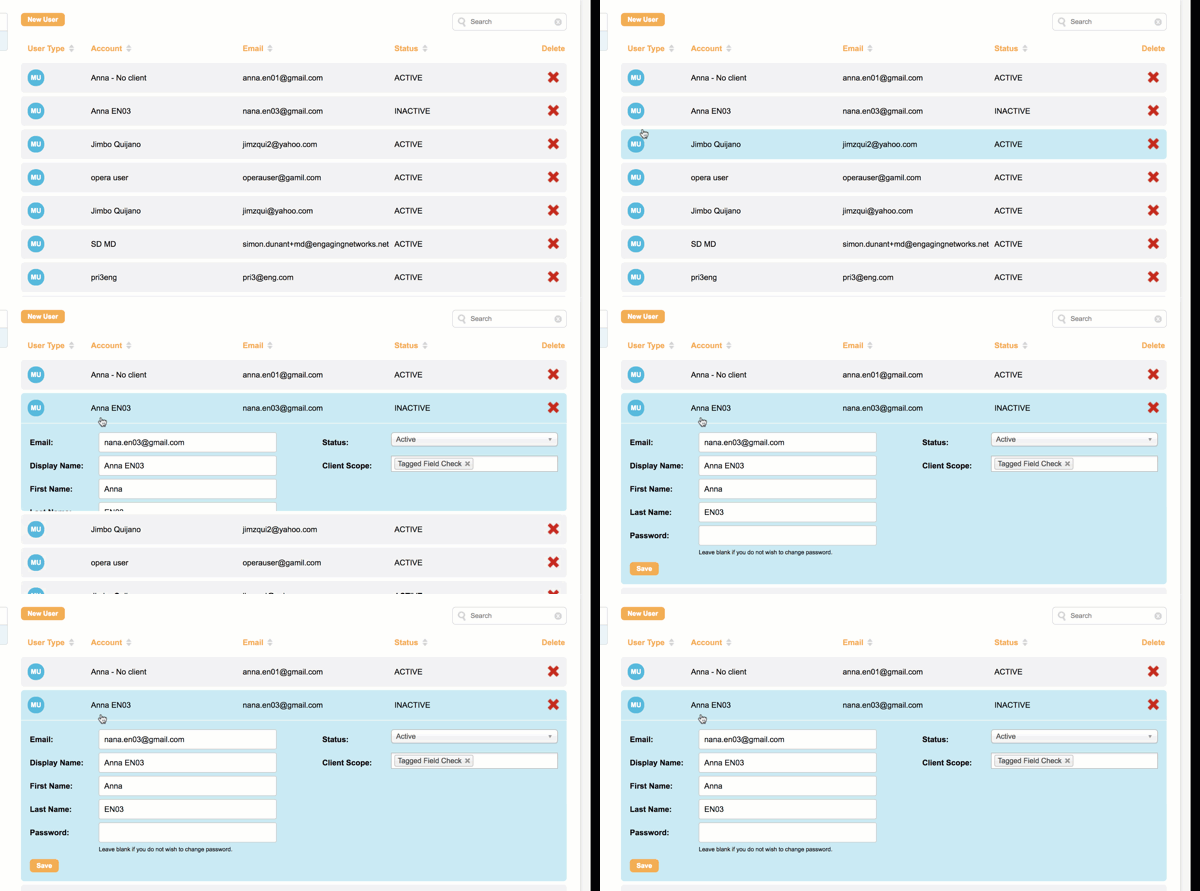
In the existing Accounts Hub user panel you can :
Update the users email
Update their display name, first, last names and password
Change their status to Active or Inactive (this temporarily disables their account)
Update the sub-accounts they have access to in the Client Scope section
To delete the Accounts Hub user click the ❌ icon next to the user you wish to remove.
Deleting a user cannot be undone. If you delete a user by mistake you’ll need to add them as a new user again.
Using Okta to log into the Hub
You can enable Okta so that your supporters can log in via the that method instead.
If already using Okta for allow users and admins to log into your Engaging Networks platform, then the Hub Okta app needs to be an additional one.
