Permission Groups and Views
Creating Permission Groups
Permission Groups allow you to set a series of rules which define what a User can see and do within your Engaging Networks dashboard.
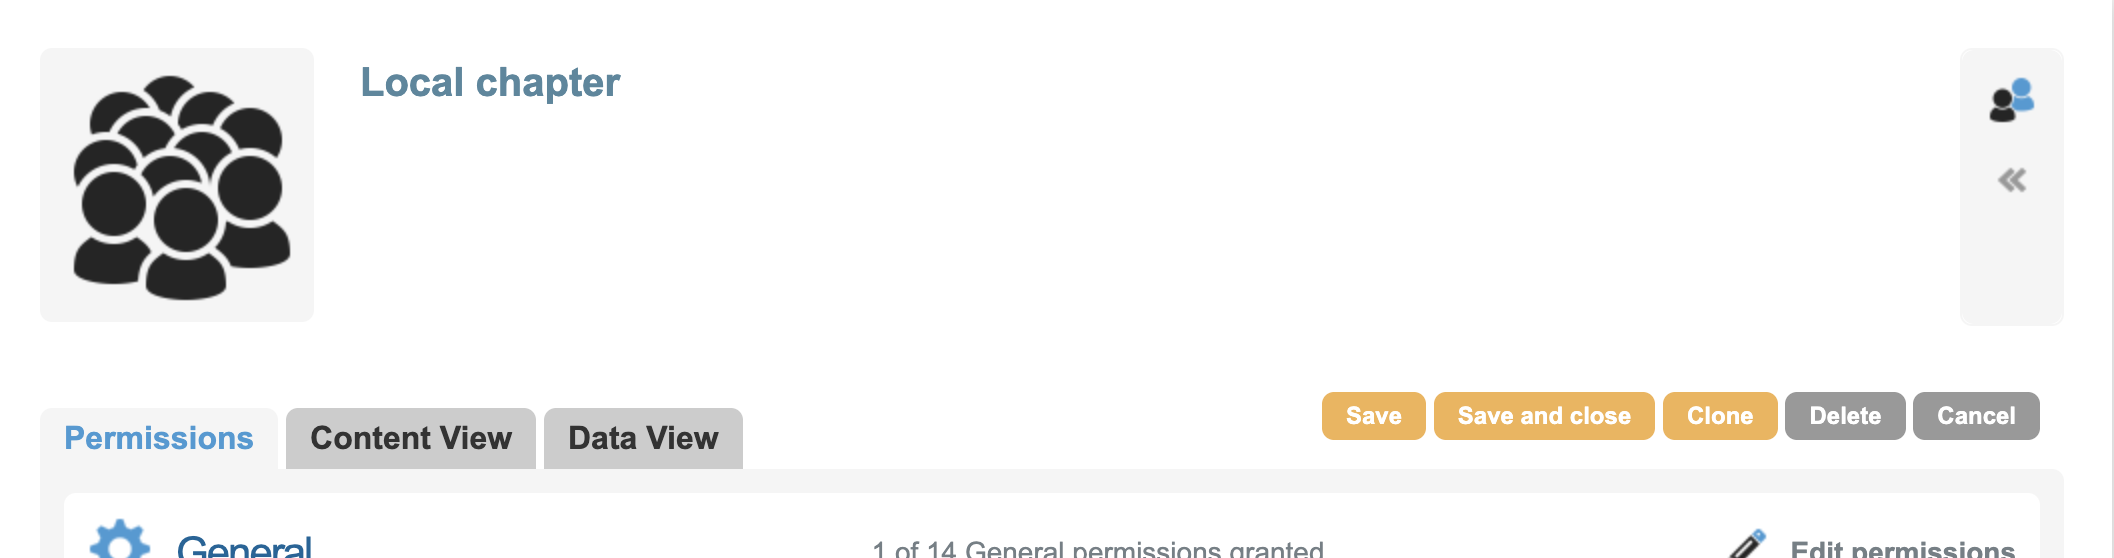
To create a new Permission Group, go to Hello > Account Settings > Permission Groups.
Here you will see all of existing groups in your account. You can edit an existing permission group by clicking on its tile.
To create a new Permission Group click on the Create new group.
Once the new group screen loads, fill out some basic information that identifies your group.
Field | Description |
Name | This will be your Permission Group’s name. It is good practice to name your Permission Group so it reflects the groups intended purpose. Examples would be “Fundraising Team”, “Advocacy Team”, or “Advocacy Interns”. |
Description | Here you can add more detail as to the purpose of the Permission Group. You can even choose to give more detail as to what permissions have been granted or revoked. |
Icon | You have the option to change your Permission Group’s icon with one of twelve pre-loaded tile icons. |
Available Permissions
Once you have the basics set up, you can grant or revoke permissions for the group.
Permissions are based on modules and are broken into eight sections, each with their own set of task-based permissions. These eight sections include:
Section | Description |
General | General permissions include things like libraries, managing account preferences, accessing libraries and jobs. |
Page | Page related permissions including access to particular page types and managing page admin access. |
Permissions for email classic broadcasts including building emails, accessing templates and sending broadcasts | |
Messaging | Permissions for marketing tools broadcasts including building emails and SMS, accessing templates and sending broadcasts |
Data management | Permissions for data including supporter record access, report access, and receipting. |
Reports | Permissions for accessing some reporting |
Data API | Permissions for the data API settings and token access. |
Peer to Peer | Permissions for accessing peer-to-peer (legacy only) |
Review this permission Matrix for a full list of permissions and their definitions: USER PERMISSION MATRIX.xlsx
Setting Permissions
To set permissions, click on Edit permissions that will then display the available permissions for the module you would like to edit. At the top of the section you have the option to grant and revoke all permissions, for this section, in one click.

If you would like to further tailor access for the group, you can go through each permission option and enable or disable what you want the Permission Group to have access to.
To do so, just click on the ❌ next to the permission you would like to enable. It will then turn into a green check mark indicating the permission is enabled.
Some modules, like fundraising or email, will require you to grant task-specific permissions. These will have a ❌ under each specific level of access you are able to grant. These include:
Access level | Description |
Organize | Allows users to change the folder location of campaigns, created content, files, etc. |
Modify | Allows users to modify existing campaigns, created content, files, etc. |
Create | Allows users to crate new campaigns, content, files, etc. |
Delete | Allows users to delete existing campaigns, content, files, etc. |
View | Allows users to view modules, campaigns, content, files, etc. |
Duplicate | Allows users to duplicate existing campaigns, created content, files, etc. |
Once you have assigned all permissions for a module, you can click on ‘edit permissions’ again to collapse it and continue to edit settings for other modules. When you have finished setting up your permissions you can click on Save to save your changes and stay on the page or ‘Save and Close’, which will return you to the main permission group screen.
Adding Group Members
Now that you have your Permission Group setup it’s time to add users to it. This can be accomplished in two ways.
From the Permission Group create/modify screen
From the User create/modify screen
Permission Group Create/Modify
To add group members when you create/modify your Permission Groups you simply need to expand the user input menu located on the right.

Once expanded, click within the user input field and a list dropdown list of all users in your account will be displayed. This is also a think ahead field, so you can easily filter which users are displayed. Once you locate the user you want to add to the group select them and click Add User.
Once you complete adding members to your Permission Group click on Save to save your changes and stay on the page or Save and Close which will return you to the main permission group screen.
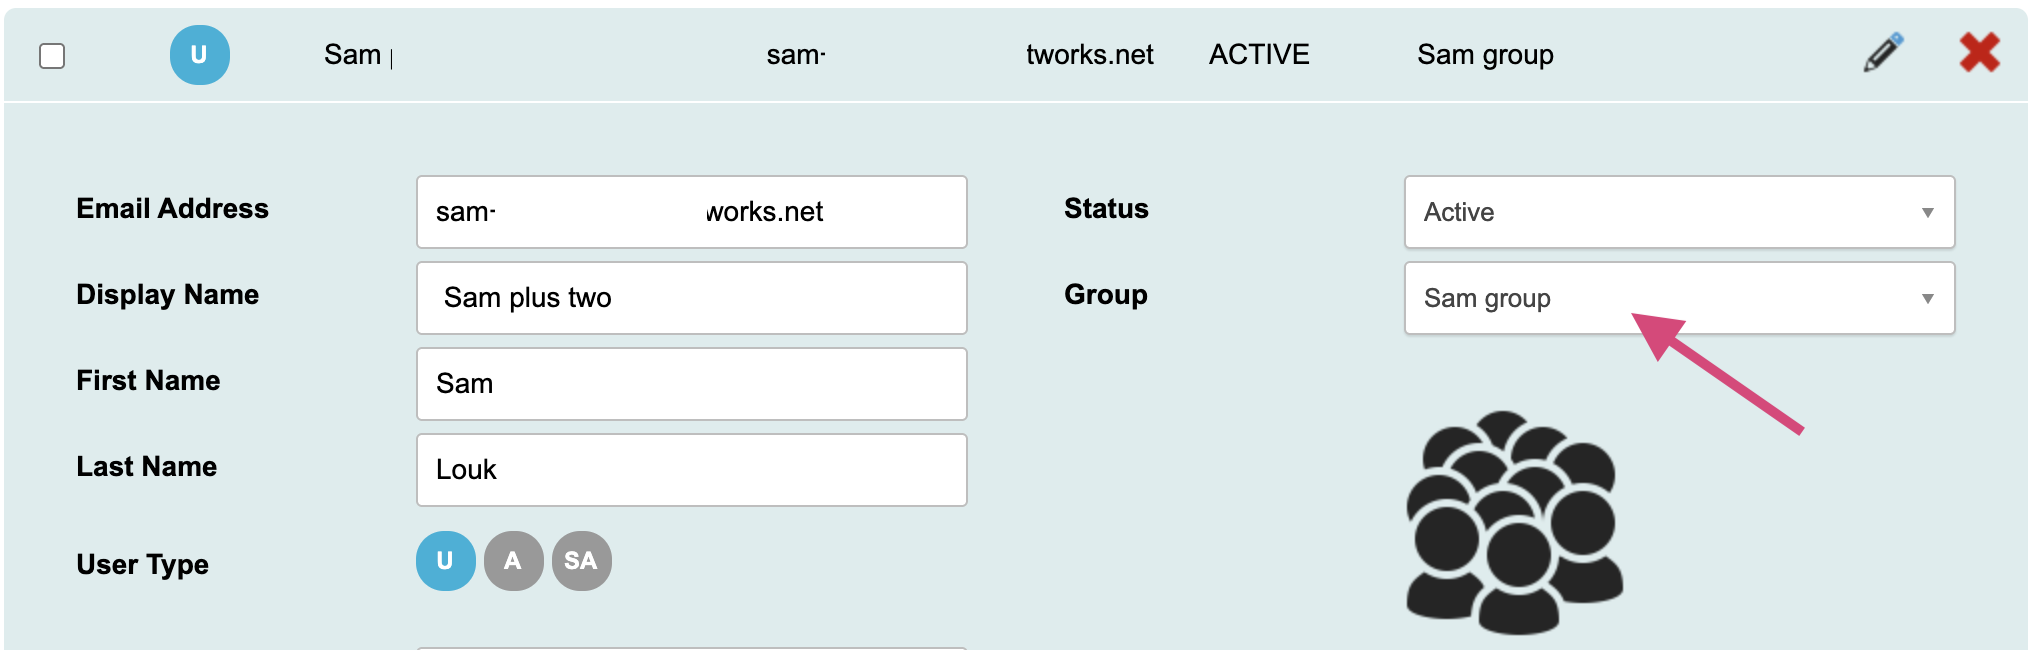
User Create/Modify
To add group members when you create/modify a user you do so by selecting the group name from the dropdown menu and clicking Save user to save your changes.
Content view
Content View allows a Permission Group access to other groups' or Users' content (pages, templates, etc) within Engaging Networks. By default, Permission Group members only have access to content created by other members of their own permission group.
From the Content View tab, you will see each created Permission Group and its group’s members (the members of the Permission Group you are editing will not be displayed).
To enable Content View, simply check the box next to the group(s) or user name(s) whose content you would like your group to have access to.
When you have finished setting the Content View for your group, you can click on Save to save your changes and stay on the page. Save and Close will return you to the main Permission Group screen.
By default, content will be owned by the User who originally created it. Ownership can be reassigned under Hello > Account Settings > Content Ownership. Read more here.
Data view
This can be enabled by request by contacting Support.
Data View allows you to restrict which supporters records your Permission Group can access within Engaging Networks. It does this by allowing you to filter the data using a field in your Account Data Structure.
To enable Data View, just check the box and set the field that you would like to base your restriction on and the value.

You can restrict the data on multiple values by separating your entries with a tilde symbol.

When you have finished setting the Data View for your group you can click Save to save your changes and stay on the page or ‘Save and Close’ which will return you to the main Permission Group screen.