Click to Call
Click to Call is a page type where your supporters can call targets, while looking at on-screen advice that you give them on what you want them to raise.
A Click to Call page acts as a bridge between the supporter and the target. The supporter will input their details, including their phone number, and will be put into a queue. The platform will then connect to the target, and once connected, will call the supporter to connect them to their target.
Because more than one supporter may be calling the target at the same time, the platform operates a queuing system and will call the supporter back once they are at the front of the queue. The queue is per target, so if you are using a post-code enabled database, the platform will be handling several queues at once, since each target phone number has their own queue.
The number that appears on the caller’s phone and the target’s will be a unique number assigned to you for the Click to Call platform. Neither party will see one another’s phone number.
It is a licensed feature, please contact support if you are interested in using it.
Getting started
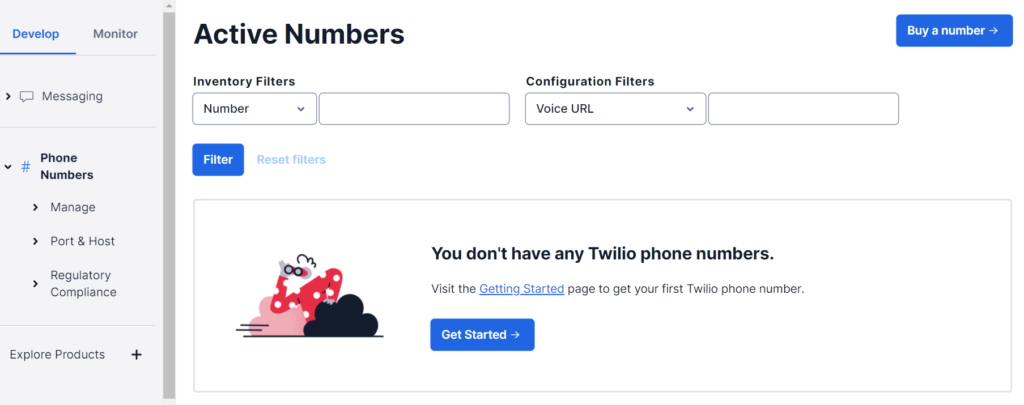
Engaging Networks uses an external provider Twilio to handle making and receiving calls. You will need to set up your own account with Twilio and configure any phone numbers you would like to use. Trial accounts may only make calls to verified numbers, so you’ll need to set up a full account. The number/s should be able to make voice calls.
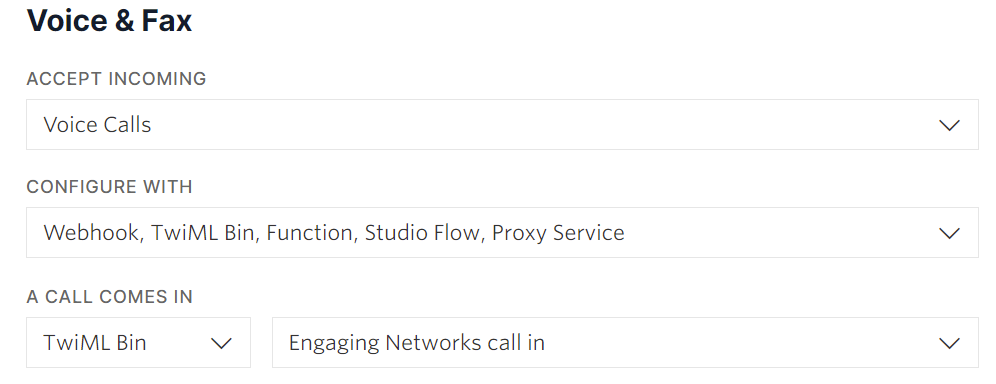
Additionally, it might be worth configuring a voicemail message for your number in case of any incoming calls. To do that, use the TwiMl Bin setting as shown below. You will need to create a new TwiMl Bin in your Twilio account and then select it under incoming call settings.
Connecting your Twilio account
Once the account is set up, we will then configure Click to Call in your Engaging Networks account where you will be able to customise office hours, time zone and queue settings directly.
Please share the following information with Engaging Networks support securely using Egnyte or another secure file sharing service so that we can connect your Engaging Networks account and configure Click to Call features.
Information you will need to provide:
Twilio auth token
Twilio account SID
Phone number you will use in Click to Call
Unlike SMS, Super Admins cannot configure Twilio for use with Click to Call from the extensions area of an account
Supporter experience
It is worth going over how the process works, since it is different to other pages in Engaging Networks.
The supporter will complete their details and submit it on the first page of the action
They will be shown a call contact block, showing them who they will be calling, or where they can choose who to call if more than one target exists.
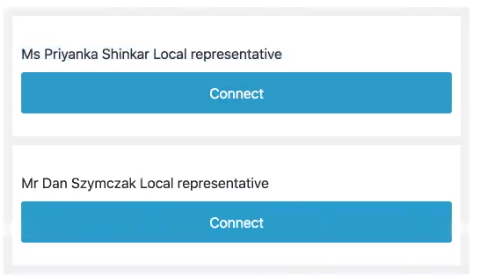
If they choose to connect, they will be shown a message giving them an estimated time, or information on the size of the queue.
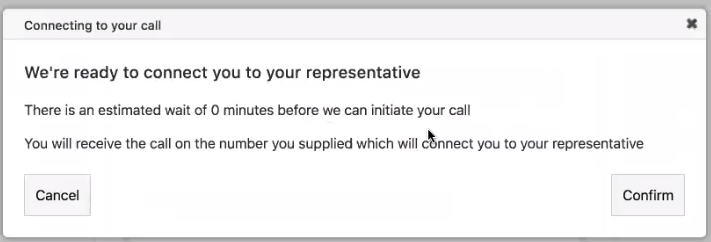
Once they confirm and the call is ready to connect, they will be shown a message displaying information on what to raise.
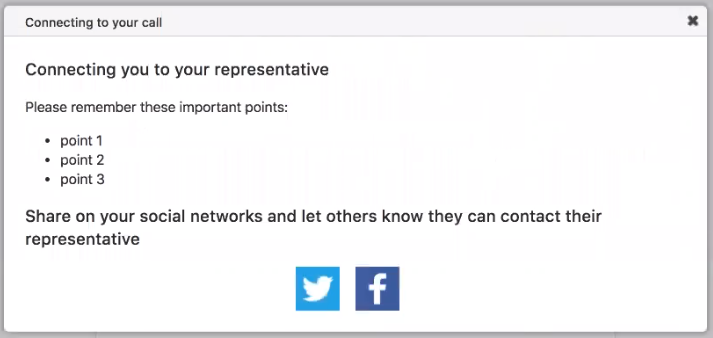
Once at the front of the queue, they will receive a call back from our platform. An automated message will play
They will be connected to the target and can speak to them
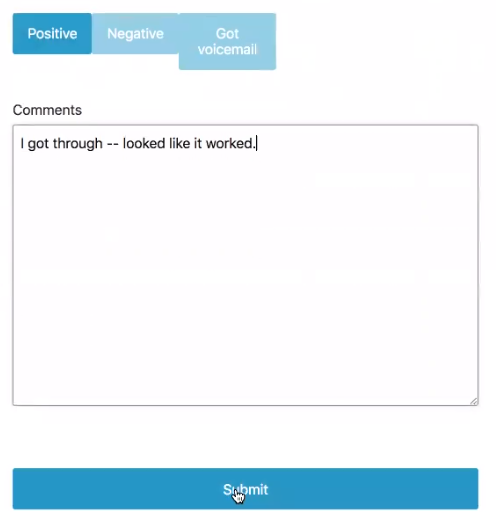
Once the call ends, a thanks email is sent where they can either click a link to call another target, or take a survey
Creating a click-to-call page
To create a new click-to-call page, go to Pages > Create Page, and choose Click to call.
Target Settings
You will then have to choose a target, which is either:
a postcode-enabled database (see this page on which databases currently support this page type)
a custom database, where you can upload your own spreadsheet. This would need to include a phone number which must be in the E.164 format.
This page type does not currently support single contacts
These are the currently supported target databases:
USA / English : US State Governors
USA / English : Congress – House
USA / English : Congress – Senate
USA / English : Attorneys General
UK / English : MP England Only
UK / English : Westminster MP
UK / English : MSP/AM/MLA/England MP
UK / English : MSP Constituency Only
UK / English : MSP Region Only
UK / English : Police Commissioners
UK / English : London Assembly
UK / English : Mental Health Trusts CEOs
UK / English : NHS Trusts CEOs
UK / English : MEP
Canada: Federal MP
Canada: Provincial MLA
Australia: MP
Settings & Notification Settings
The page settings and notification settings screens are no different to any other page type, so if you are familiar with page-builder, complete these as usual.
Click to Call Settings
Here you can set some properties specific to this page type:
Office hours – set the time in which the target is able to receive new calls. The queue is not cleared after the end of office hours, but no new calls can be queued
Office days – the days in which the target can receive the calls
Timezone – the timezone of the settings of this page
Clear queue at – this is the time at which any calls in the queue are cleared
Maximum queue size – the maximum number of supporters that can be in a queue to a single target at any one time
It may be worth setting the Office Hours end time an hour earlier than the real closing time, to give call queues time to clear before the office closes. For example, if a local target’s office closes at 5pm, setting office hours to end at 4pm leaves an hour to clear any remaining calls that are queued.
Editing a click-to-call page
When you first create a page, a lot of content is auto-populated for you.

A click to call campaign always consists of three pages:
Page 1 – where the supporter enters their details, including phone number
Contact Targets – the screen where the supporter confirms they wish to make the call, and queue information is presented
Post Call Survey – once the call is complete
Page 1
By default, this has a form block auto-populated on it. This first page collects supporter details, which must at least include an email address and tagged Second Phone number field, and a post code for post-code enabled databases. You should of course also include information on what the campaign is about here.
Important: Phone number validation Phone numbers must be input in the correct format for them to work with the platform. We have added a new validator “Required phone number” so that when the supporter enters their phone number, it will check that it is correct. The supporter must also type in the country code (e.g. +44) as part of the number, as the system uses that to determine which country the supporter is in. You can use the in-built validator, or your own custom one, but you must use one of them for the page to work.
Contact Targets
Once Page 1 is submitted, this page will be seen by the supporter. You can add text blocks here to give further information, or to add links to other pages.
This has a Call Contact Block by default. This block has several sections:
Contact details display
Allows you to determine how the target is displayed to the supporter
Confirm call
The supporter will click a Connect button to start the process off. This block allows you to decide on the the copy to display to the supporter. You can include estimated wait time, queue size in front of them and asking them to confirm they would like to proceed.

To insert this information, you can use the blue buttons. The first 6 operate exactly the same as in Email to Targets. The two final icons are unique to this page type. The stopwatch icon will insert the estimated wait time, and the people icon will display how many people are in front of them in the queue.
Script guidance / topics
A call script that will be shown to the supporter once they are ready to go. You should include points that you want them to raise here.
Connecting message
This is a voice message that will play to the supporter as they are connected. It will convert the text typed here into speech.
Alternative call blocks
Just like in email to target pages, you can click the + tab to add alternative call blocks depending on data returned by the database or given by the supporter. For example, you might have a different call script for certain contacts.
Settings
By clicking the cog icon, you are given a series of additional settings:
Display party image for contact? – If checked, this will display an image of the target’s party, if available
Social sharing header – if using social sharing, this is the text that will display before the buttons
Connecting text – this text is the title of the panel that displays when the call is about to connect
Buttons – you can edit the labels for the buttons here
Errors, full queue and office hours – this is the text to display if the call is outside the out of office hours, if there is an error connecting the call, if no valid contacts are available or if the queue is full for a particular contact. Office hours and maximum queue length are defined in the click to call page settings
Post Call Survey
This page is displayed when the supporter clicks on a survey link in their thanks email, which they will receive once the call has completed. It has a Survey Block on. This can be used to collect feedback after the call on how it went
Auto-responder thank you email
Once the supporter receives a callback to the respective target and completes the call, the thank you email will be sentto the supporter. The thank you email has two extra buttons in:
Add a Survey link to display the Post Call Survey page. If you have duplicated another click to call page, ensure you add in this link again, otherwise it will not record the comments in the survey.
Add a Call Again insert to allow the supporter to directly go back to ‘Contact Targets’ (page 2) to call other contacts, if multiple targets are supported.
Data
A CTT transaction will be created for each target called. In the same way as with ETT transactions, a registration (R) will be recorded if the supporter only submits the first page but does not go on to call. A participation (P) is recorded if the supporter calls and speaks to the target.
The survey results will be available as a CSV file that can be downloaded from the page itself, where you can decide on a date range.
Manually clearing the queue
If you set the page’s status to “Closed”, this will clear the live queue.
