Supporter Search Gadget
Lookup Supporter allows Users to search for supporters in Engaging Networks and navigate into individual supporter records. From the records, Users can easily manage and update information related to supporters like address details, opt in responses or update the status or frequency of recurring donations.
Users can access Lookup Supporter from Data & Reports > Lookup Supporter or from the Supporter Search dashboard gadget for a simple search.

Supporter Search Gadget

On the main dashboard of Engaging Networks, Users with adequate permissions can add the Supporter Search gadget using the ![]() button. This gadget allows Users to do a simple search for supporters by full or partial values for First Name, Last Name or Email Address fields. Users can also search for supporters using their full Supporter ID by prepending the value with lower case ‘id:’ (e.g., id:123456789).
button. This gadget allows Users to do a simple search for supporters by full or partial values for First Name, Last Name or Email Address fields. Users can also search for supporters using their full Supporter ID by prepending the value with lower case ‘id:’ (e.g., id:123456789).
Advanced Search

Advanced Search tool can be found by the simple search in Lookup Supporters or after using the Supporter Search gadget. It allows Users to search for supporters using supporter fields available in the account, search using multiple fields, and also has various search operators. Users can search with a combination of up to five fields using AND logic so returned records must meet all search criteria.

Operator | Definition | Example |
|---|---|---|
Fuzzy Match | Returns results that are similar to the search term, allowing for typos, misspellings, or minor variations. | Searching “aplpe” returns "apple" |
Equal To | Search terms must match exactly. | Searching "apple" returns only "apple", not “apples” or “Apple Pie.” |
Not Equal To | Will return all results excluding the search terms (but not blank values). | Searching “apple,” returns “banana”, “orange”, “pineapple” |
Contains | Returns results where the search term appears anywhere inside the target text. | Searching "app" returns "apple", "application", "snapper" |
Starts With | Returns results that begin with the search term. | Searching "app" returns "apple", "application" |
Less Than | Date based comparisons that return results below a given value. Format must be YYYY-MM-DD. | Searching “2025-01-01” returns any fields formatted as dates before 2025-01-01 |
Greater Than | Date based comparisons that return results above a given value. Format must be YYYY-MM-DD. | Searching “2025-01-01” returns any fields formatted as dates after 2025-01-01 |
Users can define what fields will be shown when performing an advanced search in the account by selecting the ![]() icon, selecting the fields that should be included, and saving the configuration. This is an account wide setting and will apply to all Users and can be helpful in reducing the number of fields to only include those needed for searching.
icon, selecting the fields that should be included, and saving the configuration. This is an account wide setting and will apply to all Users and can be helpful in reducing the number of fields to only include those needed for searching.
Search Results
After entering search terms in either the Simple or Advanced Search, Users can select ![]() to initiate the search. The results will display beneath the search tool with the following fields included in the default layout: First Name, Last Name, Email Address, Date Created, and Date Modified.
to initiate the search. The results will display beneath the search tool with the following fields included in the default layout: First Name, Last Name, Email Address, Date Created, and Date Modified.
The layout can be changed to include up to ten supporter fields as columns by selecting the ![]() , selecting which fields should be active, and then updating. This setting is unique to each User’s login (rather than an account wide setting) and allows Users to customize the supporter data they see without needing to navigate into individual records.
, selecting which fields should be active, and then updating. This setting is unique to each User’s login (rather than an account wide setting) and allows Users to customize the supporter data they see without needing to navigate into individual records.

Search Results Actions
The available actions can vary based on Users' permissions.
From the results screen, Users can take a variety of actions for supporter records. The ![]() icon will open the entire supporter record where a number of gadgets with various functions are available. From the full record, Users can see a supporter’s transaction history, change details about the supporter, manage donations, and more using Lookup Supporter gadgets.
icon will open the entire supporter record where a number of gadgets with various functions are available. From the full record, Users can see a supporter’s transaction history, change details about the supporter, manage donations, and more using Lookup Supporter gadgets.
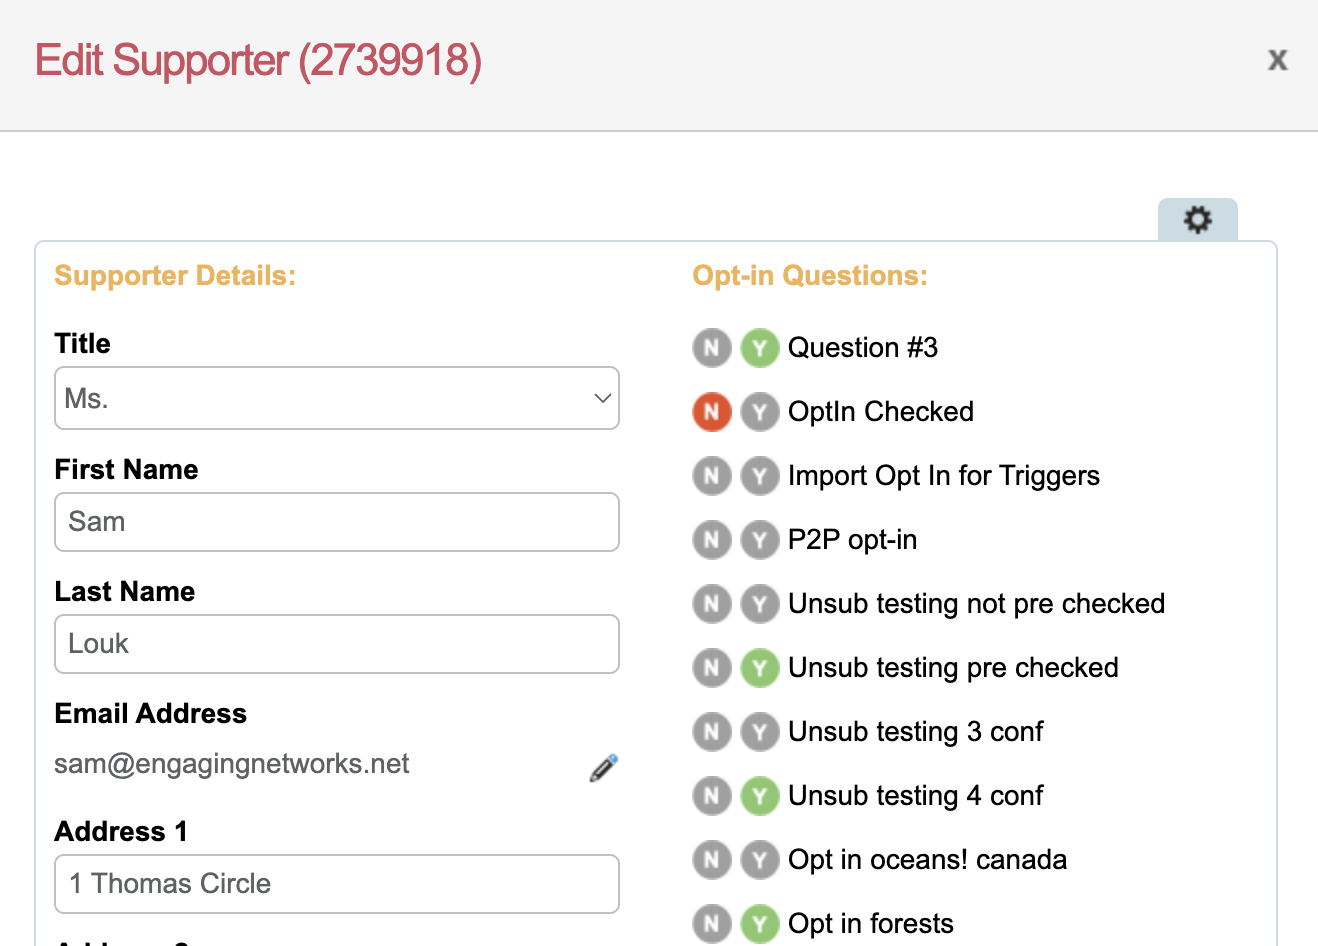
The ![]() icon will open a Supporter Details gadget and allow Users to quickly make changes to supporter field values and opt in statuses without opening the entire supporter record. Users can customize which supporter fields and opt-in questions are displayed by clicking on the settings icon
icon will open a Supporter Details gadget and allow Users to quickly make changes to supporter field values and opt in statuses without opening the entire supporter record. Users can customize which supporter fields and opt-in questions are displayed by clicking on the settings icon 

Deleting supporters cannot be undone! Deleting supporters also deletes their related transactions like opt-in history and donations, including recurring donations.
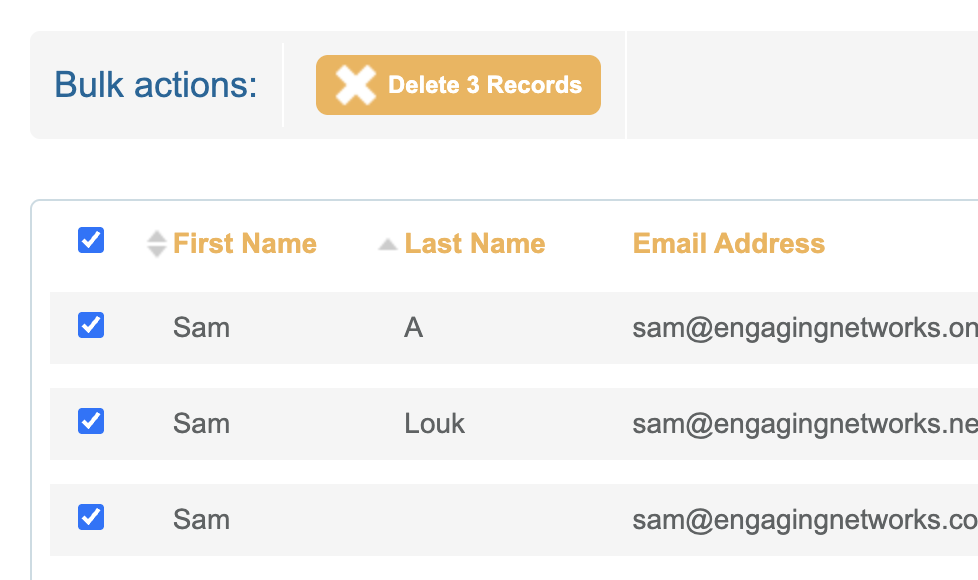
Lastly, Users can delete a supporter record from an account with the ![]() icon next to the record. Supporters can also be deleted in bulk by selecting the box to the left of each record that should be deleted. Once more than one supporters is selected, a bulk actions menu will display allowing the records to be deleted at once. After selecting delete Users will need confirm they want to delete the records before single or bulk supporters are deleted.
icon next to the record. Supporters can also be deleted in bulk by selecting the box to the left of each record that should be deleted. Once more than one supporters is selected, a bulk actions menu will display allowing the records to be deleted at once. After selecting delete Users will need confirm they want to delete the records before single or bulk supporters are deleted.
Supporters can also be deleted in bulk using an imported CSV file. Read more about that here.

Merging Supporter Records
Merging records cannot be undone. All the data from merged records will be kept on the retain record.
Merging allows Users to combine the data from two records into a single retained supporter record. Users can merge records by selecting the boxes to the left of two records that should be merged. Once two records are selected, the merge button appears.

After selecting the option to merge the records, the User can select which supporter field values should be kept on the retained record. After selecting merge, Users will need confirm they want to merge the records before the two supporters are merge.
It can take up to 24 hours to see the merged transactions on the retained record.
All transactional data like donations and opt in statuses will be kept on the retained record.
The older supporter create date and supporter ID will be kept on the retained record.
If the merged records had conflicting opt in statuses, the most recent opt in response will take precedence.
Adding a New Supporter

Users can create new supporters individually from the Lookup Supporter screen by selecting the + New Supporter button. A blank supporter record will appear with the supporter fields and opt-in questions in a quick setup window. The only required field is Email Address as that is the primary identifiers in Engaging Networks. After filling in the information, the User can “Save” to add the record to the account.
