Adding Google Analytics tracking on your pages
Google Analytics 4 replaced Google’s Universal Analytics (UA) on July 1st, 2023. Universal Analytics data will continue to be temporarily visible, but UA will not be usable as a platform.
How does Google Analytics relate to Engaging Networks?
Google Analytics is a service offered by Google that generates detailed statistics about a website’s traffic and can provide information to measure conversions and user activity.
You can use Google Analytics on your Engaging Networks pages to gain deeper insights on page activity and performance for reporting and optimization.
Setup simply involves adding Google Analytics (“GA”) to your HTML Templates.
Since Google Analytics is a third-party product, please be sure to refer directly to Google’s support pages for troubleshooting.
Google Analytics 4 will replace the existing Google Universal Analytics in July 2023, and Google recommends you install codes for both versions until after July 1st. The two versions will not conflict with each other, and you can remove your Google Universal Analytics tracking code (in format UA-XXXXXX-1) after July 2023.
Before starting
Requirements
Basic understanding of HTML
Access to Engaging Networks and HTML Templates
Understanding of Google Analytics
Recommendations
Make backups of the template you are editing by duplicating them (you can have as many templates as you wish)
Communicate with your team that you are making changes
Getting the most out of Google Analytics requires research. There are many tutorials and forums to help you gain better knowledge of it’s tools (Click here to see Google’s help)
Insert the code given by Google Analytics into the correct place of your template. Please follow the instructions from Google to do so with Google Analytics 4 here.
STEP 1: Create a new Google Analytics 4 property and “web data stream” with tracking code
1a. Getting started with Google Analytics 4 (After June 2023)
If you do not have a Google Analytics account (or you are reading this after July 1 2023) you can create a new Google Analytics 4 property by following the instructions here: https://support.google.com/analytics/answer/9304153?hl=en
This page covers how to :
Set up a new account,
Add a new GA4 property
Add a ‘’web” data stream with “enhanced measurement”
The step “Set up data collection for your website” > “Add the Google tag directly to your website” is covered in Step #3 Below.
1b. Upgrade to Google Analytics 4 if you are already using Google Universal Analytics (Pre June 2023)
If you already have an existing Google Universal Analytics account, Google offers a “Setup Assistant” to help you in the process of creating a new Google Analytics 4 property based on your existing Universal Analytics account.
The Google support article “[GA4] Add a Google Analytics 4 property (to a site that already has Analytics)” explains how to use the Setup Assistant.
GA4 Setup Assistant creates a new GA4 account that has the same time zone settings and the name will be the same as your existing account, with – GA4 appended to the end.
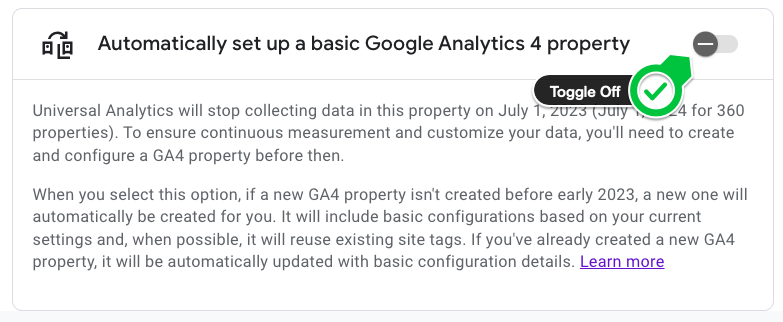
Do not allow Google to automatically set up a GA4 property (aka auto migration)
After Step 4 in the instructions here, scroll down and disable “Automatically set up a basic Google Analytics property”
This process is called “auto-migration” and Google recommends against using it. The new account will be ”automatically updated with basic configuration details” which could be problematic. It would be better to set those details manually.
STEP 2: Create a new Google Analytics 4 property with a new tracking code
Do not re-use your existing tracking code already installed on the site.
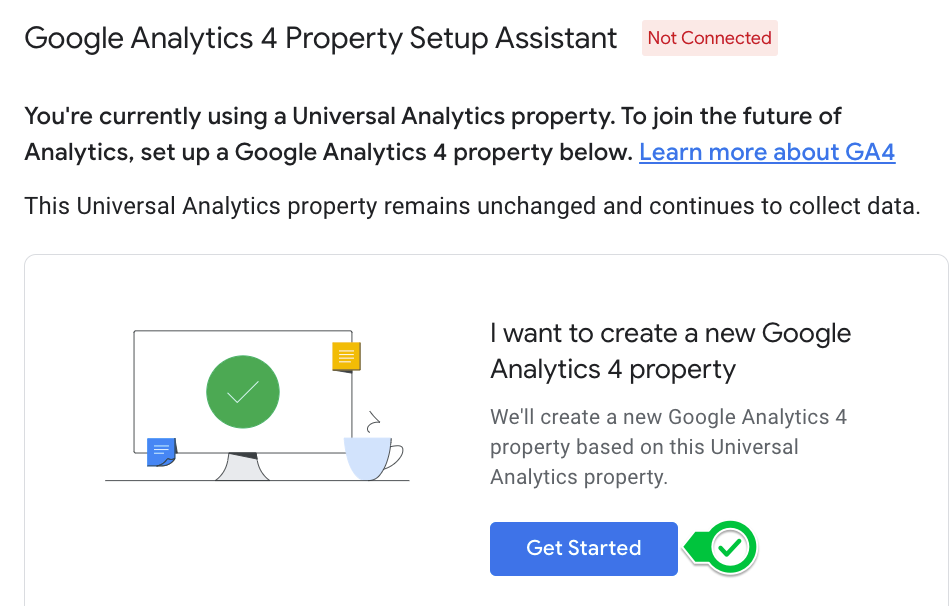
Below is a screenshot of step 5 in the process here, choose “I want to create a new Google Analytics 4 property”
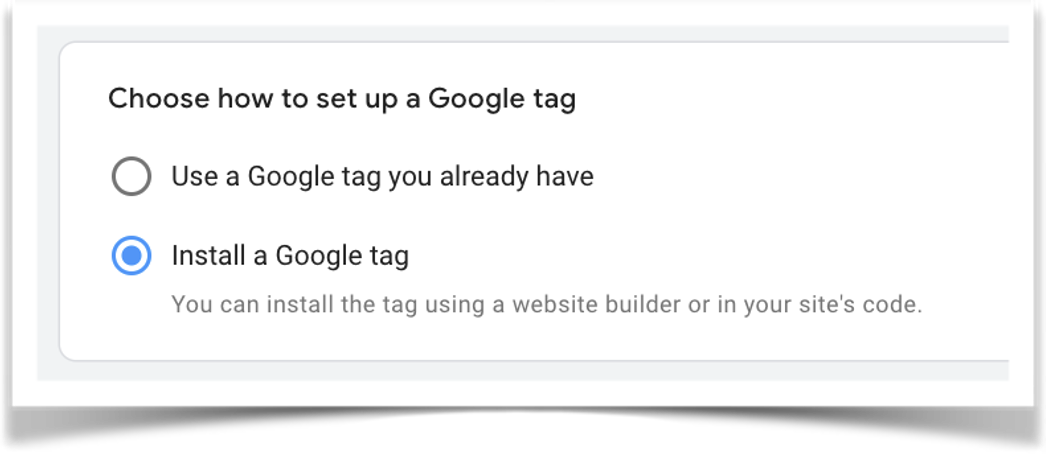
For Step 7 Choose the option to “Install a Google Tag” on the Set up a Google Tag page
You want to start with a new tracking tag specifically for Google Analytics 4. Google may present the option to re-use the existing tag on your site or you may have the option to “Create property” which re-uses the tag on your site – do not choose these options.
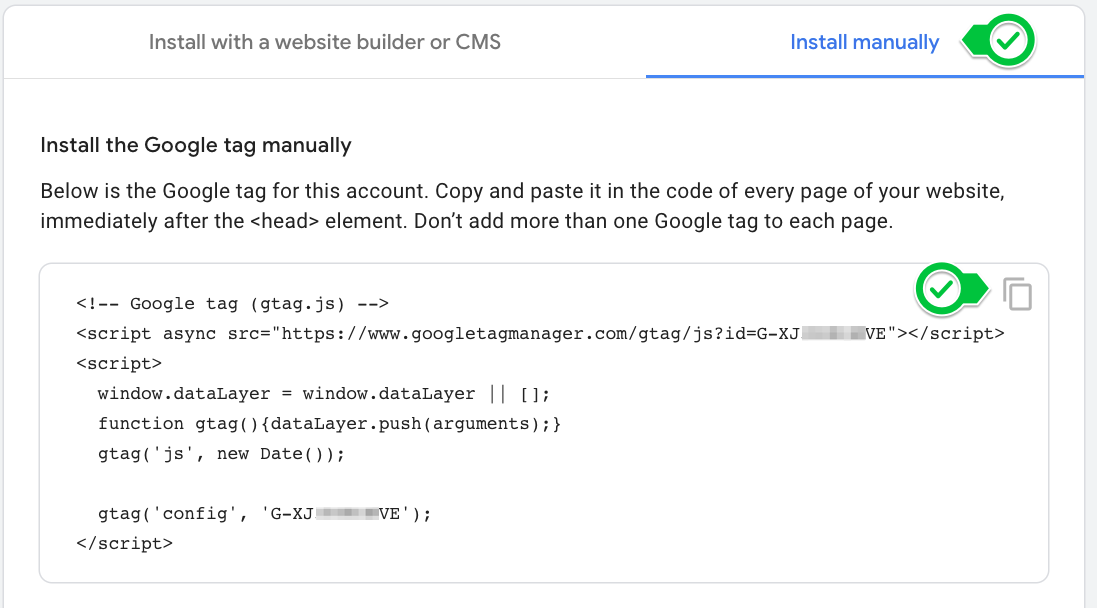
Choose “Install Manually” and copy the code that is presented.
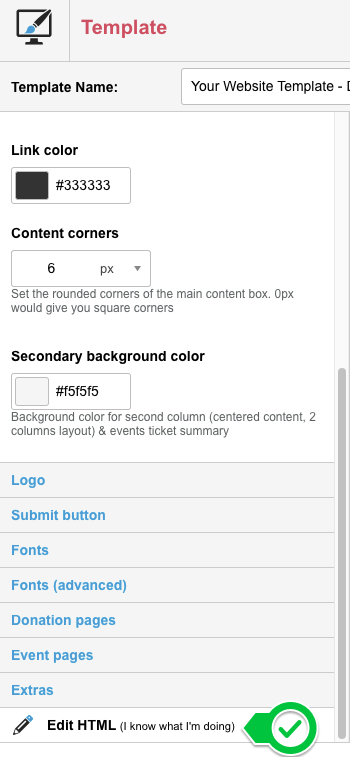
STEP 3: Add the tracking code to your page templates
Log in to your Engaging Networks account and go to Pages > Components > Templates > edit
Click on “Edit HTML” at the bottom of the list of edit options.
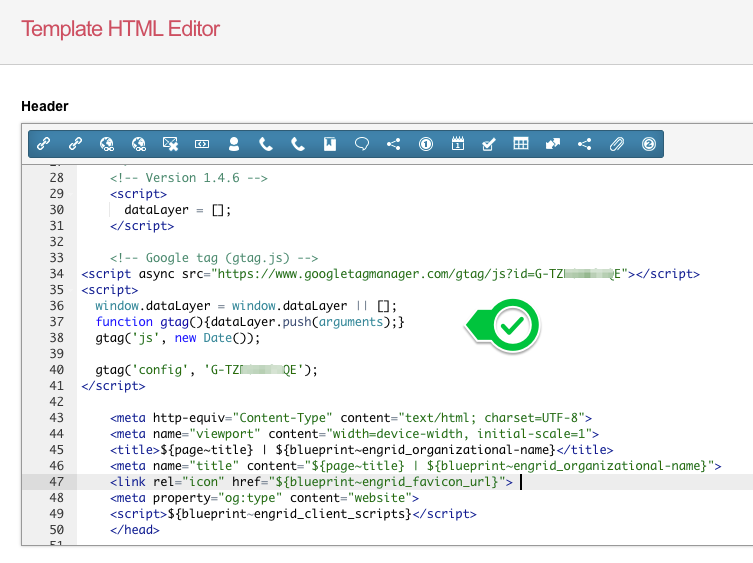
Add the code you copied in the previous step to the <head> section of all page templates, immediately after the “data layer push” code. This tracking code must be added to every page template used on the site.
As mentioned previously, you do not need to remove your Universal Google Analytics tracking code until after July 1, 2023 – in fact Google recommends keeping both tags on your site until that date.
Add the gtag.js code to the pages of your Content Management System (WordPress, Drupal, etc) – you must have the gtag.js code on every page you want to track to Google Analytics 4.
STEP 4 Confirm your Google Analytics 4 property is receiving data
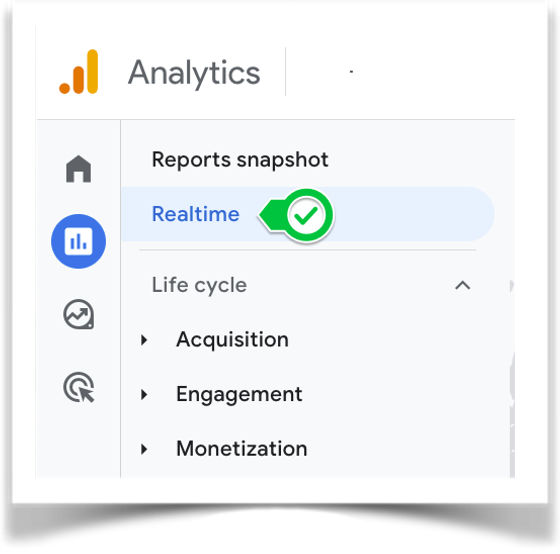
Log in to your Google Analytics 4 property. Within an hour of setup, it should indicate that the account is receiving data. Go to Reports (the second icon from top on left hand column) and check the “Realtime” report while visiting your Engaging Networks pages.
Google Tag Manager
Google Tag Manager (GTM) is a product that allows you to insert multiple tracking “tags” via a single piece of code on your template. For example you may have Facebook Pixel code as well as Google Analytics. By using Tag Manager you can add them both in one piece of code in your template, which then calls up code stored in GTM.
The more powerful part is that you can link these, and other pieces of bespoke code, to “triggers”, which only fire in certain circumstances. For example, for donation pages you could create Google Analytics eCommerce transactions containing the amount the supporter donated, thereby including this in your GA reports. If you want to be able to fetch the donation amount, and other variables, from the Engaging Networks page, then read “Exposing transaction details” below.
Just like adding GA code, you can add GTM code instead to your template. The code will be given by your GTM product.
Exposing transaction details
In page-builder, it is possible to have the system add a JavaScript object to your page that contains various properties of the page, such as donation amount. This can be used in Google Analytics or Tag Manager to create eCommerce transactions.
To enable this, go to where it says Hello YOURNAME in the top navigation, and then Account settings > Account Preferences and, near the bottom of the page, tick the box to “Expose transaction details”. Your page-builder pages will now contain a “pageJson” object that consists of various key value pairs. Click here for more information on what the variables mean.
