
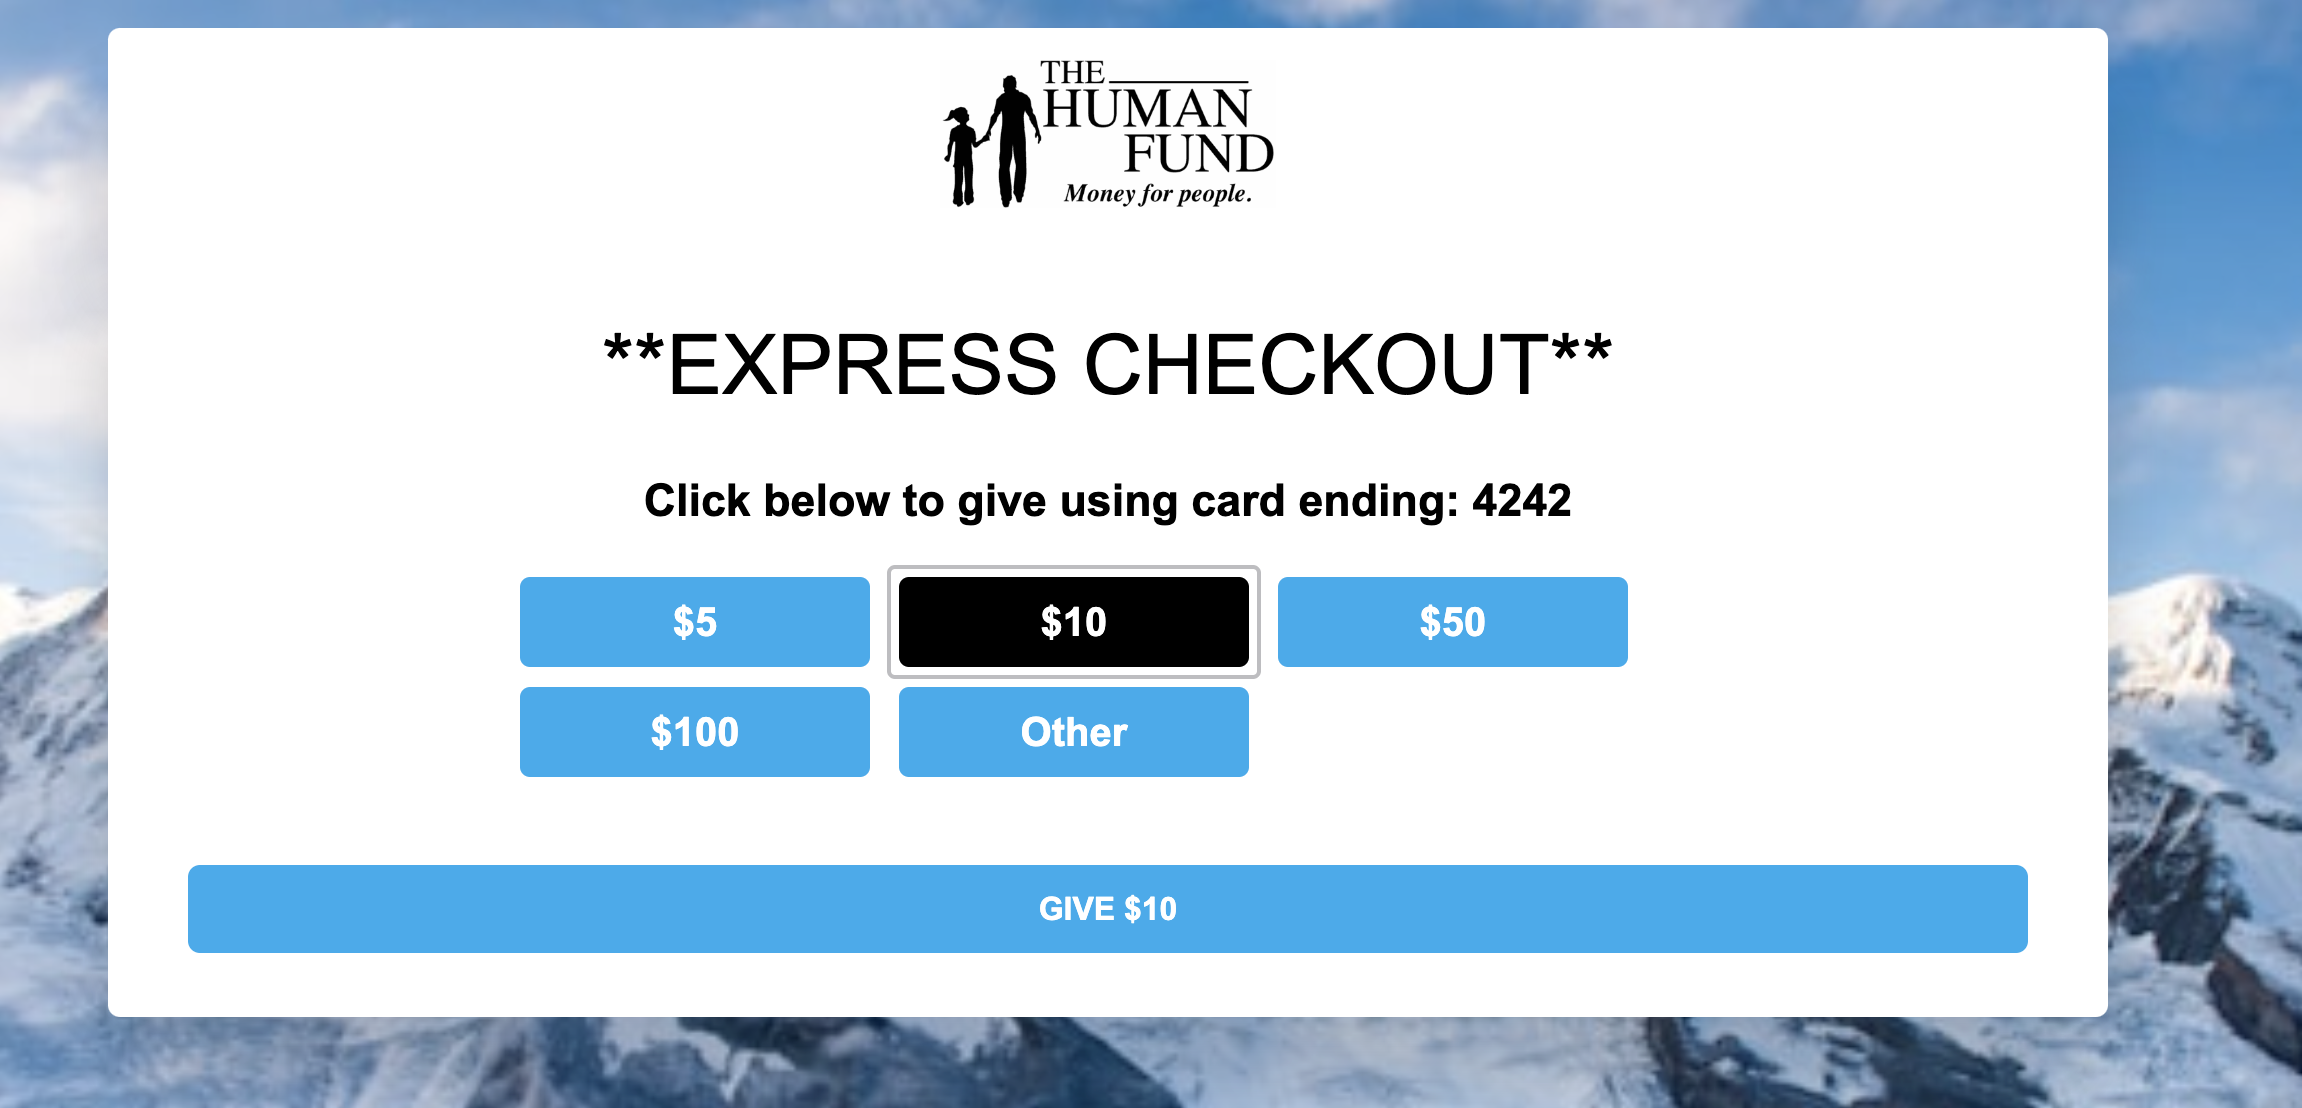
One-Click donation pages make it easier for supporters to donate if they have previously donated, because these pages do not require payment details to be typed in. It uses a token that we have stored from an earlier transaction, leading to higher conversion rates for email appeals.
They work from links in emails that the supporter clicks. The supporter just chooses how much to donate, and submits. If the donor doesn’t meet the requirements to make a one click donation, it will show the full donation page instead.
One click pages are created as a web page that is then associated to the corresponding donation page.
For a more detailed overview of how they work and the supporter journey, click here.
One click donate does not work together with Next Suggested Gift functionality
Step by step
Step 1 - prerequisites
-
You have a working donation page and gateway
-
You have supporters who have previously donated by card, through a gateway that uses tokens, and with a valid expiry date
-
You have a page template you want to use with your one click donation page
Use a Free and Flexible Template to get the most out of your One click donate page - it has specific styling options for One Click pages such as adding currency symbols to amounts
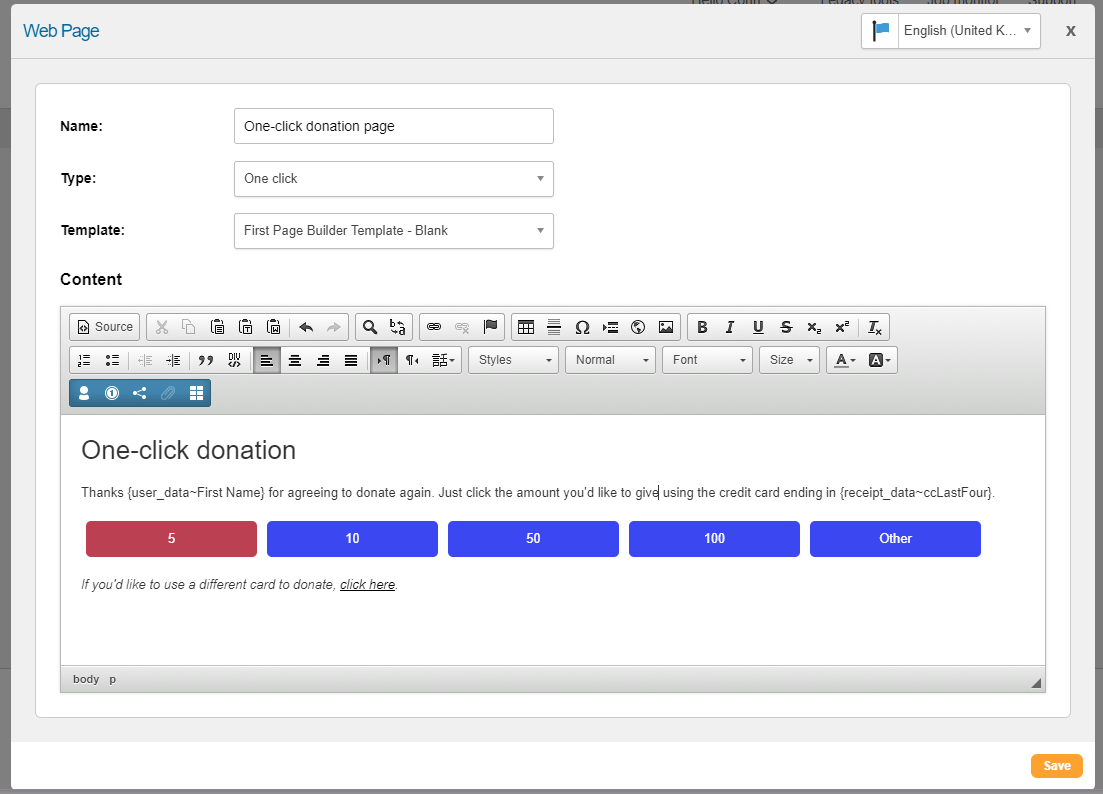
Step 2 - create your one click landing page
-
Navigate to Pages > Components, and then click Web pages on the left
-
Create a new web page and give it a Type of One click and a name that indicates to you what this page is, and then select the appropriate HTML template as you would with a standard page-builder page.
-
Add the content of your web page that you want the supporter to see when they land on the page, including the donation amounts they can select. There are several insertion tools for this:
|
|
Insert user data – insert personal information of the supporter such as their name |
|
|
Insert financial data, for example you can use this to insert the last 4 digits of the credit card to be charged to remind the supporter which card will be charged |
|
|
Insert social buttons if you’d like your supporters to share the page (although this will share the donation page that the one-click page is associated with, since one-click pages are designed to work from emails) |
|
|
Insert a link to use a different card – this inserts the link to the full fundraising page. This is used if the donor would like to use a different card for their donation. To add, select the text you’d like to make into a link and click this button |
|
|
Insert the donation amount widget – this displays a customizable list of donation amounts for your supporters to choose how much to donate. When you insert you have several options:
|
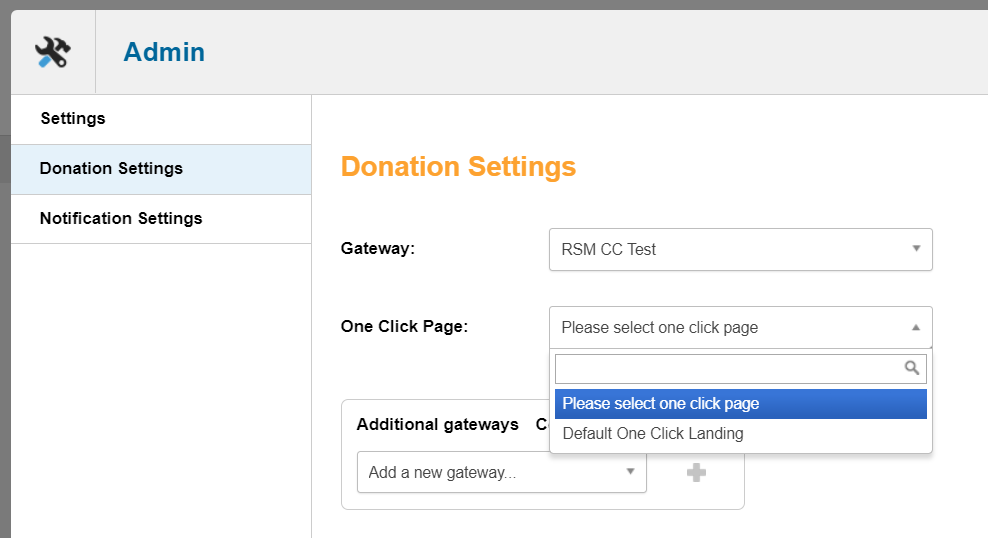
Step 3 - apply the one-click settings to a Donation Page
Now that the one-click web page is created, you need to enable it on your donation page.
-
First find your page in the page list and click the admin cog icon next to it
-
Click the Donation Settings tab and select the One-Click Donation page you would like to use from the dropdown menu and save your changes
Step 4 - test the one click donation page
Your One-click donate page will only appear if:
-
supporters who have at least one donation processed on their record (it can be a test donation or a live donation)
-
the gateway supports tokens
-
the supporter’s card is still valid
-
the donation has been made at least 24 hours. Only then is it eligible to be a one-click donation
To test without sending yourself an email:
-
Make sure your page is linked in the Donation Settings of a live donate page as in Step 2
-
Navigate to Data & Reports > Lookup supporter, and lookup a supporter that has a previous donation
-
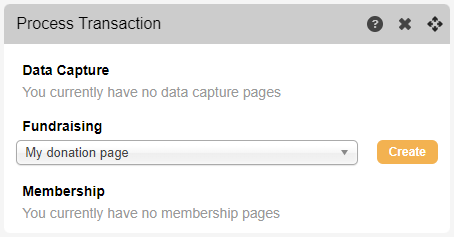
From the Process Transaction gadget of a supporter record (that has a previous donation), select the donate page under “Fundraising” that has your one-click page linked to it
-
Click "Create" to open the one-click for preview
To test by sending yourself an email:
You can also preview your one-click page via a test email from Marketing Tools (as long as you are sending to a supporter record with a previous donation), or via a live send to yourself from the Classic email tools.
When testing with a supporter record that has only made TEST donations, you will not land on the thank you page
Step 5 - link supporters to the one click page
-
If you have been testing with a Test gateway, ensure you are only sending supporters to a donation page that has a Live gateway
-
Insert your campaign link in the email campaign using the Engaging Networks WYSIWYG as you normally would. The software will direct donors to the appropriate donation page based on the built-in, One-Click criteria
For more information on the logic behind the One-Click criteria please read the overview page click here.