Social/Paid Media: Facebook Lead Forms
You can integrate Facebook lead forms with your Engaging Networks account so Facebook leads sync directly into Engaging Networks to create supporters. Supporters can be automatically opted in
Social Media Account Access
Connecting to Ad Accounts and Selecting Pages
To connect a Facebook ad account to an Engaging Networks account, go to the Extensions Manager under Account Settings. Select ‘Extensions‘ and click on Facebook. select “Account Access” in the Lead Forms area and then the “Connect Account” button.

Please note: A stable Facebook connection is necessary to ensure there will not be any disruptions to lead forms mapped and related automations set once an account is linked. Changing the password associated with your Facebook account once linked may require re-connecting the account and specific form mappings if disconnected.
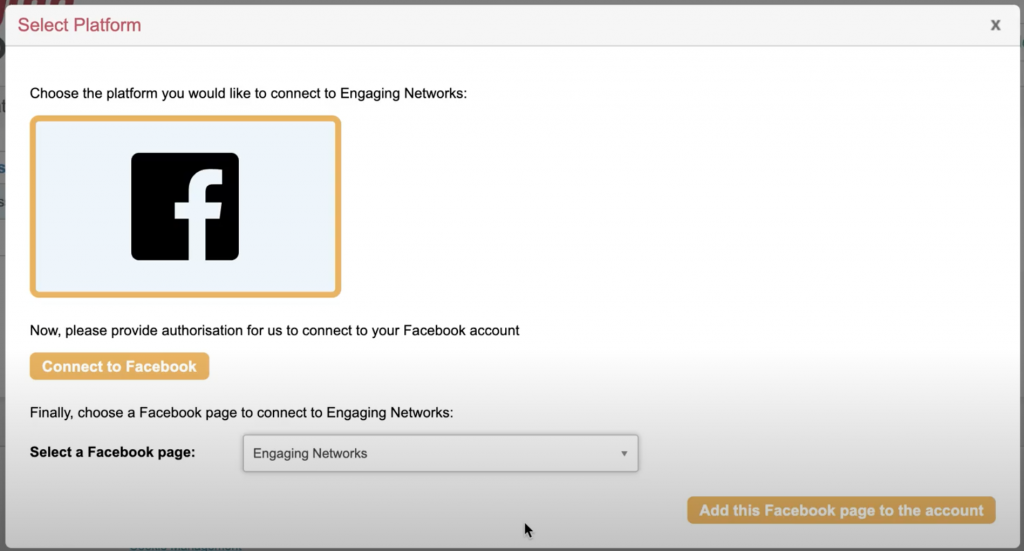
After connecting to the account using your Facebook credentials, choose the pages to use with Engaging Networks and configure what Engaging Networks is allowed to do.
After configuring the ad account settings, select the page and add it to your Engaging Networks account.
Once a Facebook account is successfully enabled, you should be able to see ‘Enabled’ written in the Facebook logo of the Extensions Manager.
Syncing Lead Forms
Connecting and Mapping Lead Forms
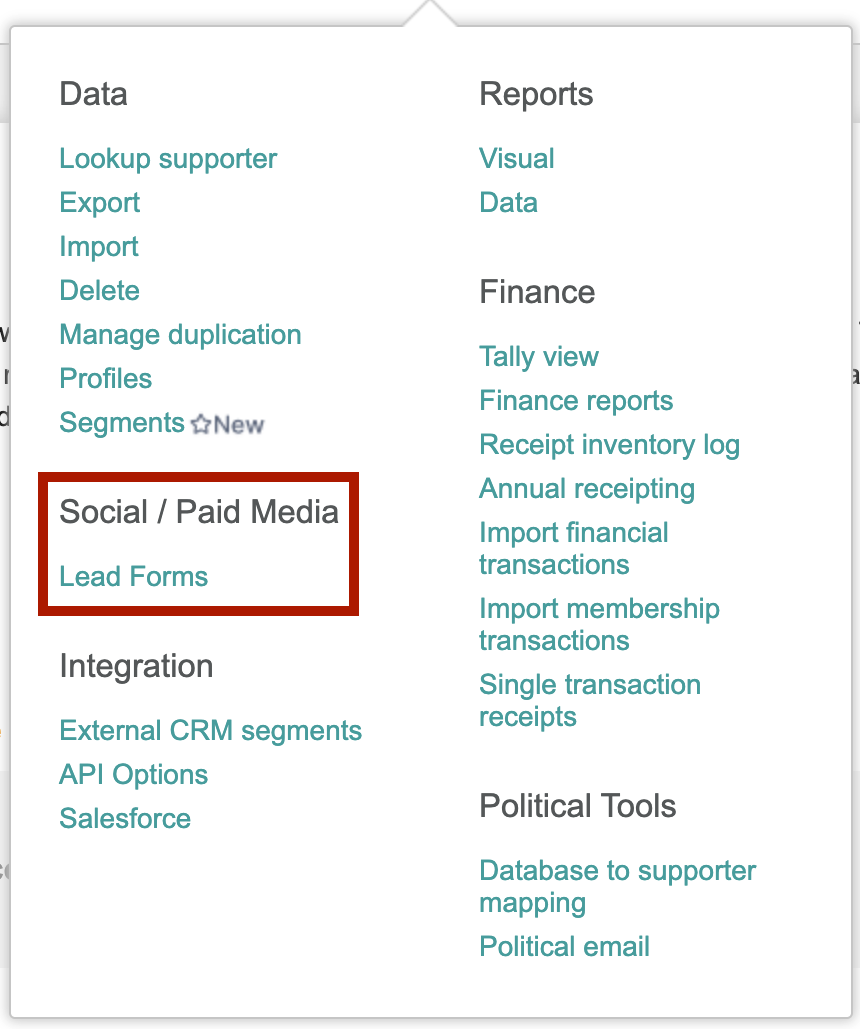
Once the intended Facebook account and page(s) are linked, navigate to Data & Reports > Lead Forms (under the Social/ Paid Media heading).
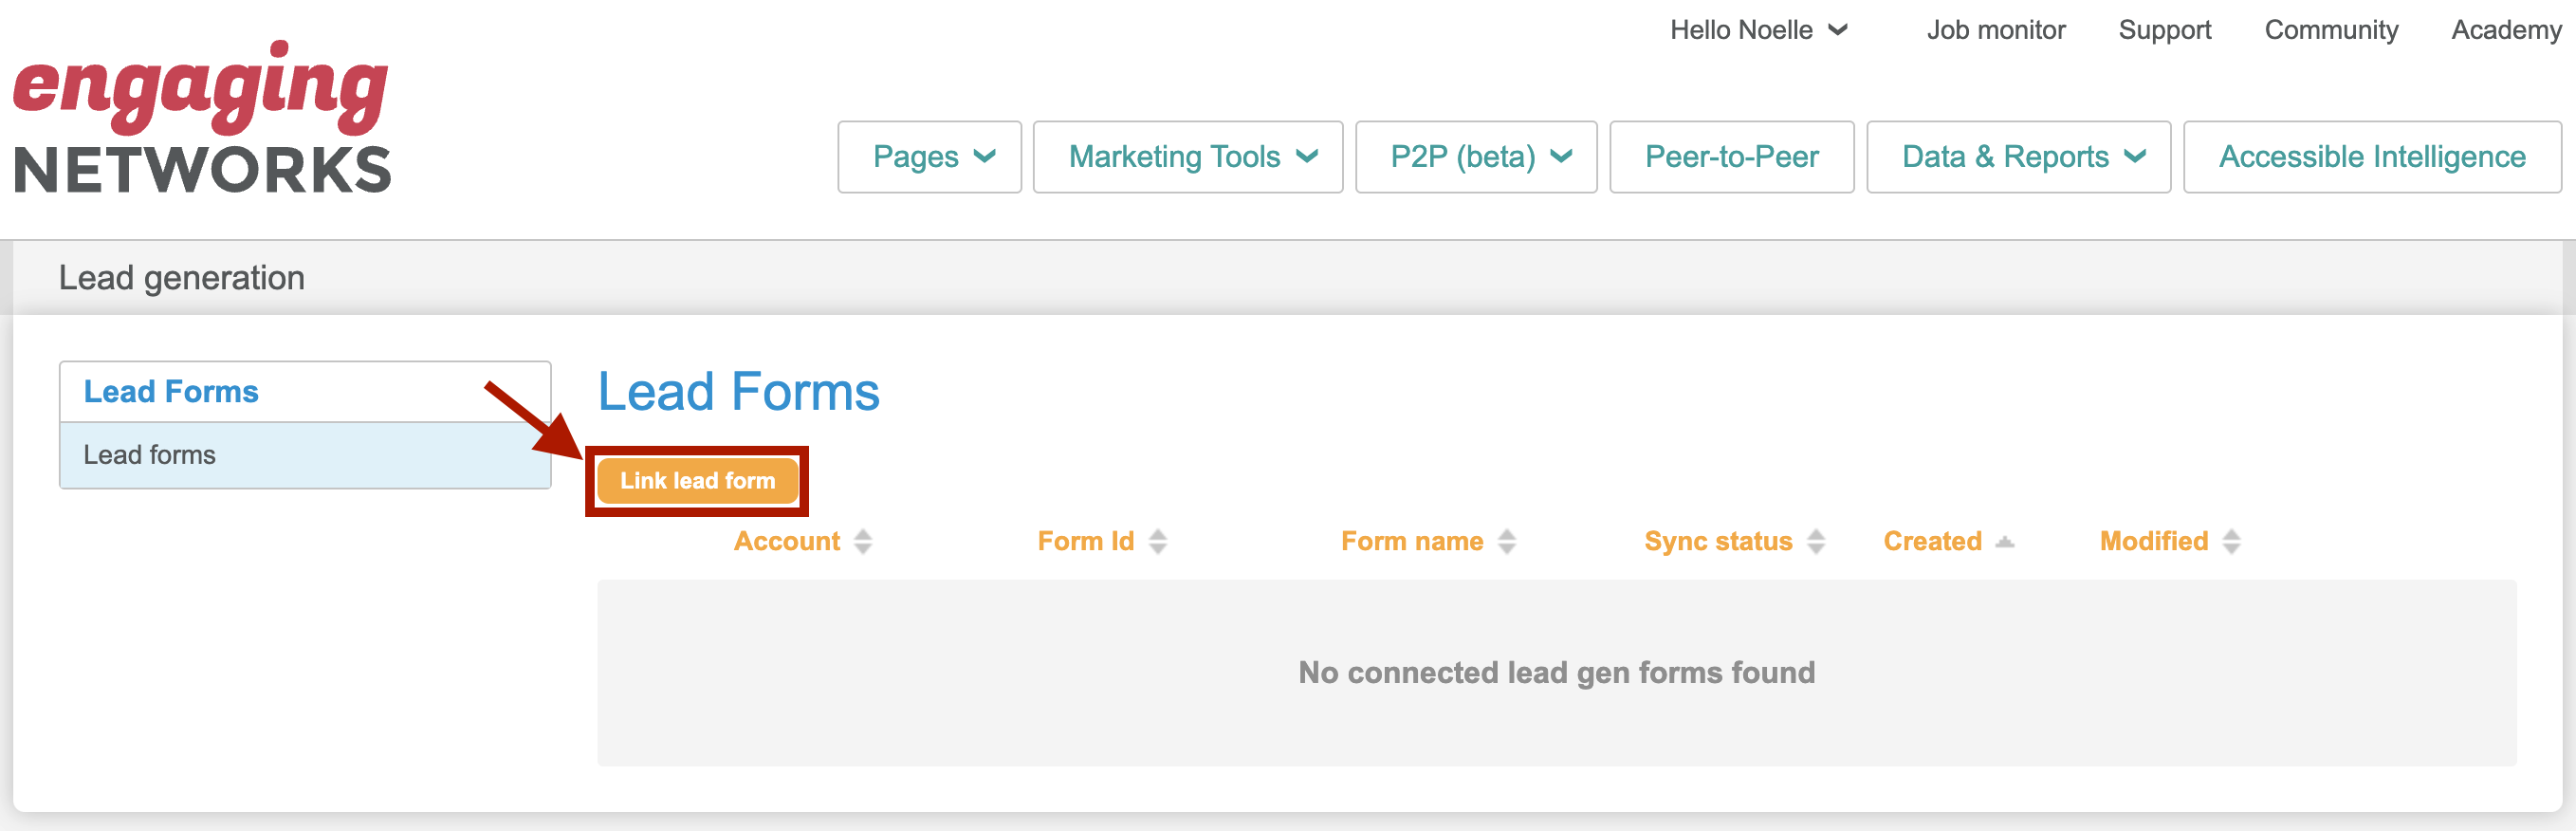
To link lead forms and begin the field mapping process, select “Link lead form”.
You will then need to select the page and forms you would like to link and map to your Engaging Networks account.
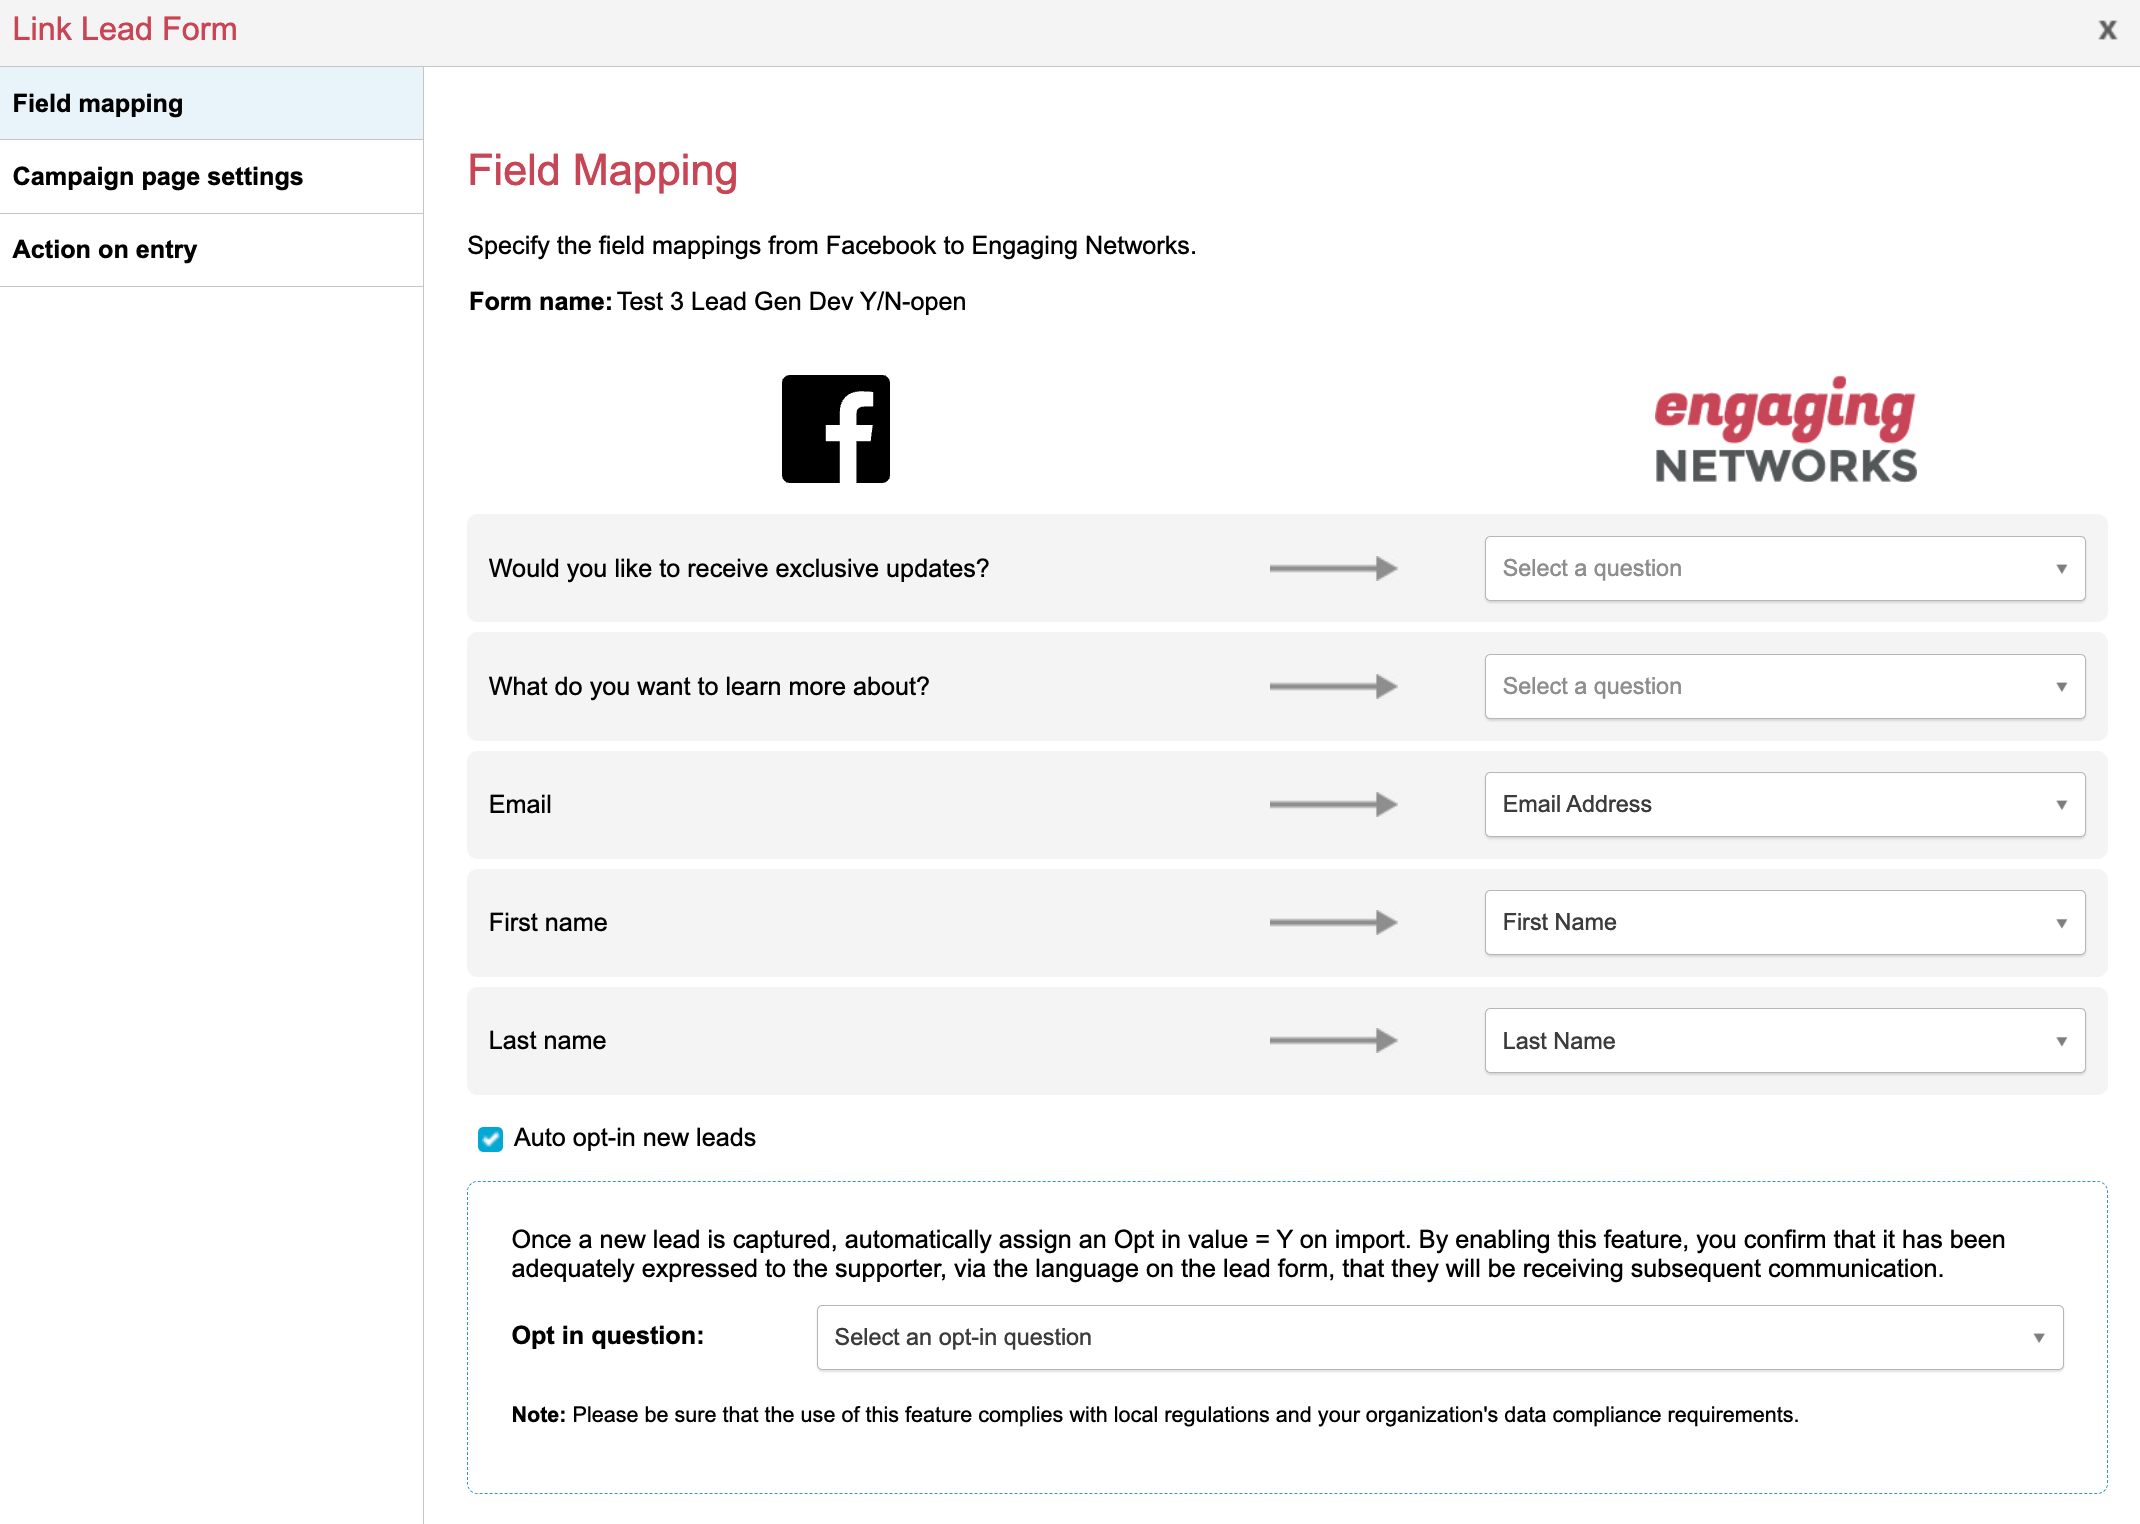
Field Mapping
Once linked, you will need to select “Field Mapping” and map the fields from your Facebook Lead form to the relevant Engaging Networks fields. You also have the option to automatically opt supporters into an opt-in as part of the field mapping.
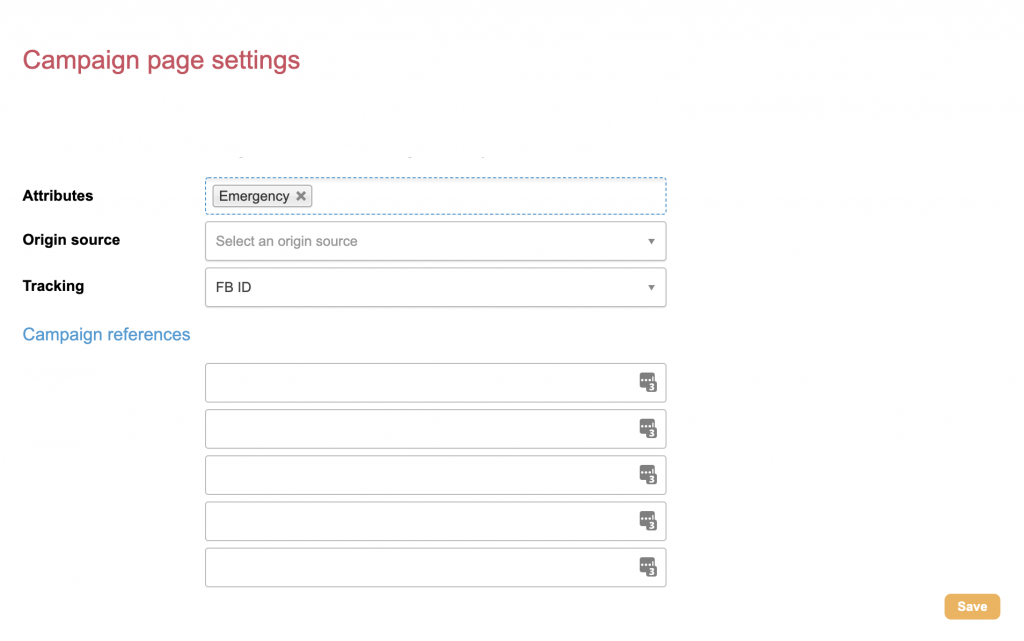
Campaign Page Settings
After mapping the fields from your lead form, you can set the campaign page settings. Attributes, origin source, tracking, and campaign references fields are optional.
Attributes – Attributes are descriptive “tags” applied to pages and emails that you build in the software. You can then query on that attribute and supporters who participated on a page or interacted with an email with an attribute will be returned.
Origin source – ‘Origin Source’ can be stored in a supporter’s data record to help identify where the record originated from and compare different channels on performance.
Tracking – Tracking parameters are values that can be appended to page URLs and are stored as part of the transaction.
Campaign References 6-10 – External Reference fields 6-10 are values stored as part of the transaction.
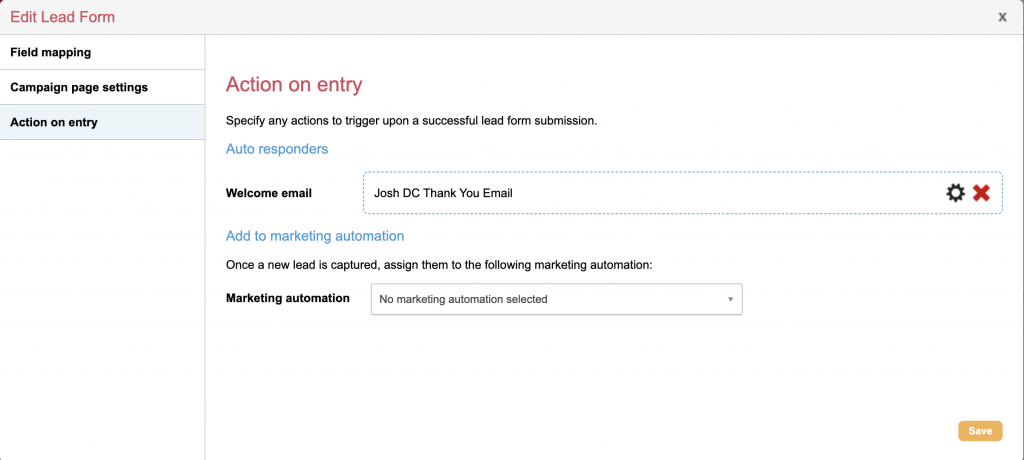
Action on Entry
Lastly you can specify any actions to trigger upon a successful lead form submission. This includes a welcome email autoresponder and/ or adding supporters to a Marketing Automation Series.
Subscribing to the Lead Form
Once you have mapped fields, campaign settings, and actions on entry as desired, you will need to select to ‘Subscribe’ to the lead form to update the status to ACTIVE.
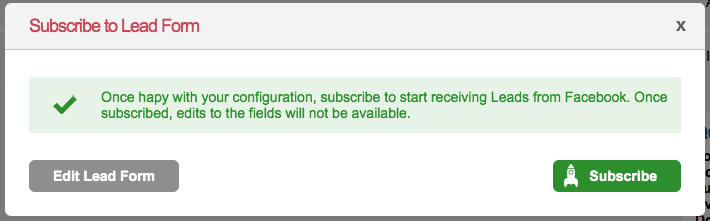
If workflow settings are not completed, this will produce an error message to continue editing, or if validated, you may proceed to subscribe to start receiving leads from Facebook. Once subscribed, field mapping will not be editable. Campaign page settings may still be adjusted as needed after subscribing.
Reporting on Lead Forms
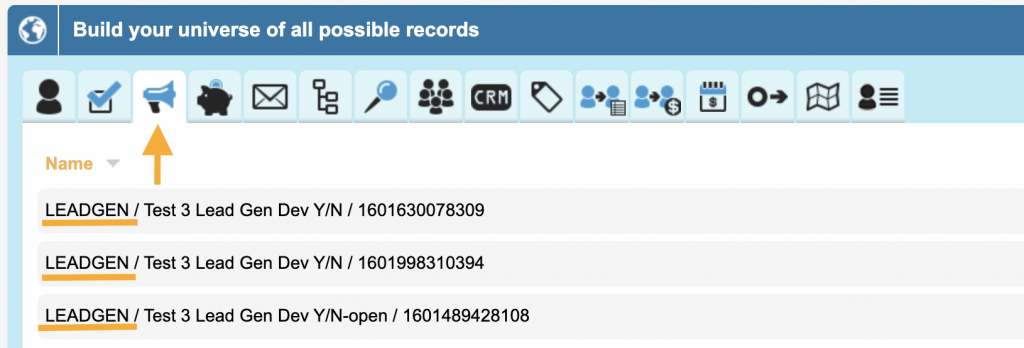
Once the sync is active and leads are submitted, you can use query builder to query on the submissions under the “Advocacy” tab which is represented with a megaphone icon. The form names will be listed with LEADGEN and you can use this to search for the forms. The submissions will create DCF transactions.
Troubleshooting
If you are having trouble connecting to Facebook, review the below troubleshooting guide. Contact Support if you still encounter issues.
Check Facebook permissions
Check Permissions in Business Settings
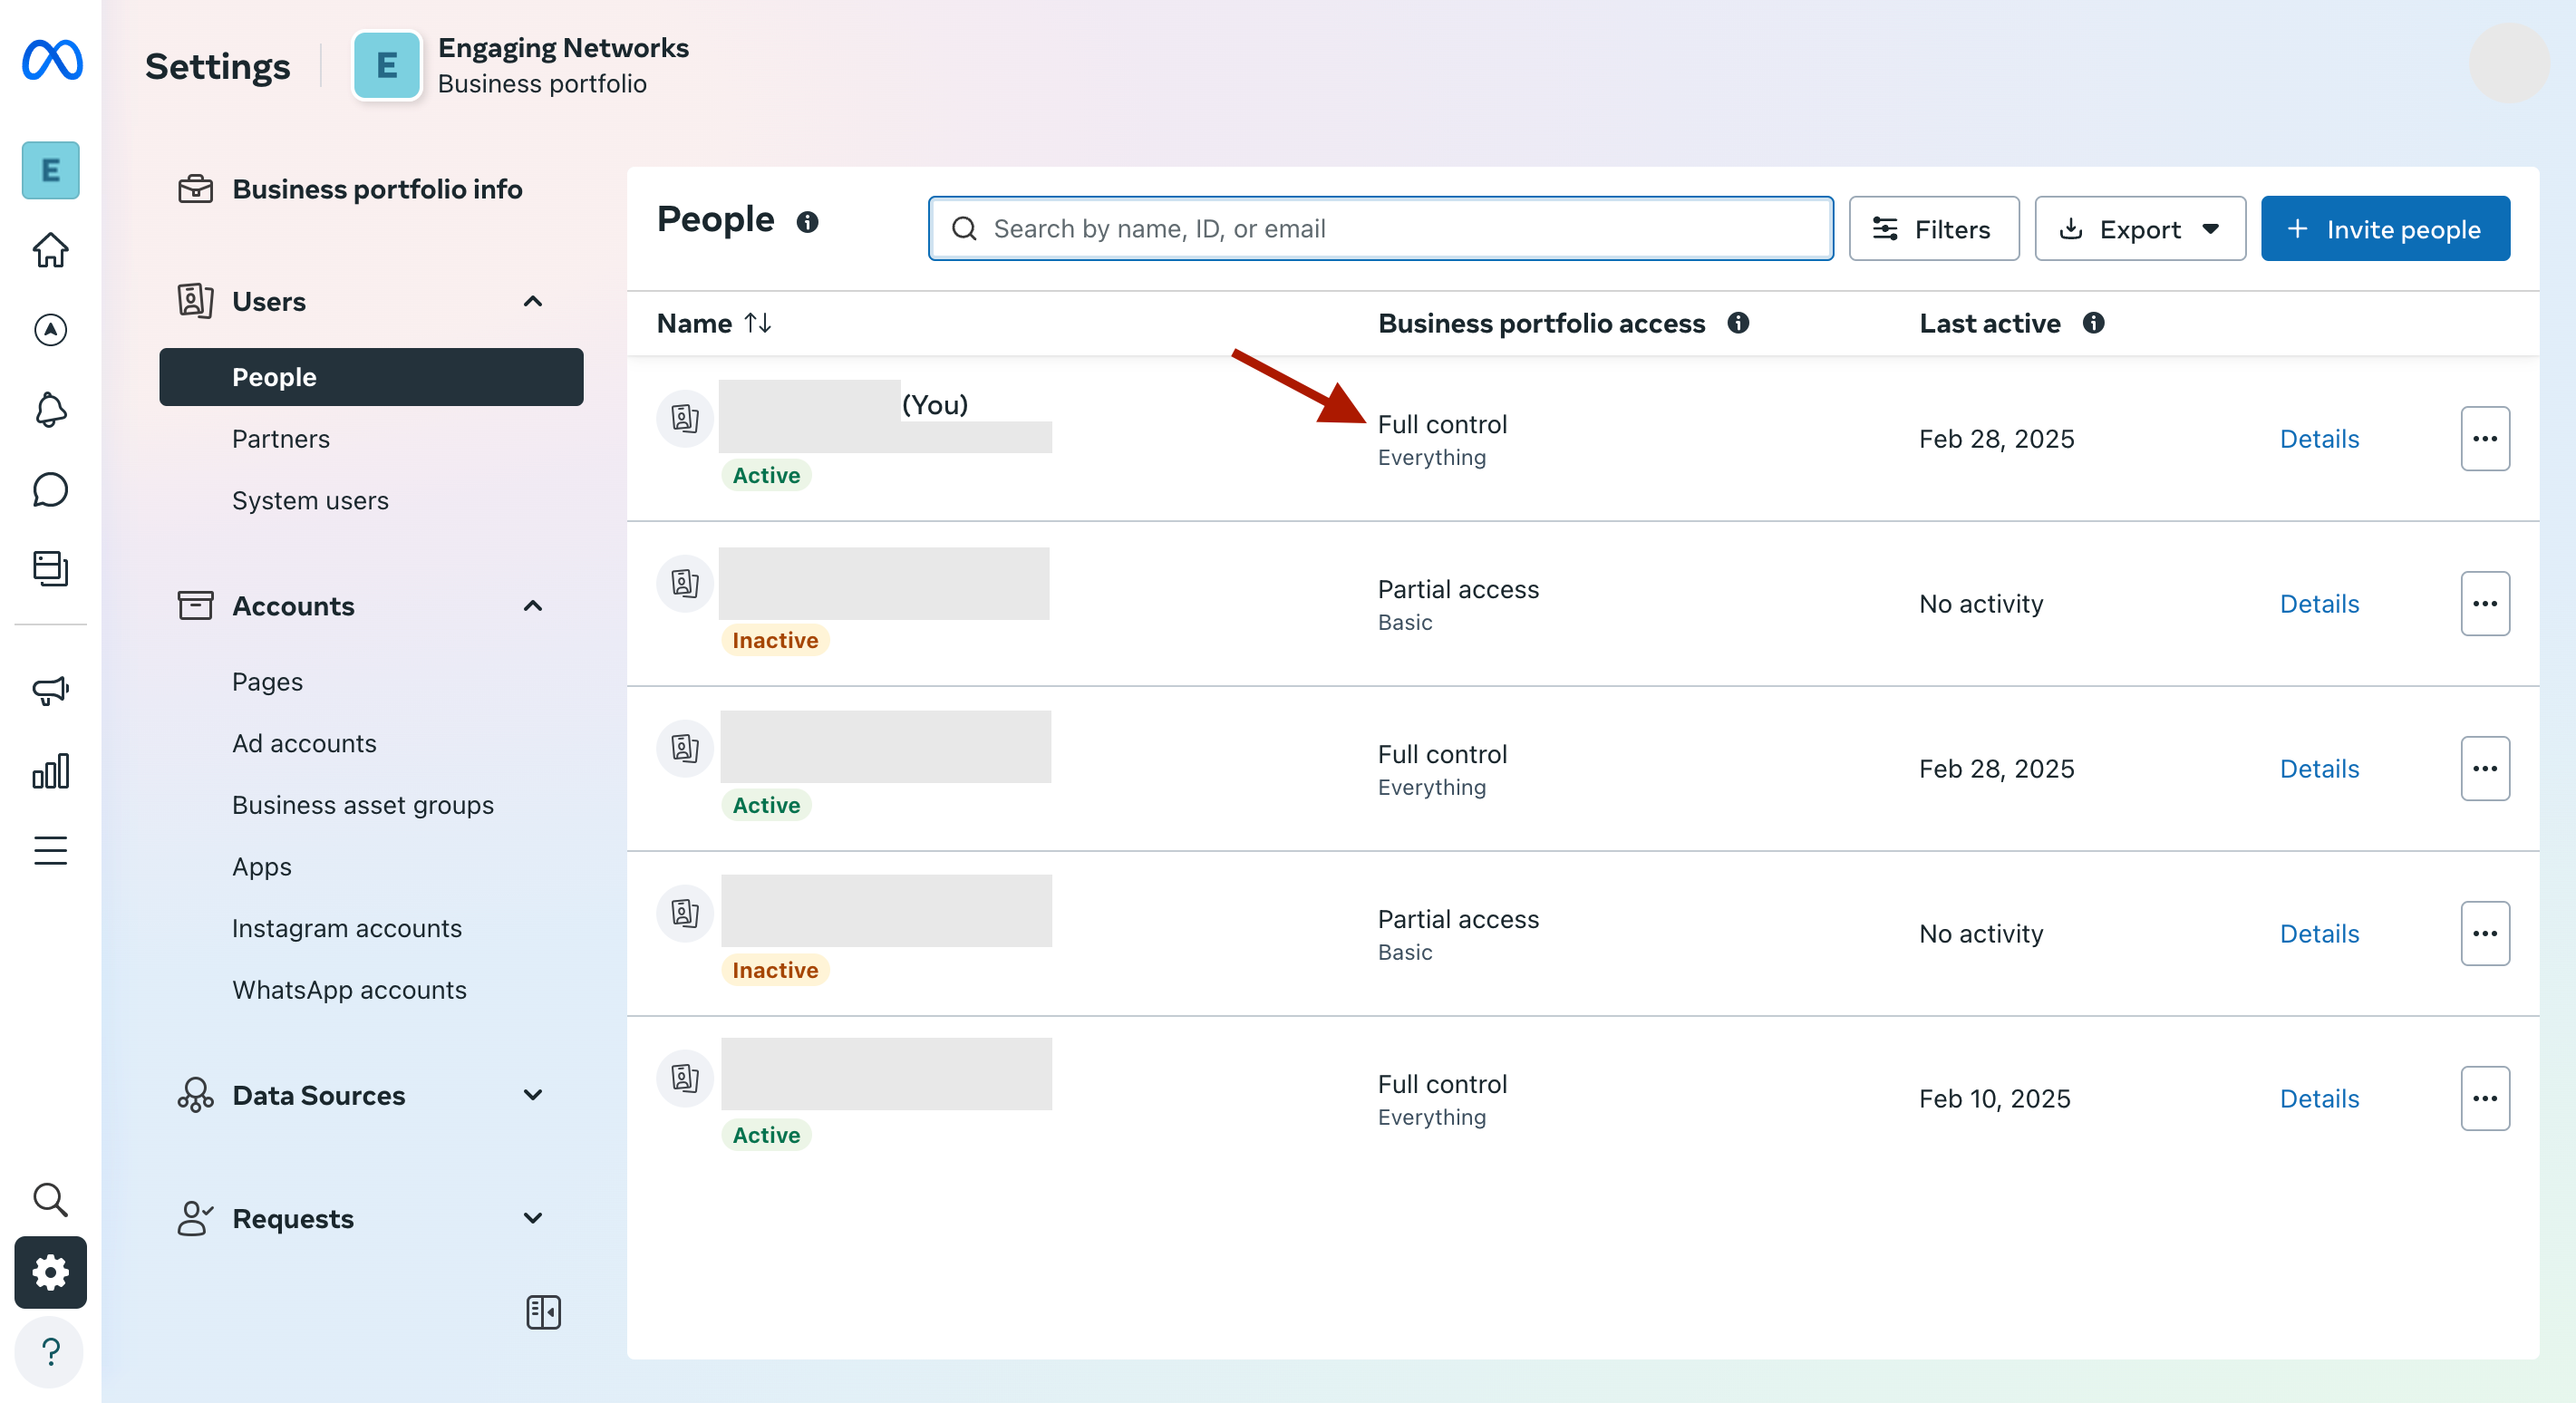
In Facebook, within the Meta Business Suite for the organization, under Settings > Users > People, verify that the appropriate Facebook user has Business Portfolio Access that is labeled “Full control - Everything”:
Give connecting user Page Access in Facebook
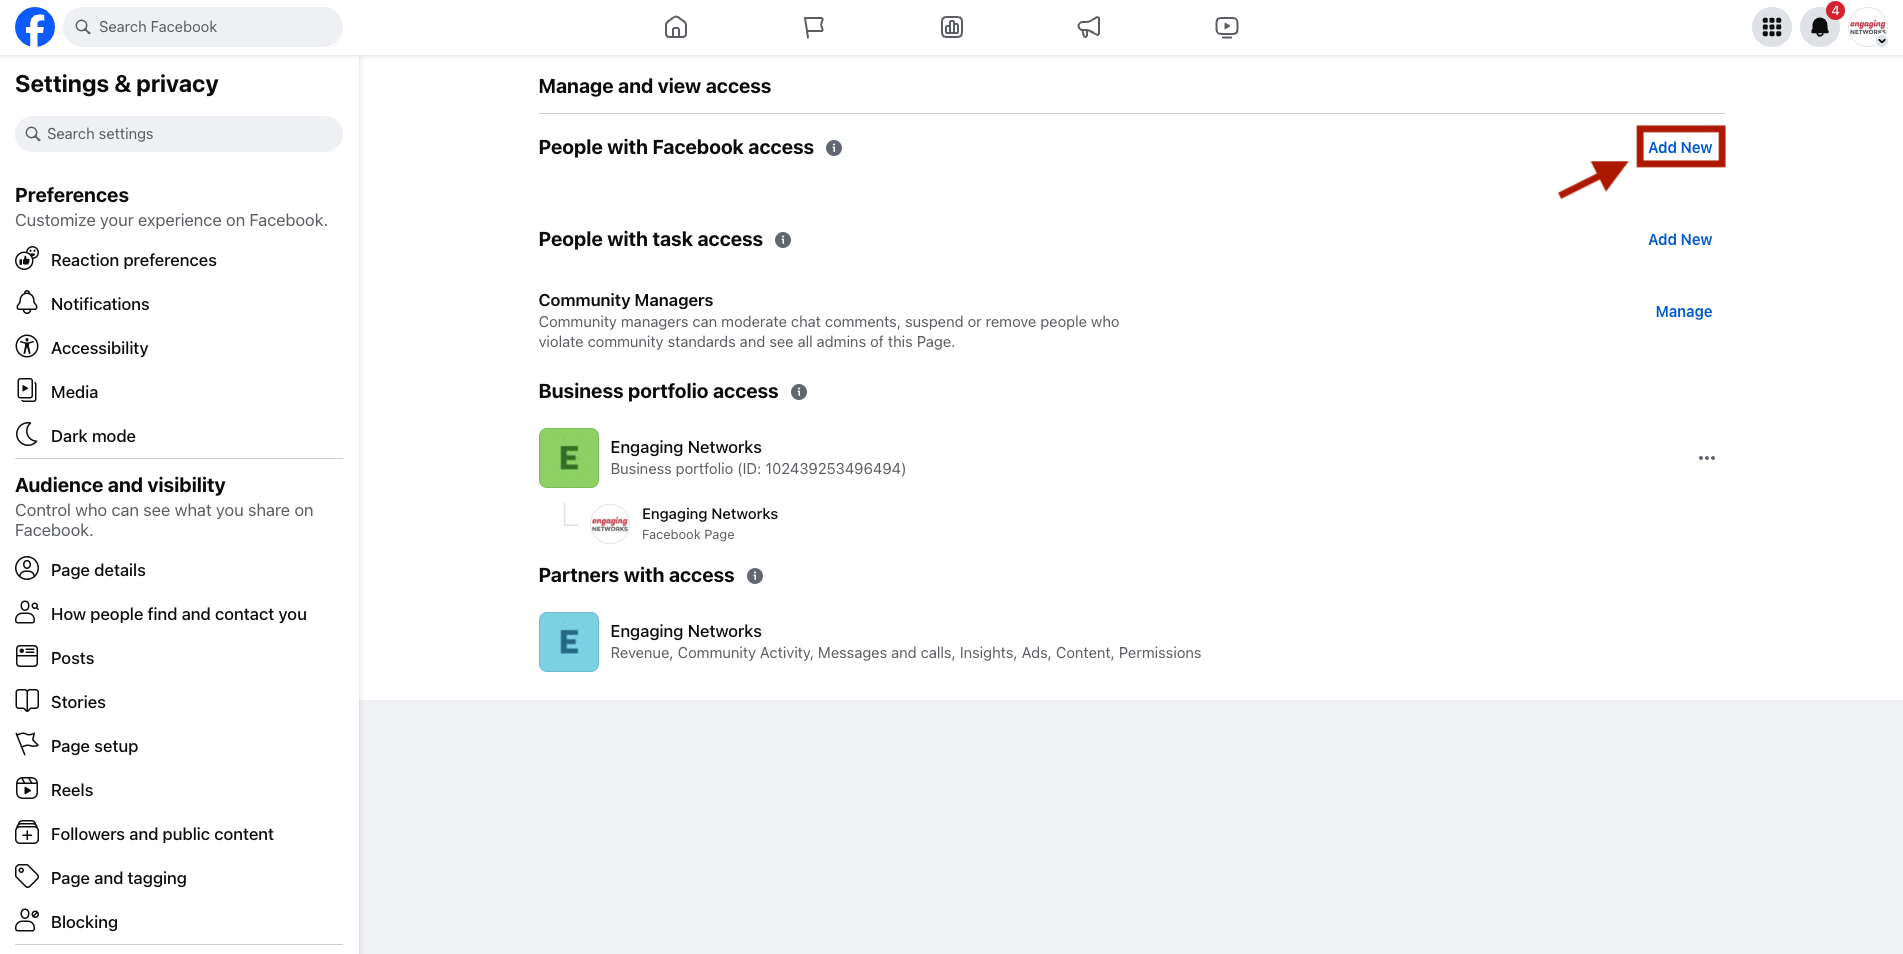
If the above permissions don’t work, you can also give the connecting user Page Access in Facebook. Click your profile picture in the upper right corner to switch profiles into the organization’s Facebook page. Then, navigate to www.facebook.com/settings.
Add the connecting user to this list:
You cannot add yourself to this list. You will need someone else with permissions to add you.
If the user you need to add is not coming up, friend them first and then try again.
If you still can’t find them, try copying and pasting their exact profile URL into the search box.
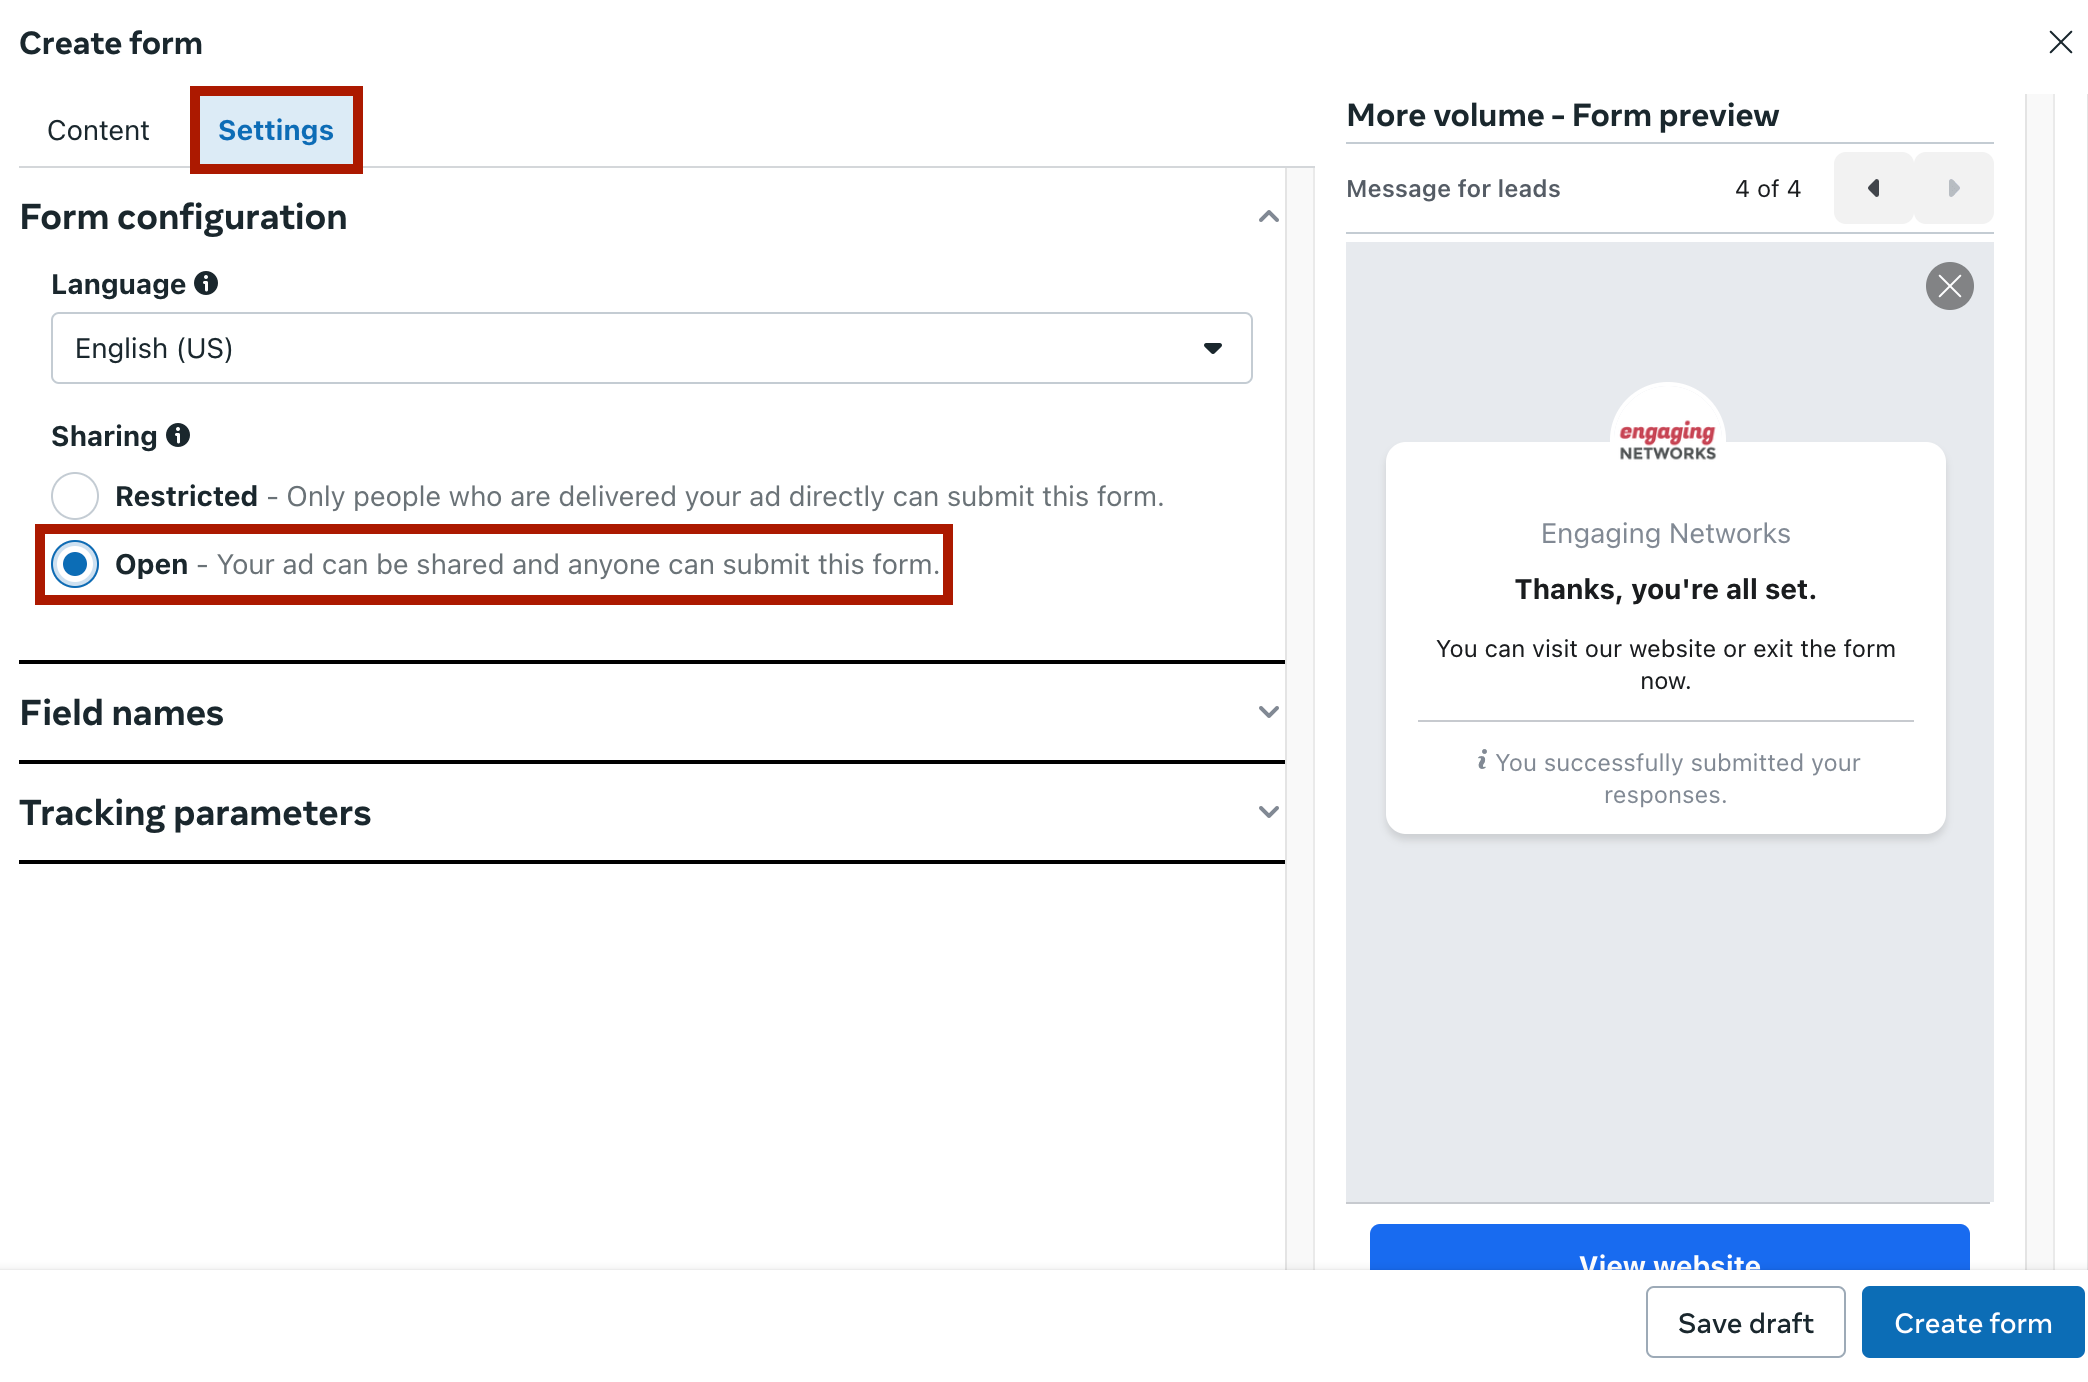
Ensure lead forms have Open form configuration in Facebook
This selection is made when you create your lead form
Check your login URL
Sometimes it can cause problems if you are logged in on an outdated domain when using Engaging Networks.
In the URL of the Engaging Networks, confirm that the URL is https://ca.engagingnetworks.app/index.html#login (Canada datacenter) or
https://us.engagingnetworks.app/index.html#login (US datacenter)