Pages, chaining and redirecting
There are several methods available that allow you to “chain” pages together so that the supporter can be taken on a journey through different campaigns and donation pages.
Pages
The most basic way to display different groups of content and forms is to split an advocacy or fundraising campaign over several pages within one campaign. When the supporter submits the first page, it will then display the second until it reaches the final page, which is most likely a thank you page.
For example, Page 1 could contain the fields for personal details (name and so on) and the second fields for the payment (credit card number etc). Page 3 would then be the thank you page.
The pages are displayed as tabs along the top and you can add a new one by clicking the + button

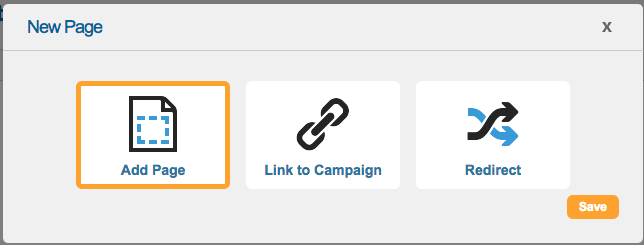
A pop-up will then ask what kind of page you want to add. Click “Add Page” to add a page within the same campaign.

Page: link to campaign
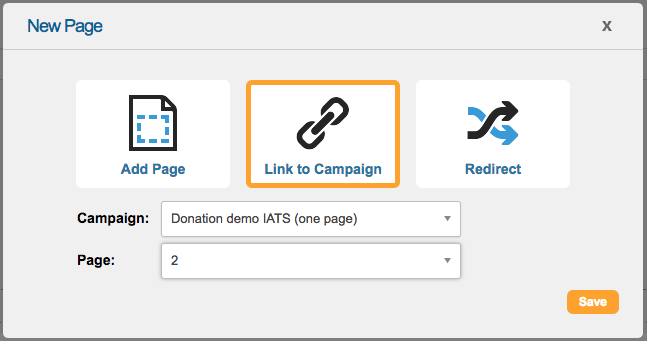
This method chains two separate campaigns together, submitting the first and then loading a second, while retaining any supporter information which means it can pre-populate any supporter fields on the landing page.
This is especially useful when linking to a donation page from an advocacy page, or vice versa, as they have to be created as separate campaigns within page-builder.
To do this, simply add a new page to your campaign and choose “Link to campaign” for an Engaging Networks page (which will also pre-populate any information already collected), or “Redirect” for a page outside of the system (e.g. your website).
Chaining works by appending a chain parameter to the linked URL (https://donate.example.com/page/123457/action/1?chain)

These are generally used instead of a thank you page. Note that if you redirect to page 2 of a campaign, then it will attempt to submit page 1 of the campaign first.
Page: Redirect to another website, or conditionally redirect
The other option is to redirect to another website, for example your homepage. This is the third button shown when you click to add a new page.
You specify a primary redirect and can optionally have conditional redirects (smart redirects). These happen after the campaign is fully completed, so you can use conditions such as “if supporter is new”. Click here to read about these redirects.
Processing rules: Redirect and filter
You can use redirect and filters to move a supporter from one campaign to another without submitting the first campaign. For example, you might wish to show supporters a static page if they live in Wales, and not allow them to take the advocacy action.
You can add several redirect and filters at once therefore creating a journey that can split depending on conditions. For more information, read this help article.
Form dependencies redirect
Additionally, you can choose to redirect as soon as a condition becomes true. This happens immediately rather than after the submit button is pressed. For example, you could redirect if Country = US, or if Payment Type = PDD.
For more information, read this help article.
Note that form dependency redirects use the URL to pass data that the supporter has filled in, so potentially personal data can be recorded by Analytics software which may be against their or your policies
