
There are three types to choose from when building an email-to-target action:
Custom Database
Quick Guide
-
Create a new ETT (if you have duplicated from a pre-existing ETT, go to the page’s admin settings, go to the Target Settings, and click “Start Over”)
-
In the Target Settings, select “Custom Database”.
-
Either select a pre-existing database by clicking “Select” ( then skip to step 10), or click “Upload” to create a new one.
-
Either click “Here is a template file as an example” to download a template, or click “OK, got it” to continue.
-
Click “Select File” to upload your spreadsheet.
-
Map your spreadsheet’s headers (which are on the left-hand side under “Header”) to the default contact data structure (which are on the right-hand side under “Map To”). The software will try to do this for you, but double-check.
-
Select a Match field by clicking the radio button on the row that has your chosen match field. When you select the field you want to match, the dropdown will populate with fields from your supporter data structure.
When selecting a match field, ensure you have selected a supporter field, not a contact field.
Contact fields are identifiable as the field name is repeated in brackets - Email Address (Email Address). When choosing a match field, you’ll be presented with both field types, but your action won’t function if you have selected a contact field.
-
Give the database a name and click “Map”
-
Either click “Select this Database” to use this database for this action, “View Data Records” or “See all Custom Databases”.
-
Start to build your action! Make sure the match field you selected in the mapping process is included in your form block.
-
To edit your custom database, go to Target Settings and click the pencil icon.
-
Download a spreadsheet of your database (download icon), re-upload it (upload icon), edit the mapping (pencil icon), or view all the contacts in your database and edit them individually (group icon).
Full Guide
A custom database does not use a supporter’s postcode to determine their correct target. It uses a spreadsheet you upload and cross-references it to find the correct target based on what a supporter submits in the form block.
If you want to download the template .csv file, click here
Your spreadsheet must contain the email addresses of your targets, with any additional information about them in separate columns. There must also be a match field column.
The match field is the field your supporter must submit to identify which target email address they will contact.
For example, if you wanted your supporters to contact their electricity supplier. On page 1, the supporter would choose their electricity supplier from a dropdown list and click submit. The software will then cross-reference the supporter’s submission with the email address associated with that electricity supplier. On page 2, the supporter will be able to compose their email and hit send. The email will then be sent to their chosen electricity supplier’s email address.
Upload your spreadsheet and mapping
When you upload your spreadsheet, you will need to map the spreadsheet’s column headers to the default contact data structure. NB. The ‘match’ field will be mapped to a field in the supporter data structure. If your spreadsheet headers are similar to your account data structure, then the software can automatically pick these up, but double-check because it can make mistakes!
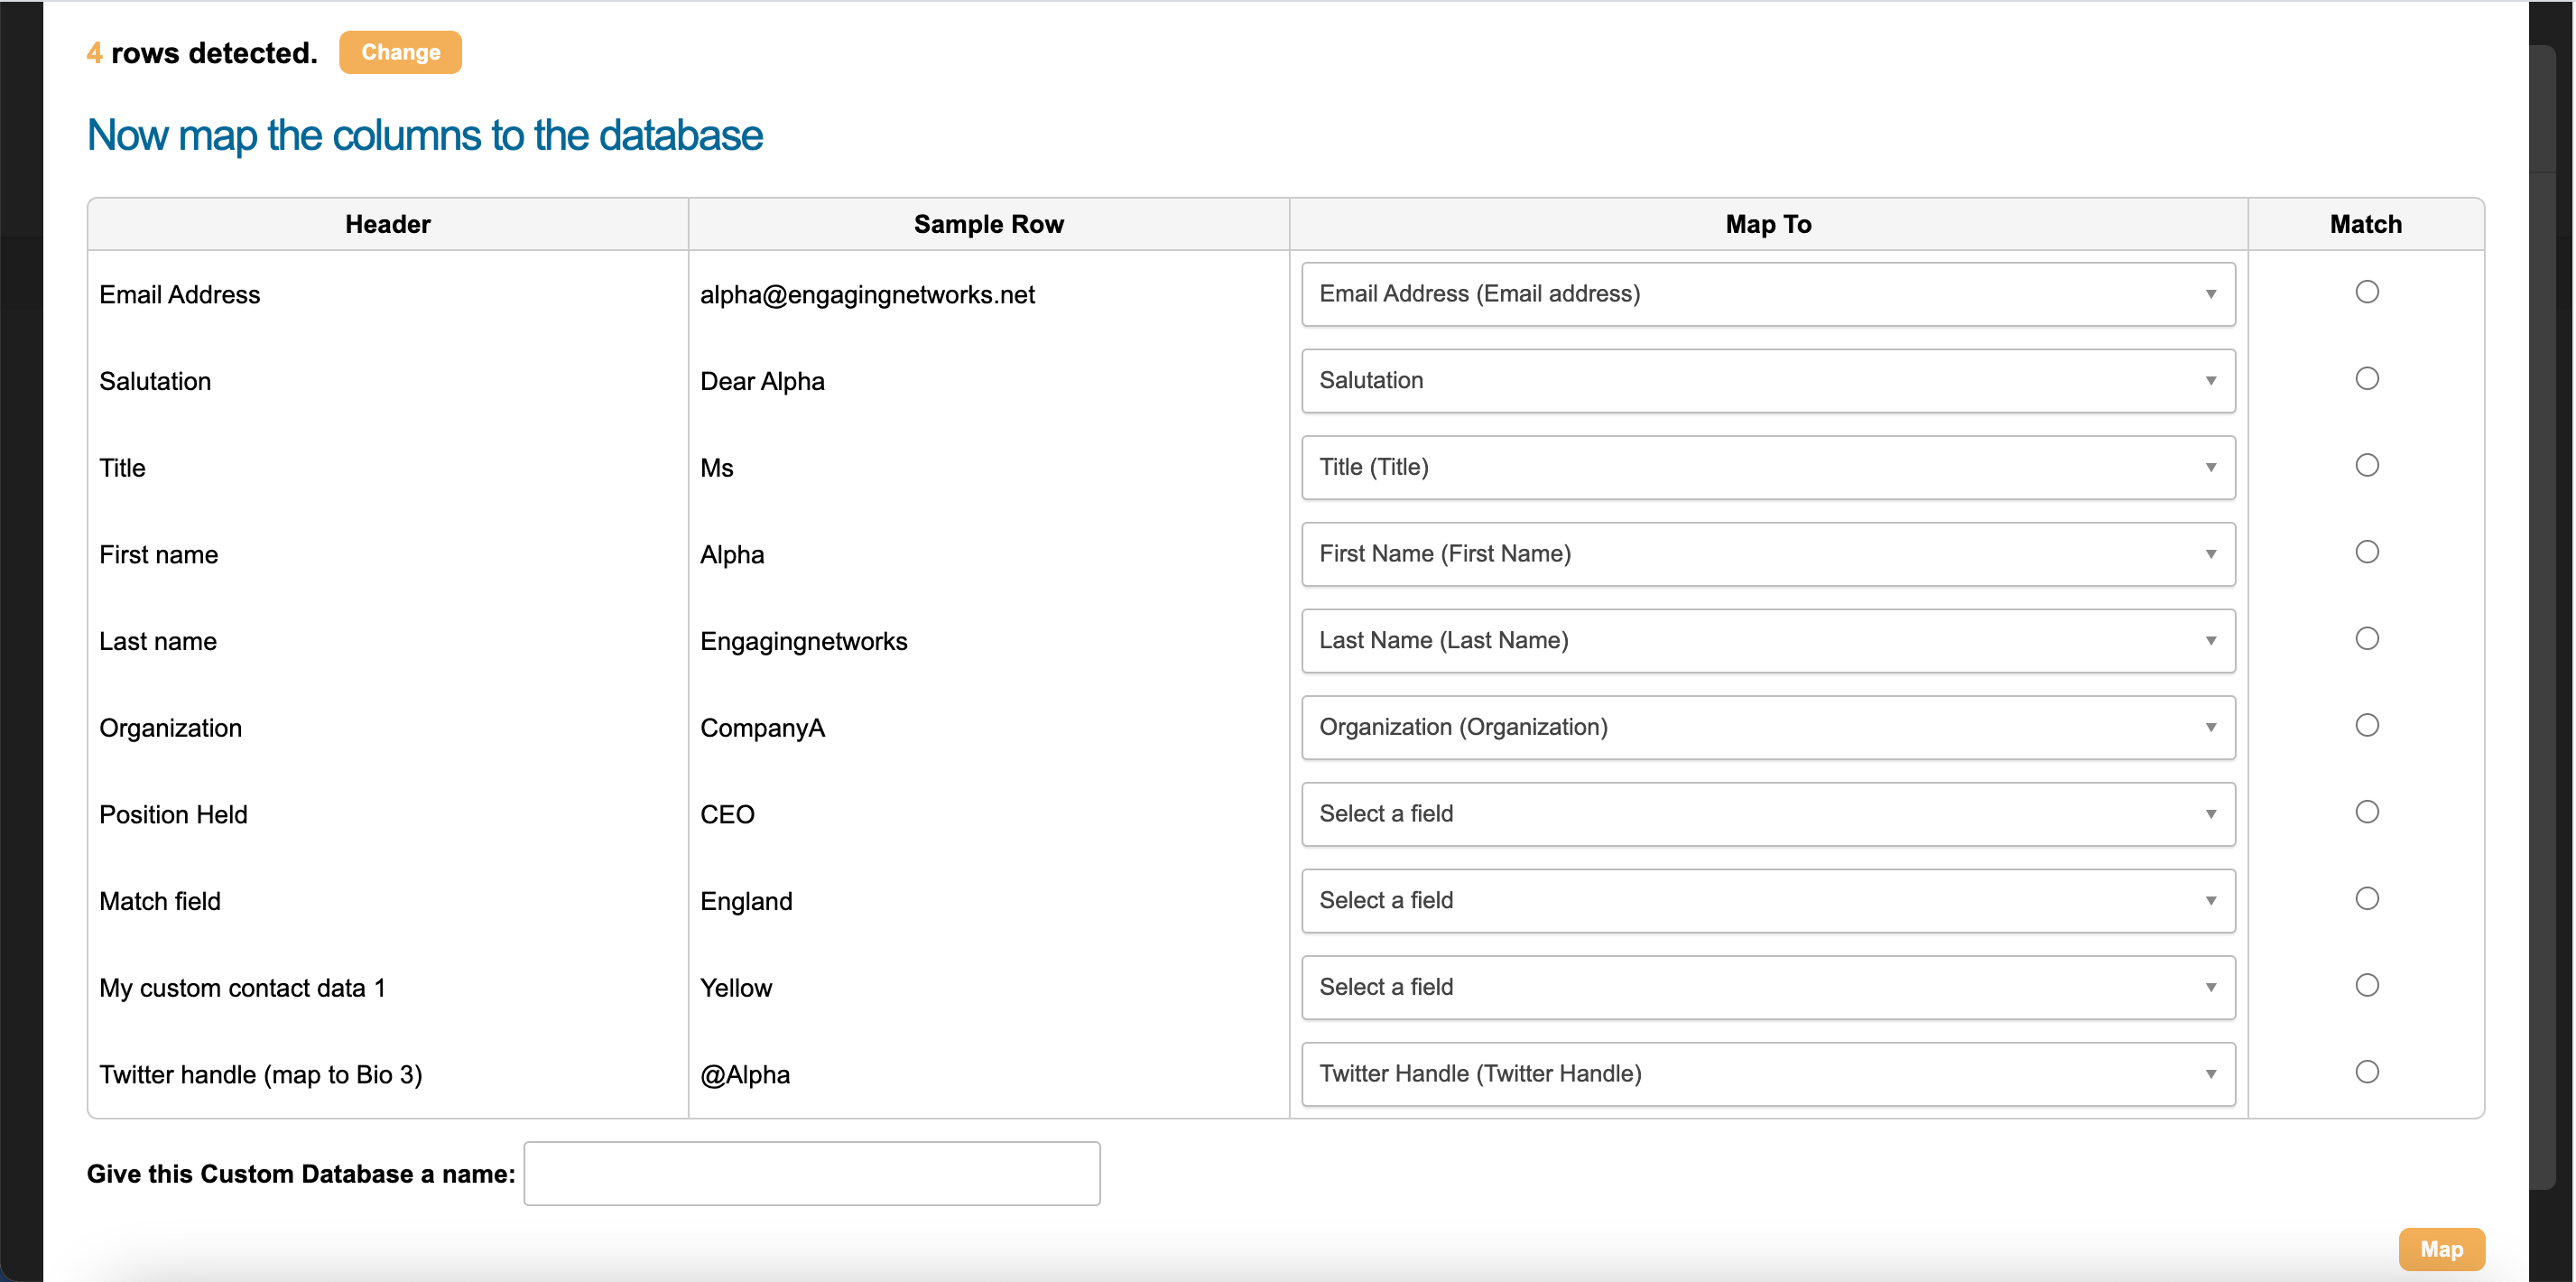
As you can see above, it has not found a field in the account data structure to map the Position Held, Match Field, or My Custom Contact Data 1. Either choose a field from the dropdown or go to your Account Settings and create a new field to map to.
There are seven Biography fields to choose from. These are blank for you to populate with data. As you can see above, we advise you to map the Twitter Handle data to Biography 3 (look at the last row). This is because our Tweet-To-Target action looks for the data inside the Biography 3 column to identify the correct Twitter handle.
The other Biography fields are free for you to assign.
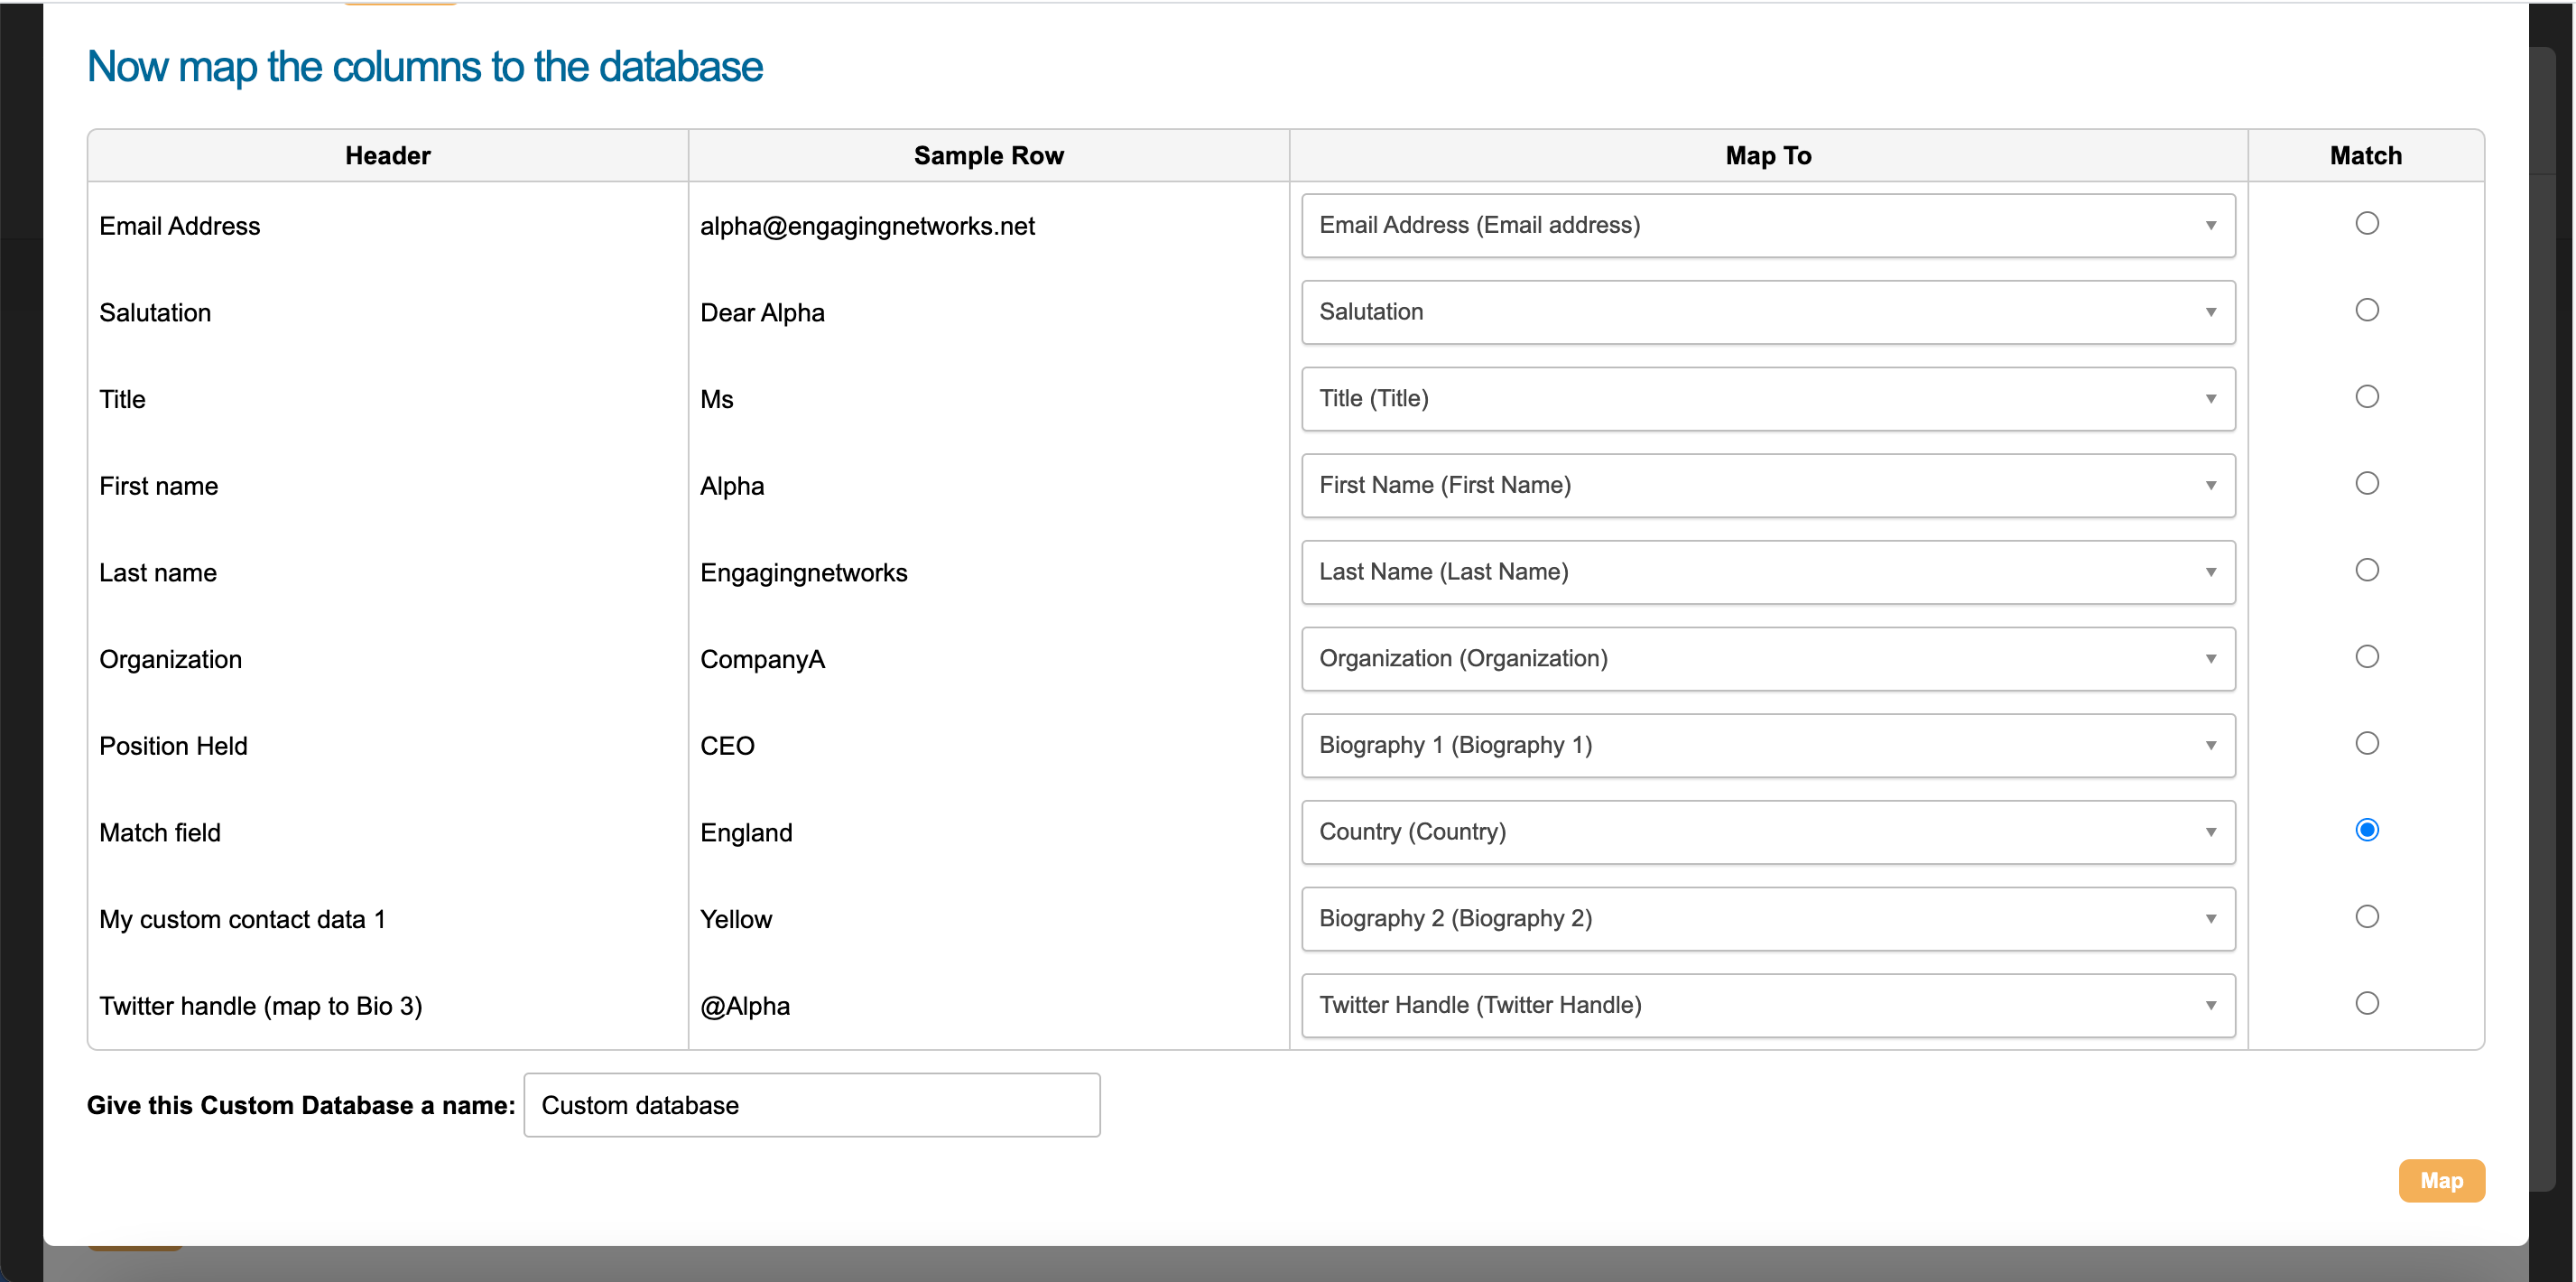
As you can see above, I have assigned the Position Held field to Biography 1. Now, I can insert Biography 1 into my target block, and “CEO” will be dynamically inserted into the email content. The supporter doesn’t need to know the target’s position is CEO; you are entering this data for them. This can help make the supporter’s email more informed without the supporter having to do any work.
You can also see that the Match Field has been mapped to Country. This is because in my example, the match field data equals “England”. So now, if the supporter submits Page 1 of the action with the field Country equaling “England”, the software will know that the supporter needs to contact alpha@engagingnetworks.net. You must click the radio button to assign the correct match field, as above.
The header "My Custom Contact Data 1" has been mapped to "Biography 2". Custom contact data is for any extra information you want to add about your target to make them more personalised. You may wish to add statistics or information about the target to your custom database, which you can then include in the email the supporter sends. To add more custom contact data, simply add more columns to your spreadsheet.
When you are ready, give it a name and click “Map”.
Edit your custom database
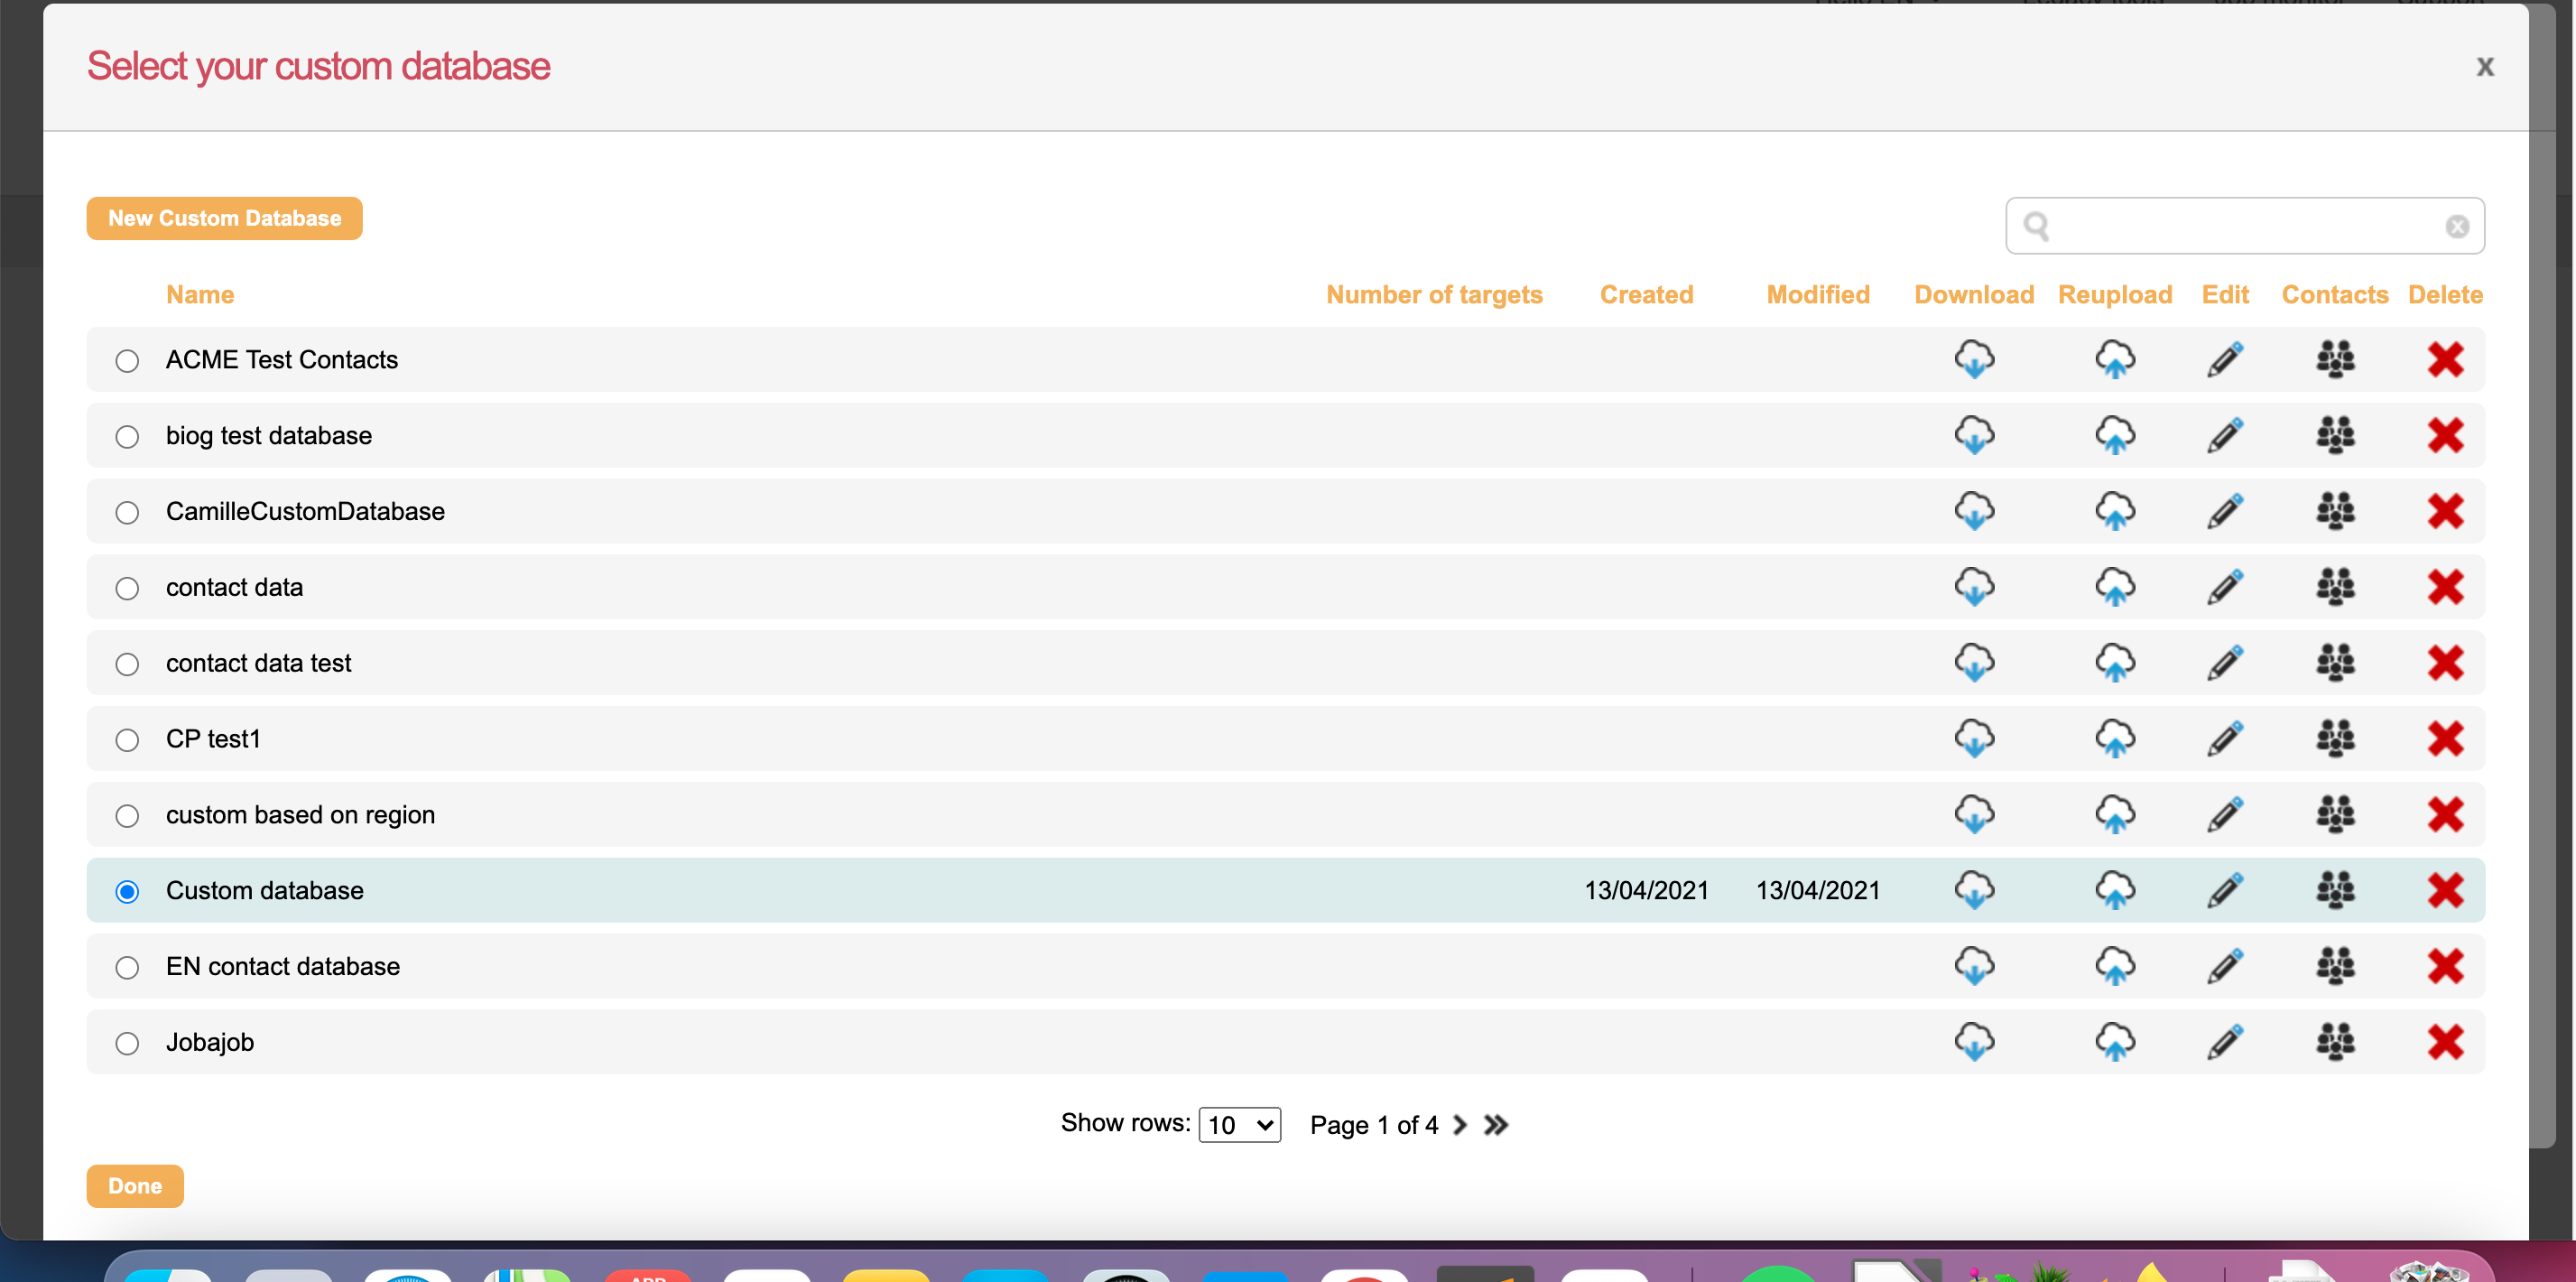
To edit your custom database, click on the pencil icon in your Target Settings, which will bring up a list of your custom databases:
To download the spreadsheet in use, click the Download button.
To re-upload and update your database, click Reupload to replace the current spreadsheet.
To edit your mapping, click the pencil edit button.
To view your contacts in your spreadsheet without having to download the spreadsheet, click the Contacts button. This will give you a view where you can edit each contact individually or delete them:

Creating the action
Now that your custom database is ready, you need to ensure the correct fields are included in your action. In this specific example, you must have Country in your form block on Page 1, so the supporter can select either England, Wales, Scotland or Northern Ireland. Then the software will identify the email address that matches their selection.
It is imperative that the spelling of what the supporter submits and what is in the spreadsheet match exactly. Otherwise, the software will not be able to make a match. If the supporter submits “NI” instead of “Northern Ireland”, the software cannot find “NI” anywhere in the spreadsheet's match column and cannot identify the target's email address.
It is advised that you use radio buttons or select fields so the supporter doesn’t have to type their answer, which reduces room for error.
Now the supporter can select their Country on page 1 of the action and be taken to the correct target email on page 2.