
You use an ‘Event page’ when you want to build a page that allows your supporters to purchase tickets for a scheduled event.
Create your page
To create a new event, you can either duplicate an existing page, or create a new one from scratch.
To create a brand new page, click “New Page”. You will be shown a variety of different pages you can make:
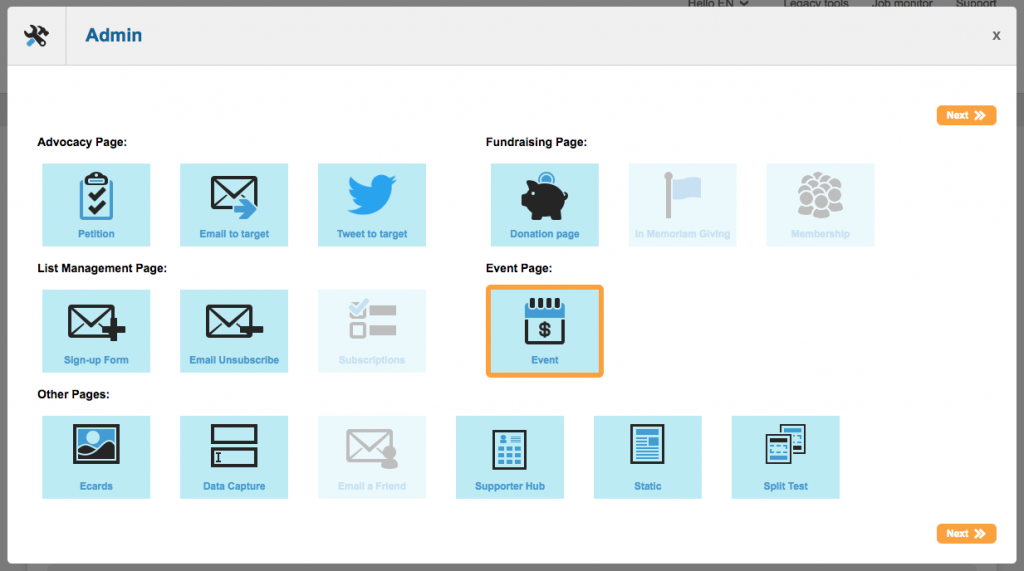
Click on “Event” and click Next. You will be taken to the settings page which you can read about on the next steps.
Duplicating an existing event instead
Alternatively you can duplicate an existing page you have previously created. To do this, go to your list of campaigns (by clicking on Page Builder in the menu) and next to the one you wish to duplicate, click the Copy button under the “Dup” column.
Update the page settings
You can also access this screen later on by clicking the cog icon.
The following fields can be completed:
-
Name: This is the reference name of your page for your own purposes (the supporter won’t see this). It is a good idea to come up with a naming convention so you can keep track of your campaigns, which is especially useful when using the query builder. For example, “2017 Save the Earth Donation Page”
-
Public title: This field is the public name of your page. You can reveal this by using page tags
-
Status: By default, pages are “New” until you are ready to launch them. New means that the live URL is not available until you set the status to “Live”. You can also close pages here
-
Base URL: The Base URL is the first part of the page URL (
example.charity.org). By default this will use the URL defined in your account preferences. -
Notes: Any notes you want to add, type in here. This is for internal use and isn’t visible to supporters.
-
Closed landing page and Error landing page: read more here.
-
Automatically expire: if you wish you can make the page close itself on a certain date
-
Address lookup: US Only – this allows you to validate addresses using postal code mapping
-
Language: You can optionally add the ability to have different locales for your page, so that text blocks, forms and so on show different versions depending on the browser language
-
Template: The template determines how your page looks – the header and footer, as well as fonts, colours and so on. For more about templates, click here
-
Attributes: You can optionally categorise your page according to Attributes.
-
Session validation: It is recommend you keep this checked
Once you click next, you can optionally set notification settings which will can send you an email when a supporter completes the page. Click ‘Save’ and the admin screen will close, showing you the page-builder itself.
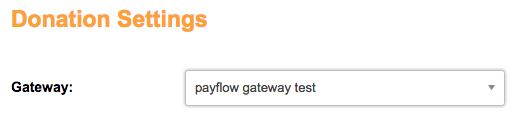
Donation settings
This screen allows you to choose your payment gateway(s). Using the gateway dropdown, choose your primary gateway.
If you would like to add additional gateways, click “I would like to add additional gateways…”. You will need to choose the gateway and the condition under which it should be used. Example: Currency = USD.
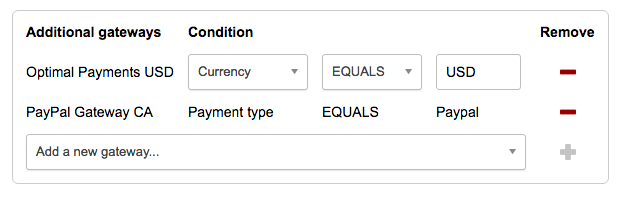
If you are adding a PayPal gateway to process pay via PayPal payments, you do not need to select a condition.
Setup a notification recipient
If you would like to receive an internal notification email each time a successful purchase is made, you can choose the recipient from the default drop down menu.
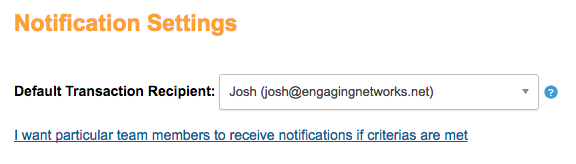
If you want to create custom notifications for certain criteria, click the link below the drop down menu. The following choices need to be made:
|
Name of Rule |
Internal reference name for the custom rule. Supporters will not see this. Example: “Large gifts”. |
|
Short Name |
A shortened reference name for the rule. |
|
Priority |
Numeric priority assigned to the rule, where 1 is the highest priority. |
|
Message |
The message that will be sent when the rule is triggered. To edit or create new messages click |
|
Recipient |
The person or people who should receive the message. To add recipients click |
|
Filter |
The filter type used to define when the message is sent, such as Donation Amount or Supporter Data. Multiple filters can be added. |
|
Condition |
The specific conditional logic that determines when the message will be sent. |
Extensions
If you have the Zoom Webinars extension enabled on your account, this is where you connect your webinar to your Event page.
Event Details
You can also access this screen later on via the cog icon.
|
Field |
Description |
|---|---|
|
Public or Private Event |
Set the event as open to the public or a private function. This setting doesn’t affect how the page operates. |
|
Organizer |
The name of the person or organization organizing the event. |
|
Summary |
A summary of the event. This pre-populates a text block on page 1 when the event is created and can also be used in the thanks email. |
|
Event tags |
Keywords or terms linked to your campaign (e.g. gala, fundraiser, summer ball). |
|
Image |
An image for your event. The URL can also be used in the thanks email. |
|
Details |
Additional details about the event. |
|
Event Schedule |
Set the start and end time (with timezone). After the event ends, ticket purchases are no longer available. You can specify single or recurring events. |
|
Online event |
When selected, location details are hidden from both the admin section and the event page. |
|
Location |
The venue and address (not applicable for online events). This also pre-populates the same text block as the Summary and can be used in the thanks email. |
Tickets
This section of the admin panel allows you to set the tickets available for your event.
Before adding your ticket types, you need to set these general settings:
-
The venue has a seat capacity: if ticked, then you will also need to enter the number of tickets available. This will set a maximum for number of tickets available
-
Show the number of tickets remaining: if ticked, the number of tickets of that type remaining will be shown beneath the ticket chooser:

-
Currency of the event: Event pages do not have a Currency field like Donation pages do. You need to select the appropriate currency here
Ticket types
Note that you can also manage this by editing the ticket block once added to your page.
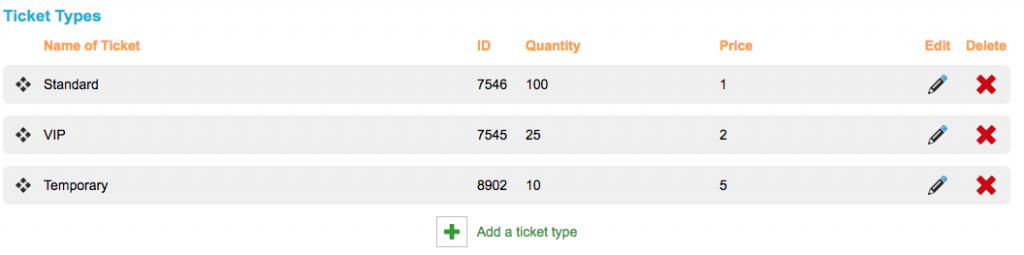
Each ticket type can have a different quantity, price and discount code. You need to have at least one ticket type. When you add a ticket type, you have these options:
|
Field |
Description |
|---|---|
|
Name |
Displayed in the ticket block where supporters choose their tickets. |
|
Short Description |
Also shown in the ticket block. |
|
This is a… |
Choose between a Single ticket or Group ticket. For group tickets, you can specify how many people it covers. This also determines how many attendees are requested in the attendee block. |
|
Quantity available |
The number of tickets available for this type. Once the limit is reached, the ticket is no longer available for purchase. |
|
Purchase minimum/maximum |
Defines the minimum and maximum number of tickets a supporter can purchase of this type. |
|
This ticket costs / is free |
If free, no cost is applied. Otherwise, you must enter a price in your selected currency. |
|
Ticket availability |
Either available until the event starts (based on Event Schedule) or restricted to a specific date range. |
|
Sales period |
Optional setting for things like early bird tickets. Allows you to define a date range and a different price for the ticket. |
|
Enable Waitlist |
Optional setting to allow supporters to sign up for waitlist should ticket type sell out (maximum quantity be met) All waitlist autoresponders need to be enabled in order to use waitlist. |
Discount codes
You can optionally add discount or promo codes against tickets, which, if used, will discount the price for the supporter.
Discount codes do not work for tickets that have a sales period
|
Field |
Description |
|---|---|
|
Code Name |
The name of the code that supporters enter to receive the discount. |
|
Status |
Indicates whether the code is Active or Inactive. |
|
Tickets this code applies to |
Select which ticket(s) the code can be used with. |
|
Usage limit |
The number of times the code can be used before it stops working. |
|
Discount amount |
The value of the discount, either as a percentage or a fixed monetary amount. |
|
Validity period |
The date range during which the code is valid. |
|
Discount application |
Determines whether the discount applies only to the first ticket or to every ticket. Example: 5 tickets at £10 each with a 50% discount → first ticket only = £45 total; every ticket = £25 total. |
Add the content of your page
Once you have completed your notification settings, you will be taken to a page editor which allows you to add content such as text and form fields to your campaign.
Some components will automatically be added for you – a text block with the event description on Page 1, the ticket template below this, and on Page 2 the order summary.
Events have three special components unique to Events pages (under Events in the right-hand toolbar). The ticket block at the very least must be added to make the Events pages operate:
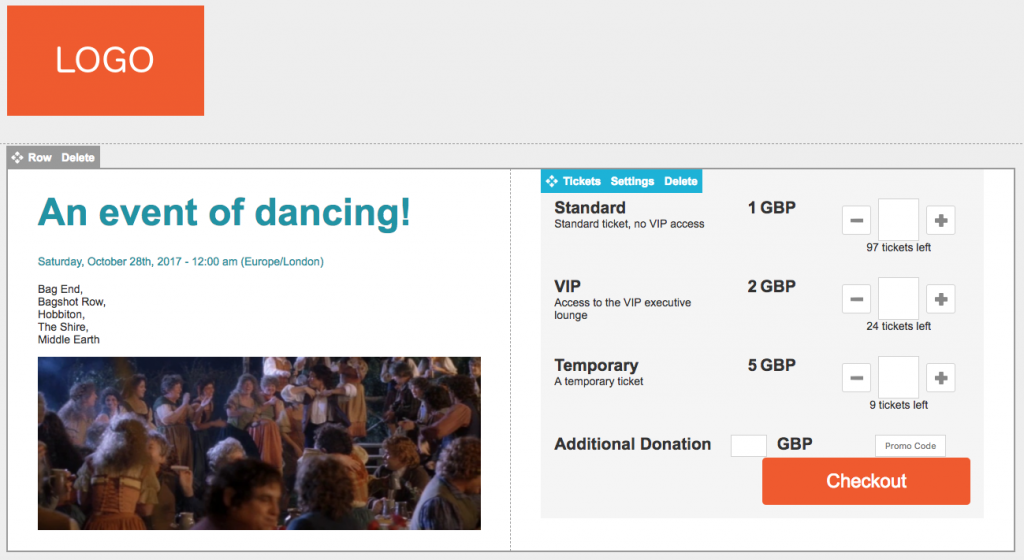
Ticket block (mandatory)
The ticket block should be on Page 1 and allows the supporter to add or remove tickets to their order. It also includes an additional donation box, and a promo code box. If you hover over the ticket block on the page you can access the ticket block settings which includes the ticket themselves and also labels and alerts.
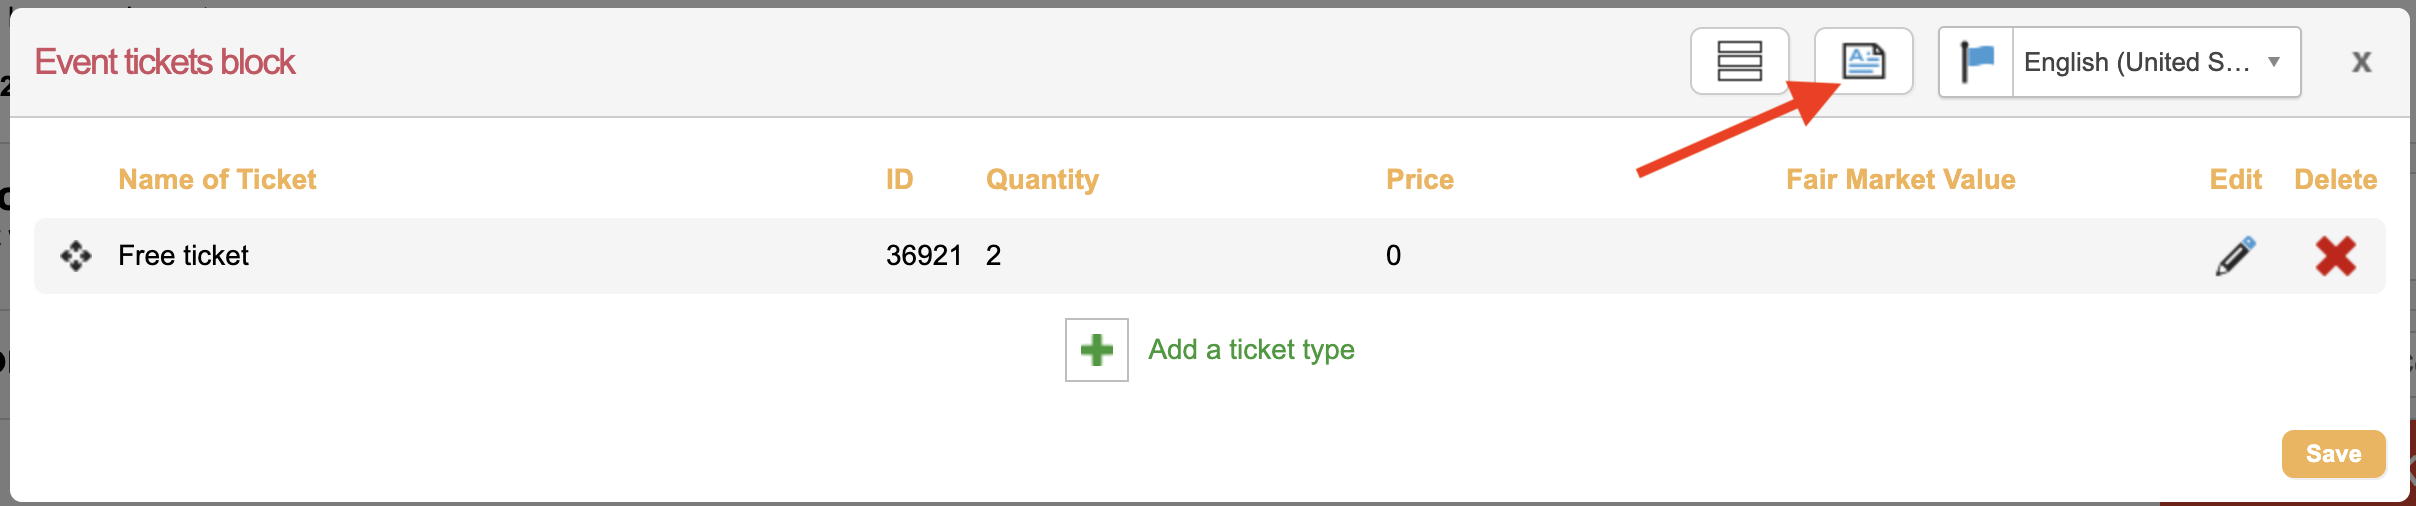
Customizing the ticket block
The ticket block labels and related alerts can be customized by editing the ticket block and selecting the menu.
|
Field |
Definition |
|---|---|
|
Tickets remaining |
Displays the number of tickets still available for purchase. |
|
Sold out |
Indicates that no tickets are available for this option. |
|
Additional donation |
Labels the optional extra donation field supporters can add to their purchase. |
|
Promo code placeholder |
Placeholder text shown in the promo code input field to guide users. |
|
Checkout button |
Label for the button that takes the supporter to complete their purchase. |
|
Waitlist |
Section label for the waitlist functionality when tickets are unavailable. |
|
Sold Out Ticket Message |
Message shown when a ticket type is sold out, prompting users to join the waitlist. |
|
Waitlist fields |
|
|
Waitlist Signup Message |
Instructions encouraging users to sign up for the waitlist. |
|
Waitlist Confirmation Message |
Message displayed after a user confirms their place on the waitlist. |
|
Ticket Claim Expired Message |
Error message shown when a claimed ticket is no longer valid. |
|
Multiple Ticket Attempt Message |
Message shown when a user tries to claim more tickets than allowed. |
|
Join waitlist button |
Label for the button used to join the waitlist. |
|
OK button |
Label for a confirmation or acknowledgement button. |
|
Join waitlist confirmation message |
Message shown after successfully joining the waitlist, prompting email confirmation. |
|
Supporter waitlist first name |
Label for the first name input field on the waitlist form. |
|
Supporter waitlist last name |
Label for the last name input field on the waitlist form. |
Attendees block (strongly recommended)
The attendee block should be on page 2 and allows the supporter to add attendee information for each of the tickets purchased via the ticket block. It will show a series of inputs for each attendee (so should be on a page after the ticket block) allowing the supporter to add details of the ticket holders.
If you hover over the ticket block on the page you can access the attendee block settings to configure the fields, field values and labels for the attendee fields.
Customizing the attendee block
The following fields are available for the attendee block. There are six custom fields but the other can be repurposed for other needs as well.
|
Icon |
Purpose |
|---|---|
|
|
Click to drag and drop the field into the order you’d like them displayed within the block |
|
|
Will be highlighted if the field is shown in the attendee block. |
|
|
Click to expand the field and configure the field type, values, and which tickets the field will display for. |
Title
First name
Last name
Email address
Address 1
Address 2
City
Region
Postcode
Country
Phone number
Dietary preferences
Mobility requirements
Custom 1-6
Order summary (recommended)
The order summary should be page 2 automatically shows a summary of the tickets chosen and their price. This can be useful to put on the same page as where you ask the supporter for their payment details. You cannot edit the order summary block and there are not associated settings.
You can also add a thank you email that includes a ticket template.
Example set-up
Events can have a maximum of three pages. You can navigate between pages using the “Page 1, Page 2” buttons at the top. A common set-up for an Event is:
Page 1
-
Two-column row
-
Left column – a banner image depicting the event
-
Left column – a text block with information about what the event is, when it’s being held, and where (a text block like this is automatically created and pre-populated in the editor from the information you entered when setting-up the event).
-
Right column – a ticket block where supporters can select the tickets they want for the event. This section also contains fields for additional donations and any relevant promotional codes.
Page 2
-
Two-column row
-
Left column (top) – an order summary block showing the tickets the supporter has selected, which includes the price totals for these tickets.
-
Left column (bottom) – an attendees block with form fields where the supporter can enter the details of the attendees for each purchased ticket.
-
Right column – A form block with personal information and payment details fields for the total cost of the tickets outlined in the order summary block.
Page 3
-
One-column row
-
A text block saying thanks to the supporter.
-
Social share buttons
Test and launch your events page
Test your pages
Events pages in DEMO mode do not record any transactions (e.g. ECF, ETK, ETA). Only live events without the demo mode URL parameter will capture that data.
Click the orange Done button to validate the page once you have saved the page and are ready to test it. This button reports on any missing elements, and reminds you about other things you may want to think about.
You can view the page as if it were live by clicking the magnifying glass. The page is shown in a new tab in “DEMO” mode (which you can confirm by viewing the URL – it will end with “?mode=DEMO”). If you have created versions for different locales or profiles, you will be able to view them via the preview button too.
When the page is in demo mode, it means you can make test donations to verify that the form is set up properly to process.
Make it live
Once you are happy it is working correctly, you can change the status from New to Live. To do this, click the cog icon and change Status from New to Live, then click Save.
In the page-builder list of pages, you can then click on the name of your page to view the Live URL.
Under Published URLs you can see the URL of your page. Click “Add tracking” to add different versions of this URL for use on other channels, such as your website, in emails, or on Facebook. Then you can easily see how people come to see your page.
Once it has been running for a while, you can click “View quick report” to see how your action is doing.